Setting up the IonOpticks heater
and heater controller. (COLHTR01 and IOHEATCON1)
1
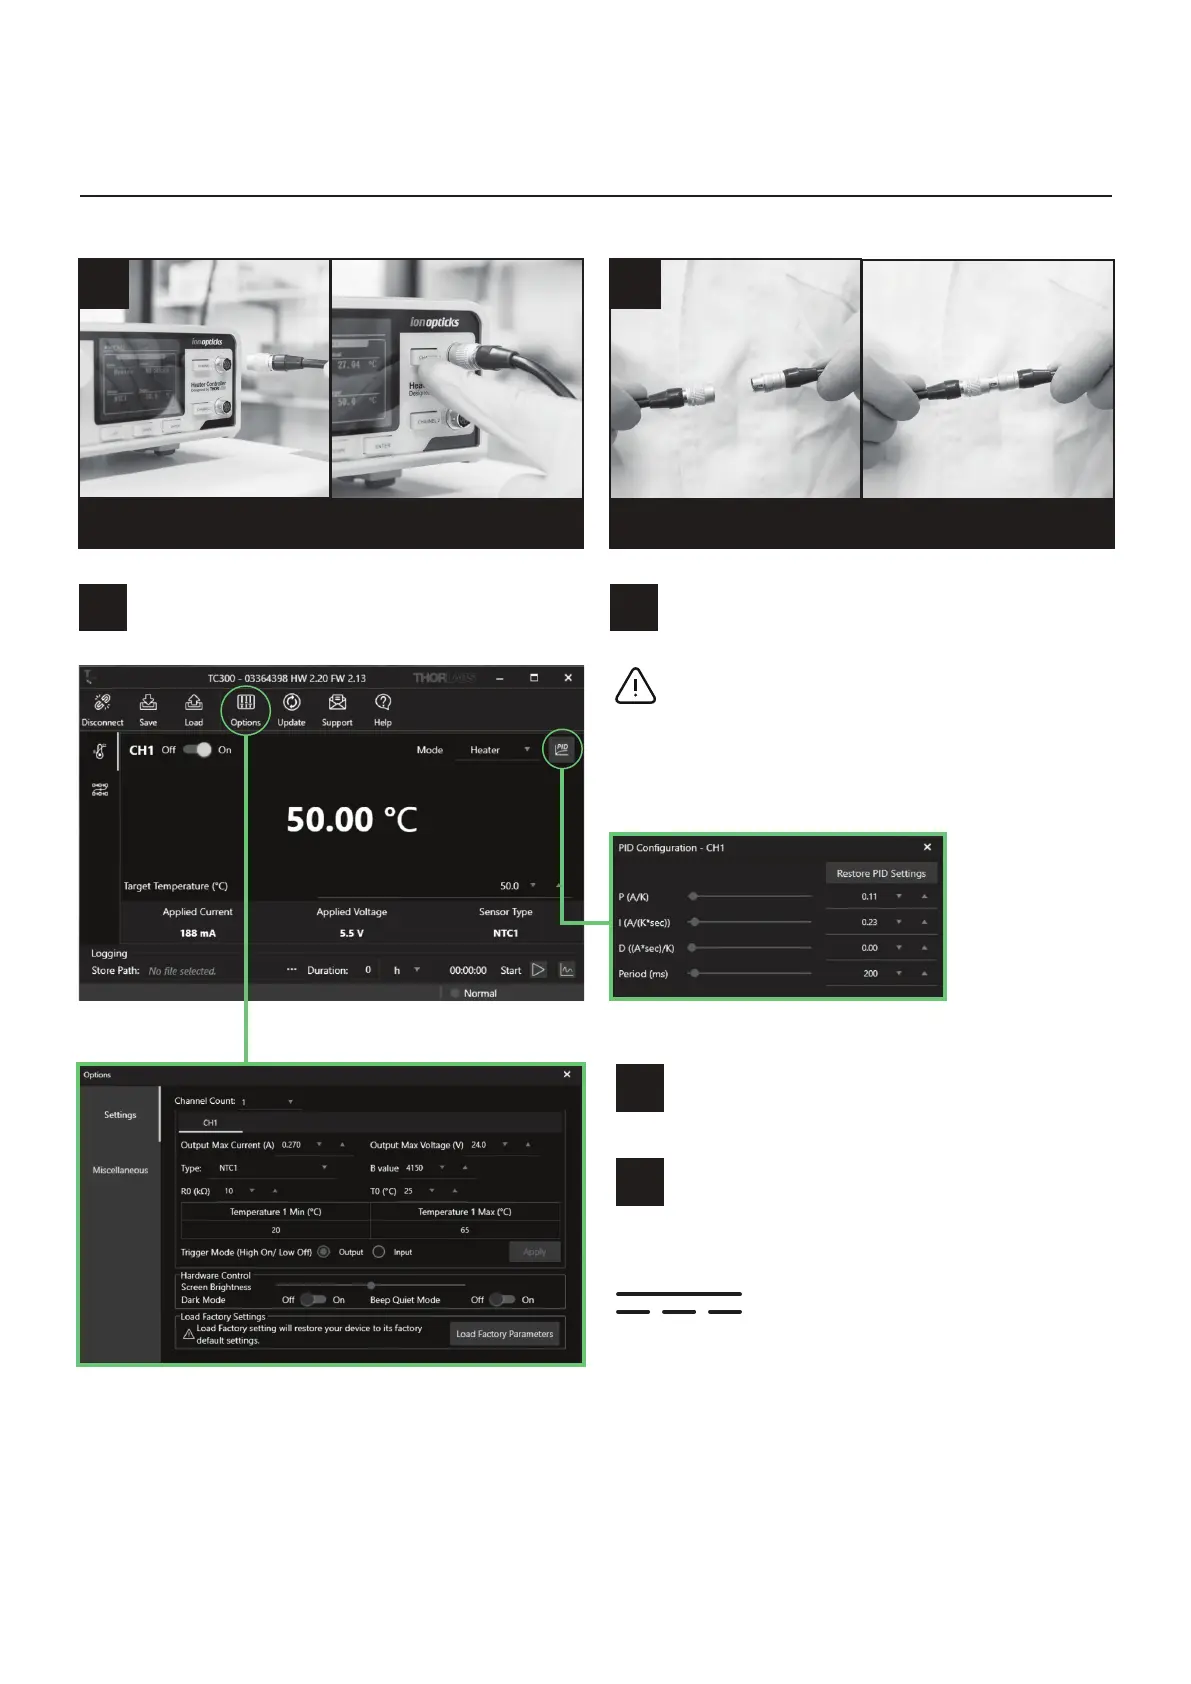
Plug heater cable into channel 1 of Heater Controller unit.
2
Ensure settings on the heater controller unit
match these found here:
3
Set heater to desired temperature. We recommend using a
temperature between 40-60°C. The maximum recommended
temperature is 60°C.
4
The heater is now installed and ready for use.
1.1
If using an IonOpticks Heater Extension Cable (EXTCABLE03):
Plug extension cable into channel 1 of IonOpticks Heater Controller
unit. Plug cable from IonOpticks heater into the receiving plug on
the Heater Extension Cable
Note: Only a single extension cable can be used with the IonOpticks
Heater. The use of multiple extension cables may cause a failure in the
operation of the heater and could damage the IonOpticks Heater and
IonOpticks Heater Controller.
1.2
5© Copyright 2023. Ion Opticks Pty Ltd
This device complies with part 15 of the FCC Rules.
Operation is subject to the following two conditions:
(1) This device may not cause harmful interference,
and (2) this device must accept any interference
received, including interference that may caused
undesired operation.
24 V, 0.8A, 20 W
Heater Rating


 To Next Page