3
iOptron Corp. | 6E Gill Street | Woburn, MA 01801 USA | (781) 569-0200 | www.iOptron.com
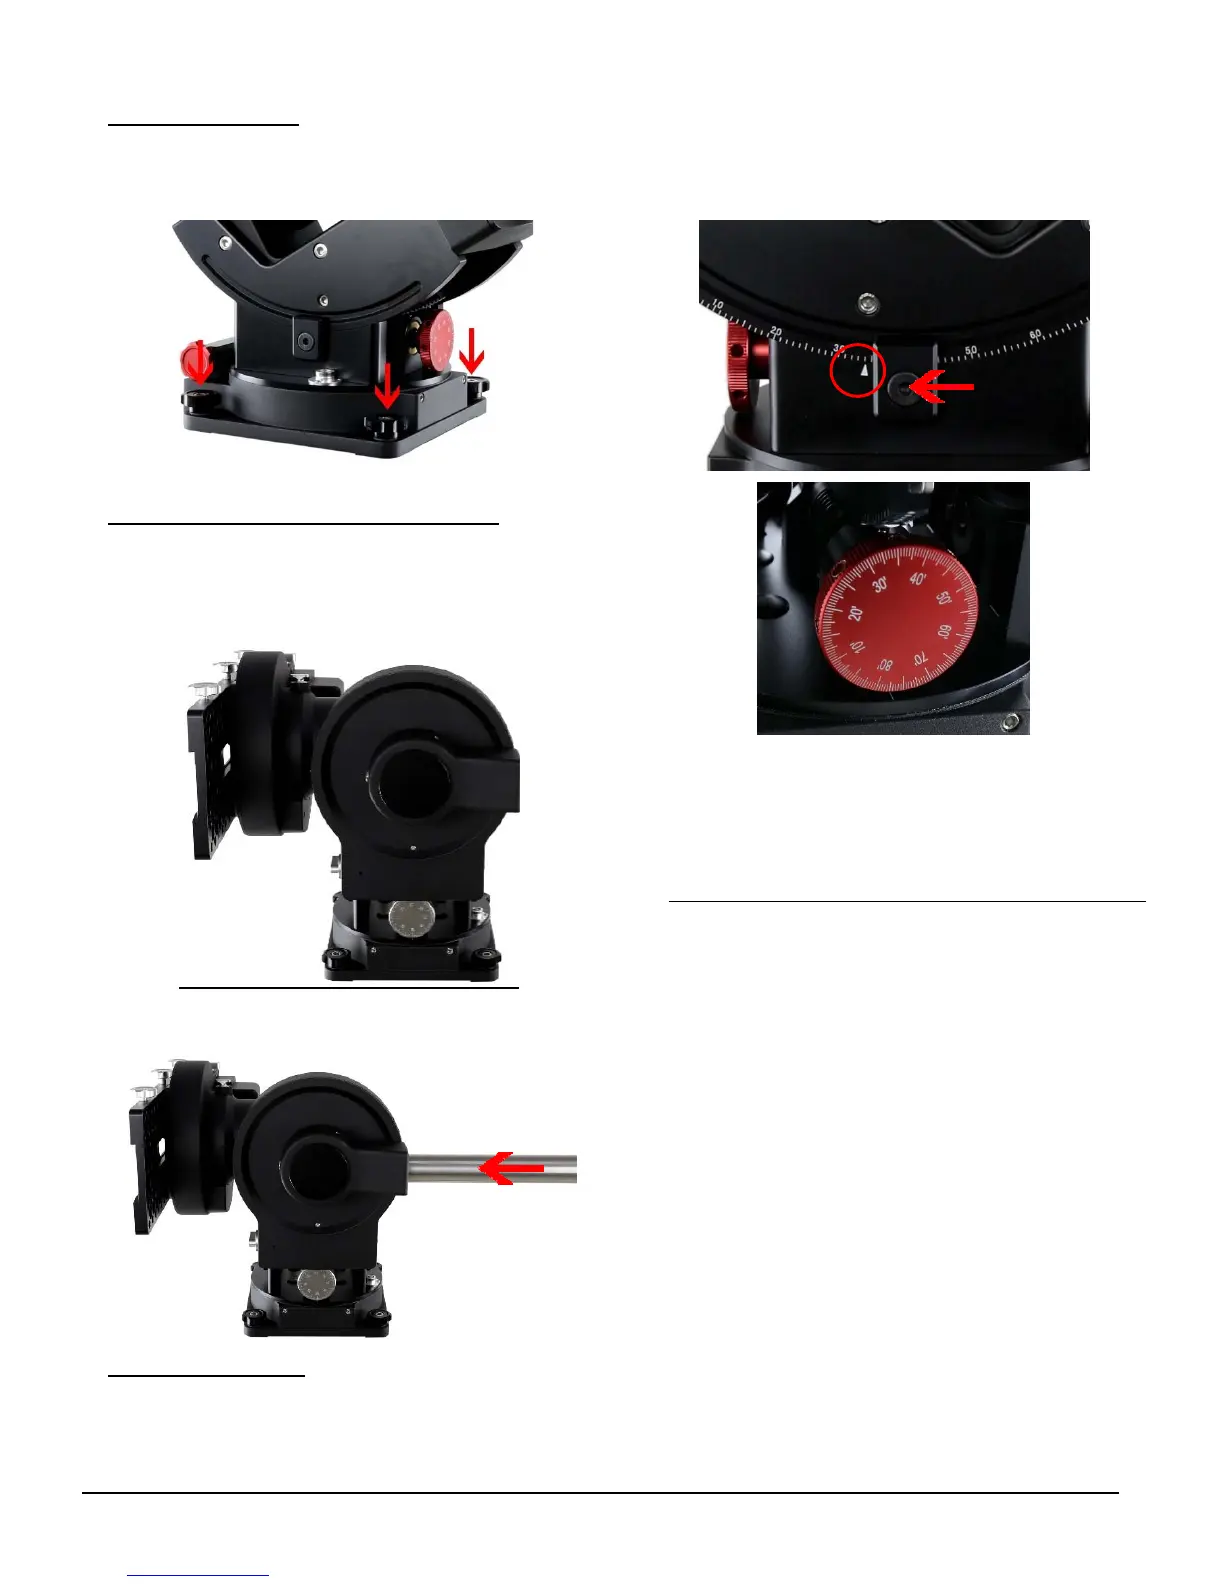
1. AttachingtheMount:MakesurethattheRAaxleis
atthelockingposition.Removethemountfromthe
package.Putitontoapier/tripodtopandsecureit
withfourincludedBaseMountingScrews.
2. Installing the Counterweight (CW) Shaft:
Holdthe
mountheadwithonehand,pulltheRAAxleLocking
Knoboutward,slowlyrotatethemountRA90degree
tolevelposition.ReleasetheRAAxleLockingKnobto
locktheRAaxisagain.
RemovetheCWshaftfromthepackageandthreaded
intotheCWshaftmountinghouse.
3. Setting the Latitude:
LoosentheLatitudeLocking
Clampsaboutaquarter(1/4)turnwitha5mmAllen
wrench.
Turn the Latitude Adjustment Knob until the arrow
pointstoyourcurrentlatitudeontheLatitudeScale.
There are fine scales on the Knob, as shown in the
photo.
TightentheLatitudeLockingClampswhendone.
[NOTE:Forthoselowlatitudeplacesbetween0°to
10°, special low latitude CWs (#7326LL) are needed.
Pleasespecifywhenorder.]
4. Installing the Counterweight(s) and Telescope
:
Before installing the Counterweight(s), make sure
that mount is at Zero Position, i.e.,CWshaftis
pointing to ground. Both R.A. and DEC Axle Locking
Knobsareatthelockingposition(refertoFigure.1).
Remove the CW Safety Cap at the end of CW Shaft.
GuidetheCWovertheshaft.TightentheCWLocking
ScrewtoholdtheCWinplace.PlacetheSafetyCap
backontotheshaft.
You may need more CW for heavier payload, or
smallersizeCWforlighterscope.

 Loading...


