4
iOptron Corp. | 6E Gill Street | Woburn, MA 01801 USA | (781) 569-0200 | www.iOptron.com
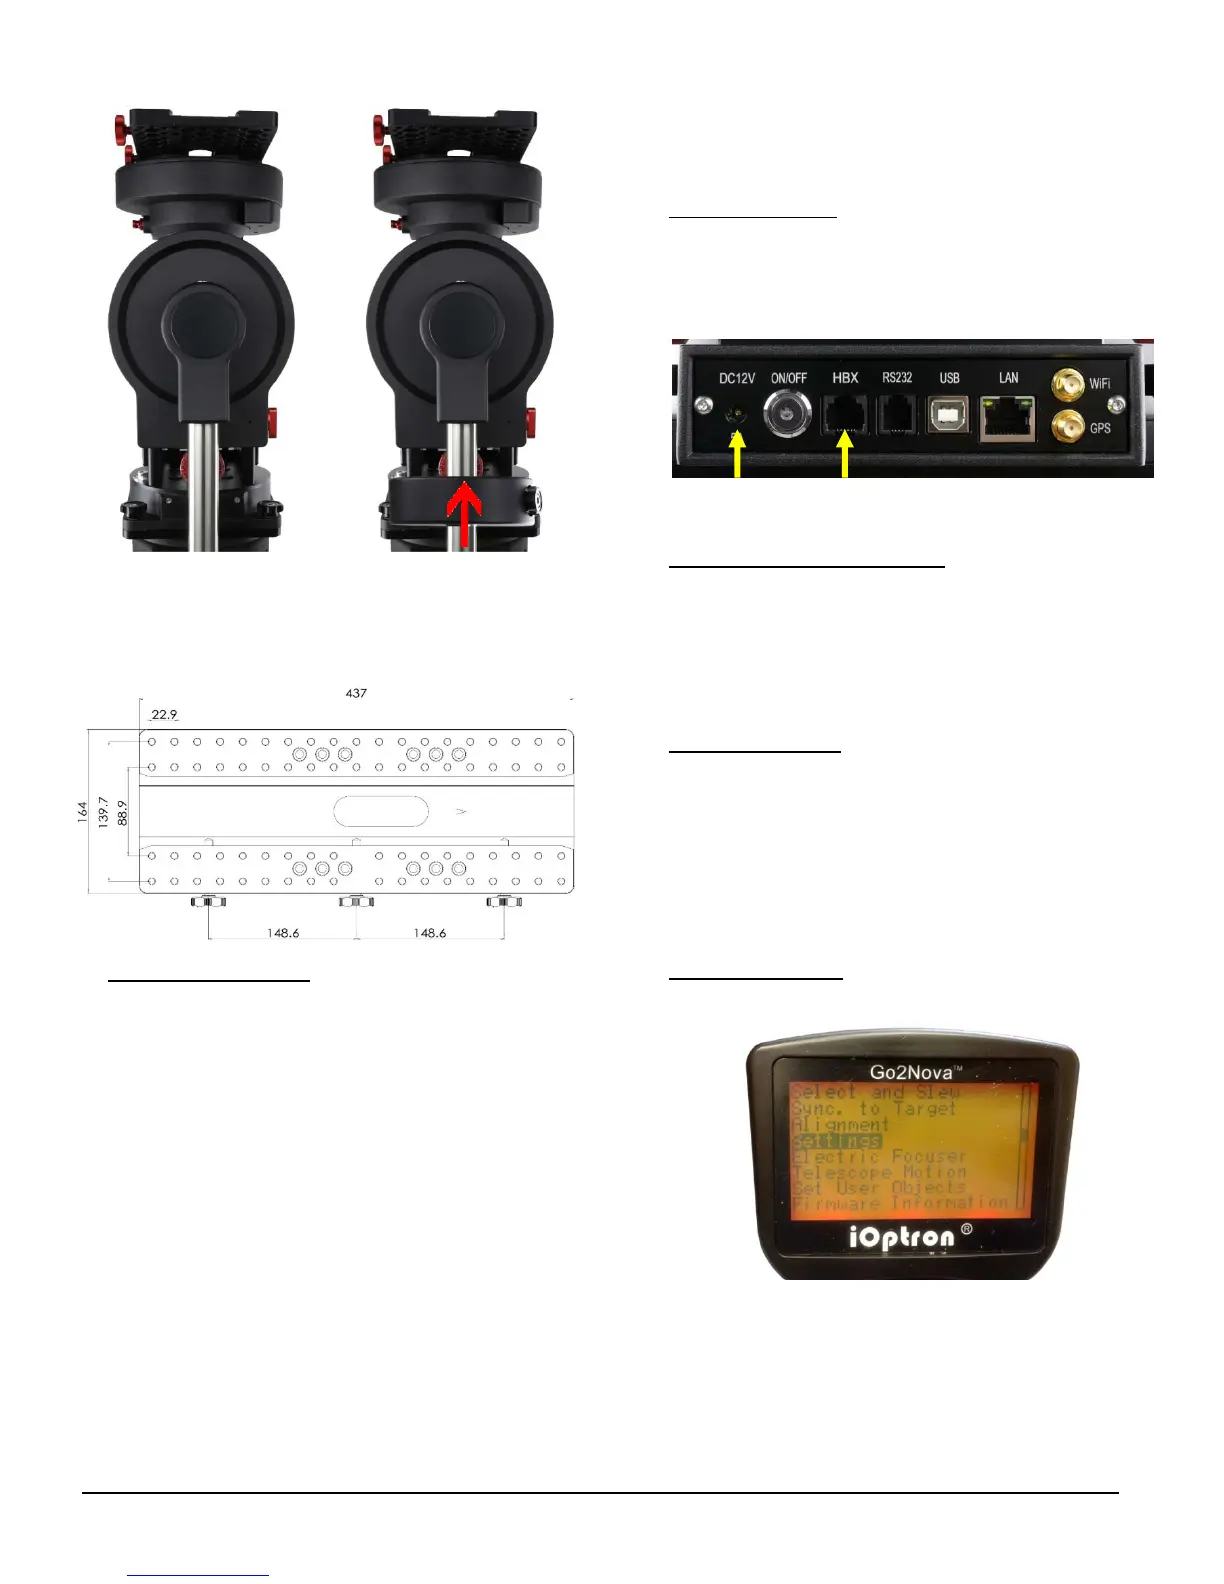
TheCEM120hasaLosmandyDdovetailsaddle,as
shown below. Release the dovetal saddle locking
knobs and slide the telescope dovatal plate into the
saddle.Tightenthesaddlelockingknob.
5. BalancingthePayload
:Afterattachingthescopeand
accessories, the mount head assembly must be
balanced in both R.A. and DEC axes to ensure
minimumstressesonthemountdrivingmechanism.
CAUTION:Thetelescopemayswingfreelywhenthe
R.A. or DEC during the balancing process. Always
hold on to the mount and/or telescope assembly
beforereleasingtheAxleLockingKnoband/orGear
Switches to prevent it from swinging, which can
causepersonalinjuryand/orequipmentdamage.
With the corresponding Gear Switch disengaged,
balance in DEC axis by moving the scope with
accessories back and forth in the mount saddle.
BalancetheassemblyinR.A.axisbymovingCWalong
itsshaft.
Onlybalanceoneaxisatatimeandstartwiththe
DECaxisfirst.Doublecheckthemounttomakesure
boththeRAandDECaxesarebalanced.
Return the mount to the Zero Position after
balancing; i.e., the CW Shaft points to ground, and
thetelescopetipisatitshighestposition.
6. ConnectingCables
:Plugina12VDCpowersupplyto
theDC12VPOWERsocket.ConnecttheGo2Nova
®
8407HandControllertotheHBXportonthemount
sidepanel.InstallWi‐Fiantenna(rightangleone)and
GPSantenna.
RefertothefullUser’sManualonhowtousethe
cablemanagementsystem.
7. Performing Polar Alignment:
You may install an
optional electronic polar scope, with an optional
polarscopeadapter,forpolaralignment.Oryoumay
usepolaralignmentsoftwaretodothejob.
You may also use “Polar Iteration Align” in hand
controllerforpolaralignment.
8. Manual Operation
: The mount can now be used to
observe astronomical objects with the HC. Unlock
bothRAandDECAxleLockingKnob,andengageboth
RAandDECGearSwitch,asshownnFig.3.Usearrow
keys(►,◄,▼,and▲)topointthetelescopetothe
desired object. Use the number keys to change the
slewing speed. Press the STOP/0 button to start
tracking.
9. Setting Controller:
PresstheMENU button; then
“Settings”=>“SetTime&Site”.
EnterthecurrentdateandcheckforDaylightSaving
Time using arrow and number keys. Enter the time
zoneoffsettotheUTC;forexamples:
Bostonis“UTC‐300minutes”
LosAngelesis“UTC‐480minutes”
Romeis“UTC+060minutes”

 Loading...


