The LCD screen will switch to the information screen, as indicated in Figure 7, with pressing any
button.
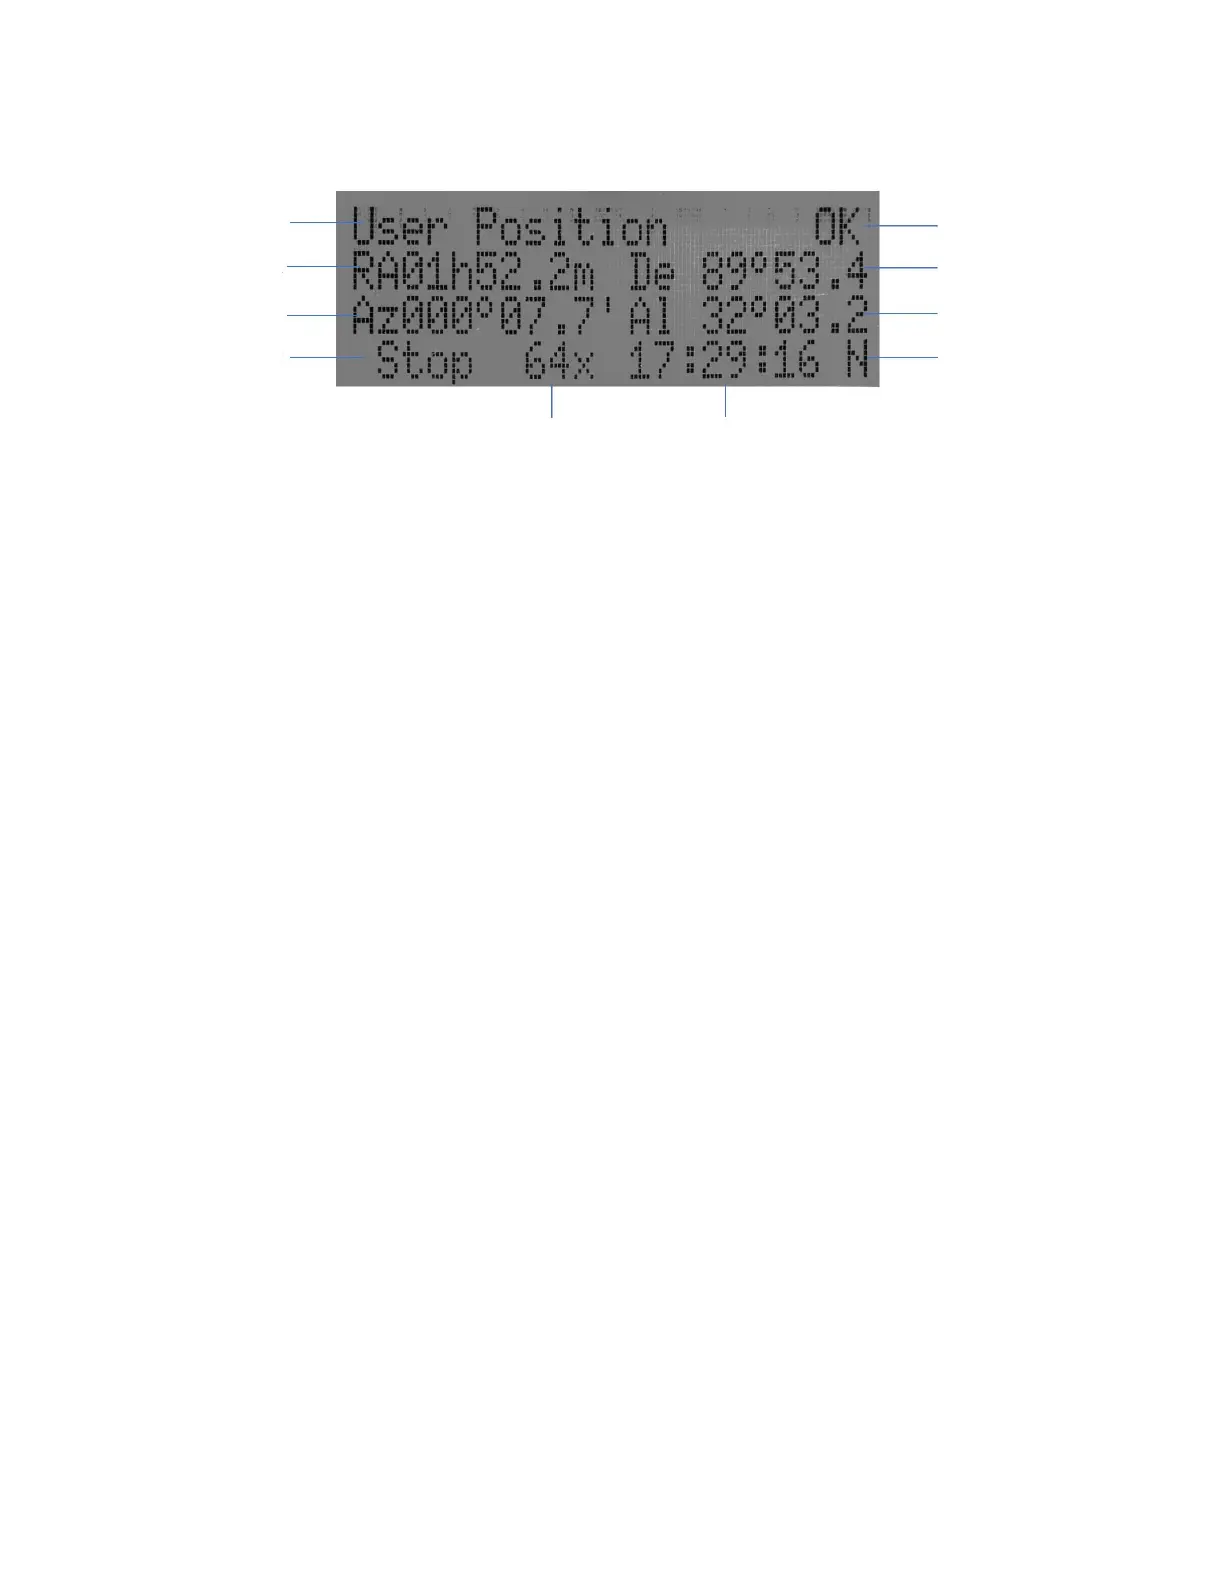
Figure 7. 8409 HC LCD Information Screen
1. Target Name/Mount Position: displays the name of the target that telescope is currently pointed to or
the current mount position.
An object name, such as “Mercury” or “Andromeda Galaxy”: Name of the Star or celestial object
that the mount is currently slewing to, GOTO or tracking;
User Position: The mount is point to a user defined position, which could be a real sky object or
just simply due to press an arrow key;
Zero Position: Mount is at Zero Position. When set the mount at Zero Position physically, the
hand controller should display the same.
2. GPS Status: Indicates if there is GPS or GPS is connected to the satellite. HEM27 does not have a
GPS. The GPS status will be always OFF.
3. Right Ascension: Right Ascension of the telescope, or R.A.
4. Declination: Declination of the telescope, or DEC.
5. Azimuth: Azimuth of the telescope (north is 0º, east 90º, south 180º, and west 270º).
6. Altitude: Altitude of the telescope (degrees vertical from the local horizon - zenith is 90º).
7. Mount Status: Display current operation status of the mount.
Stop: mount is not moving;
Slew: mount is moving with an arrow key is pressed;
GoTo: mount is slewing to a celestial object using “Select and Slew”;
8. Slew speed: It has 9 speeds: 1X, 2X, 8X, 16X, 64X, 128X, 256X, 512X, MAX(1440X, or 6°/sec).
9. Current Time: display local time in a format of HH:MM:SS.
2.5. Install and Check the Hand controller Battery
The hand controller uses a CR2032 button battery to keep the Real Time Clock running. The HC is
shipped without battery installed due to shipping restrictions. Open the HC back cover with a good, size 1
(4mm) Phillips Screw Driver. With battery + sign facing up, slide the battery under two small metal hooks on
the positive side first. Then push the battery down to make a good contact. Make sure that two spring
contacts on the negative side are underneath the battery. If none of the metal pins in battery holder can be
seen after battery installed, the battery is not installed properly.