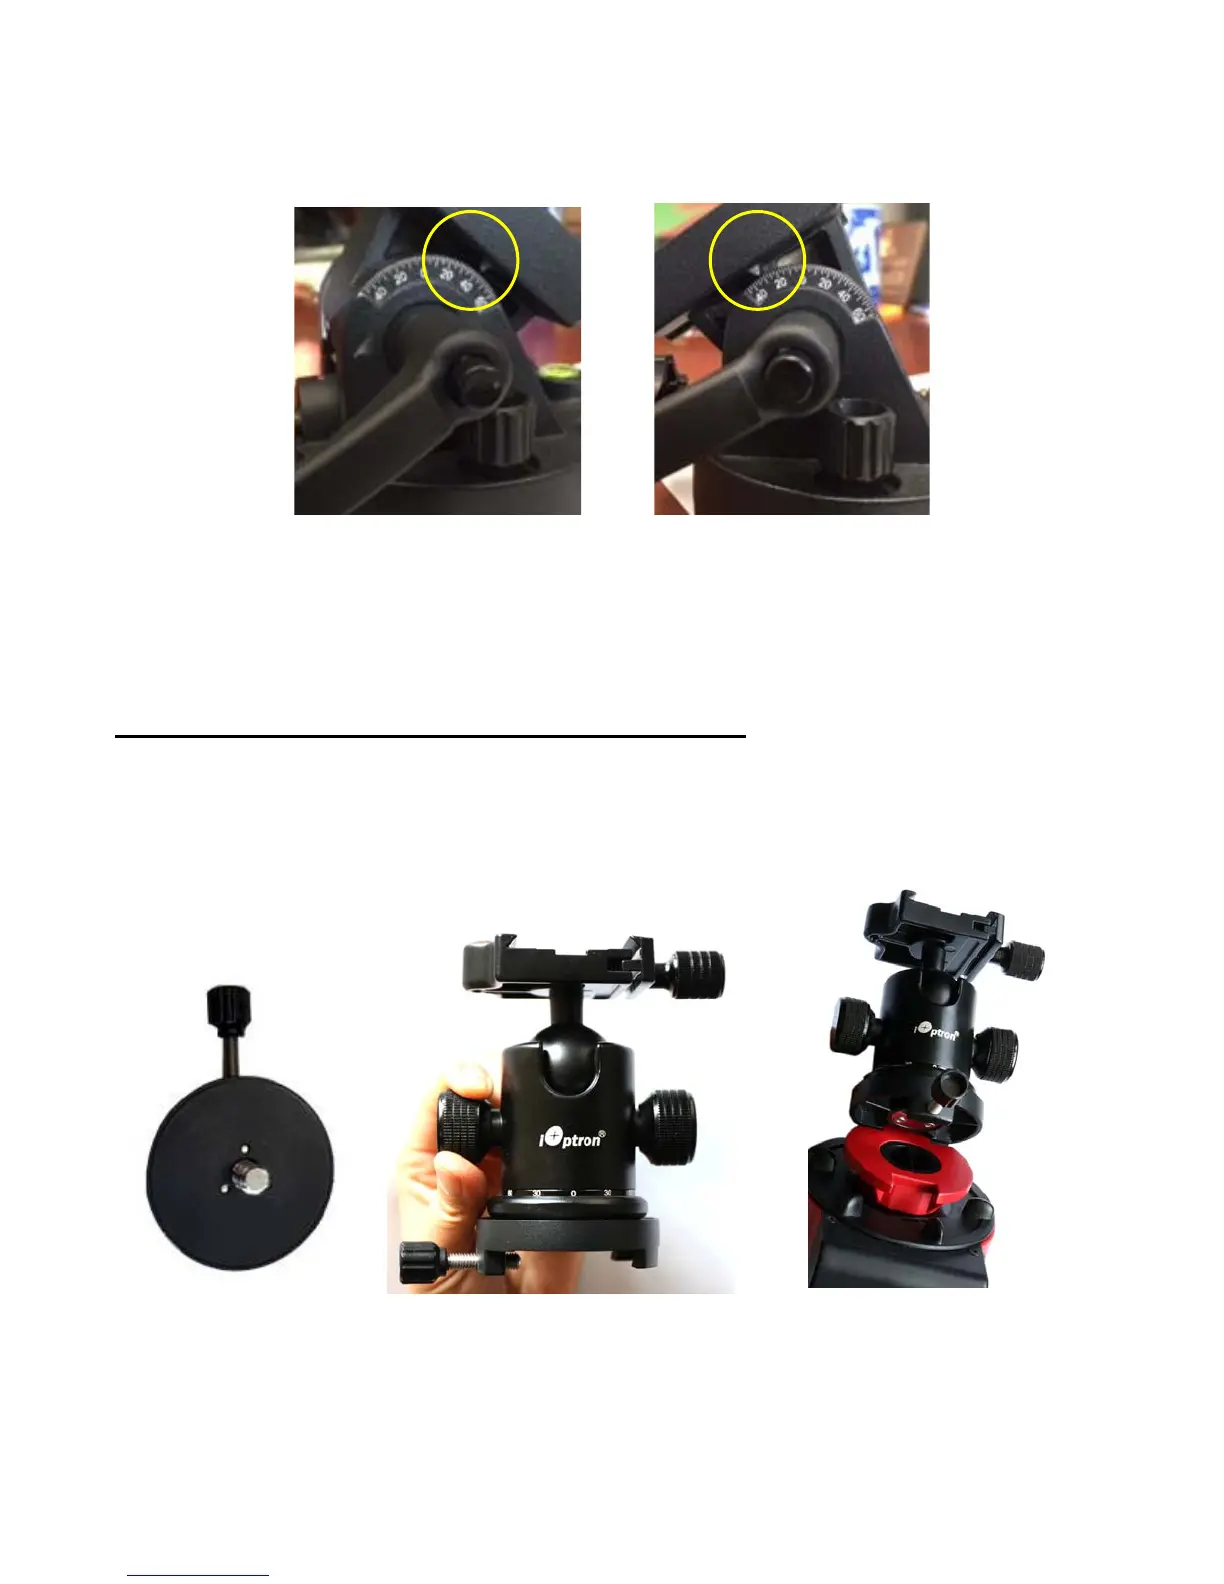
11
payload. The latitude adjustment range can be from -30° to 65°. If possible, choose the one with the
center of gravity of the system as close to the center of the base as possible. The factory default
mounting position is on 30° side.
Figure 11. Alt-azi base latitude settings
STEP 3. Install a ball head and mount a camera
A DSLR camera can be mounted to the SkyGuider
TM
Pro in many ways. Here are two most
common methods.
For a light payload (less than 1.5kg or 3.3lbs, including lens)
A DSLR can be attached directly to the SkyGuider
TM
Pro mount through a ball head. Loosen
the camera mounting block Locking Screw to remove the Camera Mounting Block from the
SkyGuider
TM
Pro. Attach the Mounting Block to the base of a ball head (not included) with a 3/8”
threaded mounting hole and turn the mounting block to secure it onto the ball head, as shown in
Figure 12. Reattach the mounting block to the SkyGuider
TM
Pro and tighten the Locking Screw.
(a)
(b)
(c)
Figure 12. Attach a ball head to the mounting block
Finally, attach the quick release plate of the ball head to the bottom of the DSLR camera and
secure it with the 1/4” screw, then attached the camera to the ball head (Figure 13).