14
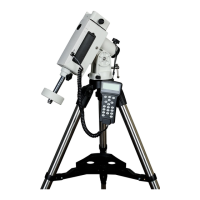
STEP 4. Set the SkyGuider
TM
Pro mount
Assuming you are using the SkyGuider
TM
Pro mount with the alt-azi base and located in
northern hemisphere. Face the mount to the true north with assistance of a compass or an electronic
compass from your smart phone. Please note that true north is not necessarily aligned to the
magnetic north from you compass. However, some smart phone compass may display both magnetic
north and true north. Rotate the base to align the mount to the north as close as possible. Release the
Latitude Lock half a turn by simply rotating the locking lever counterclockwise. Set the latitude scale at
your current latitude by turning the Latitude Adjustment Knob and retighten the Latitude Lock. The
latitude lock laver can be rotated to any suitable position by pulling and turning.
Loosen two Azimuth Locking Knobs, adjust the Azimuth Adjusting Knobs to align the polar axis
to the north, and then tighten the Azimuth Locking Knobs. More details on polar alignment are in next
step.
When powering on, the SkyGuider
TM
Pro mount will be in tracking mode at a rate that shown
on the Mount Status Indicator. If your goal is only take the wide field image of the sky and stars, set
the tracking speed to 1X (celestial tracking speed). With a good polar alignment, this will keep the
stars rounded in your image. If you would like to take the image of both the starry sky and the night
landscape at the same time, you need to set the tracking speed at 1/2X. This will let you take clear
images of both the sky and the land objects at a proper exposure. Solar speed is for tracking the Sun
and lunar speed for the moon.
Keep pressing the center round Function Button to change the tracking speed from
Solar=>Lunar=>1/2X =>1X.
Figure 17 Change tracking speed
You may fast slew the RA axis by pressing ◄ or ► button while the mount is at tracking mode.
The letter “S” indicates if the mount is set to northern or southern hemisphere. If the LED
under “S” is on, it indicates the mount is set to southern hemisphere. To change this setting, press
and hold the Function Button until the LED under letter “S” starts to blink. Press the button to
toggle between the “S (LED on)” and “N (LED off)”.
Figure 18 Set southern or northern hemisphere
STEP 5. Polar Alignment
To achieve accurate tracking, precise polar alignment is crucial. SkyGuider
TM
Pro mount offers
a quick polar alignment.