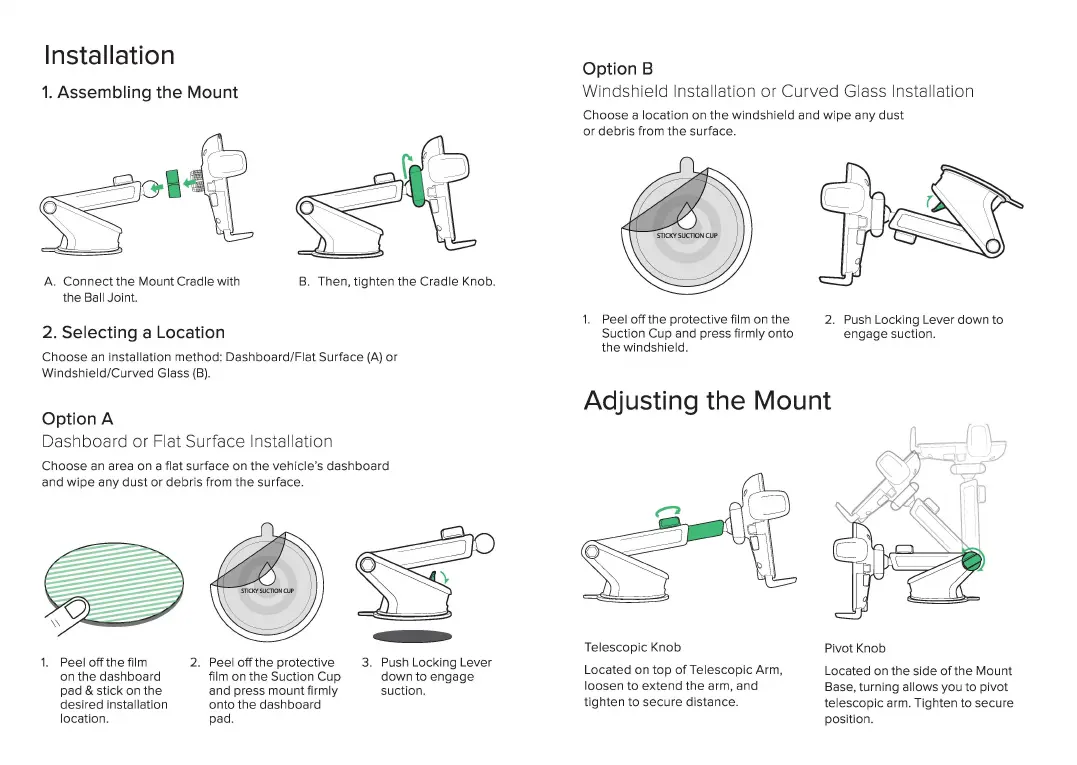
Installation
1.
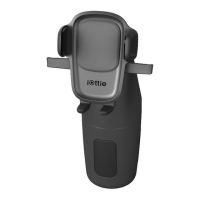
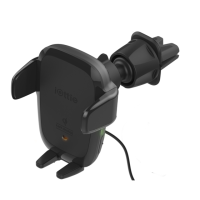
Assembling the Mount
A.
Connect
the
Mount Cradle with
the Ball Joint.
2. Selecting a Location
B.
Then, tighten the Cradle Knob.
Choose an Installation method: Dashboard/Fl
at
Surface
(A)
or
Windshield/Cur
ve
d Glass
(B).
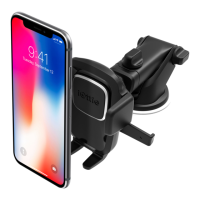
Option A
Das
hboard or Flat Surface I
ns
tallation
Choose
an
area on a flat surface on
the
vehicle"s dashboa
rd
and
wipe
any dust or debris from
the
surface.
1.
Peel
off
the film
on the dashboard
pad &
slick
on
the
desired installation
location.
2.
Peel off the protective
film on
the
Suction Cup
and press mount firmly
onto
the
dashboard
pad.
3.
Push Locking
Le
ver
down
to engage
suction.
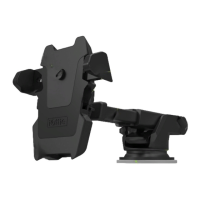
Option B
Winds
hi
eld Installation or
Cu
rved
Gl
ass Insta
ll
ation
Choose a
locat
i
on
on
the
winds
hi
eld
and wi
pe
any dust
or
debris from
the
su
rface.
1.
P
ee
l
off
the protective film on the
Suction
Cu
p and press firmly onto
the windshield.
2.
Push Locking Lever down to
engage suction.
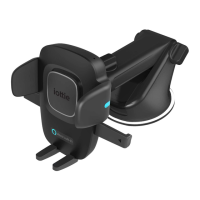
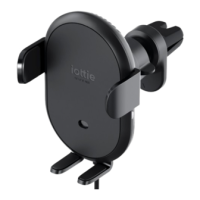
Adjusting the Mount
Tel
esco
pic Knob
Located on top
ofTe
lescopic Arm,
loosen to extend
the
arm, and
tighten to secure distance.
Pivot Knob
Located on
the
side
of
the Mount
Base, turning allows you to pivot
telescopic arm. Tighten to secure
position.