URL service
Six.
A.
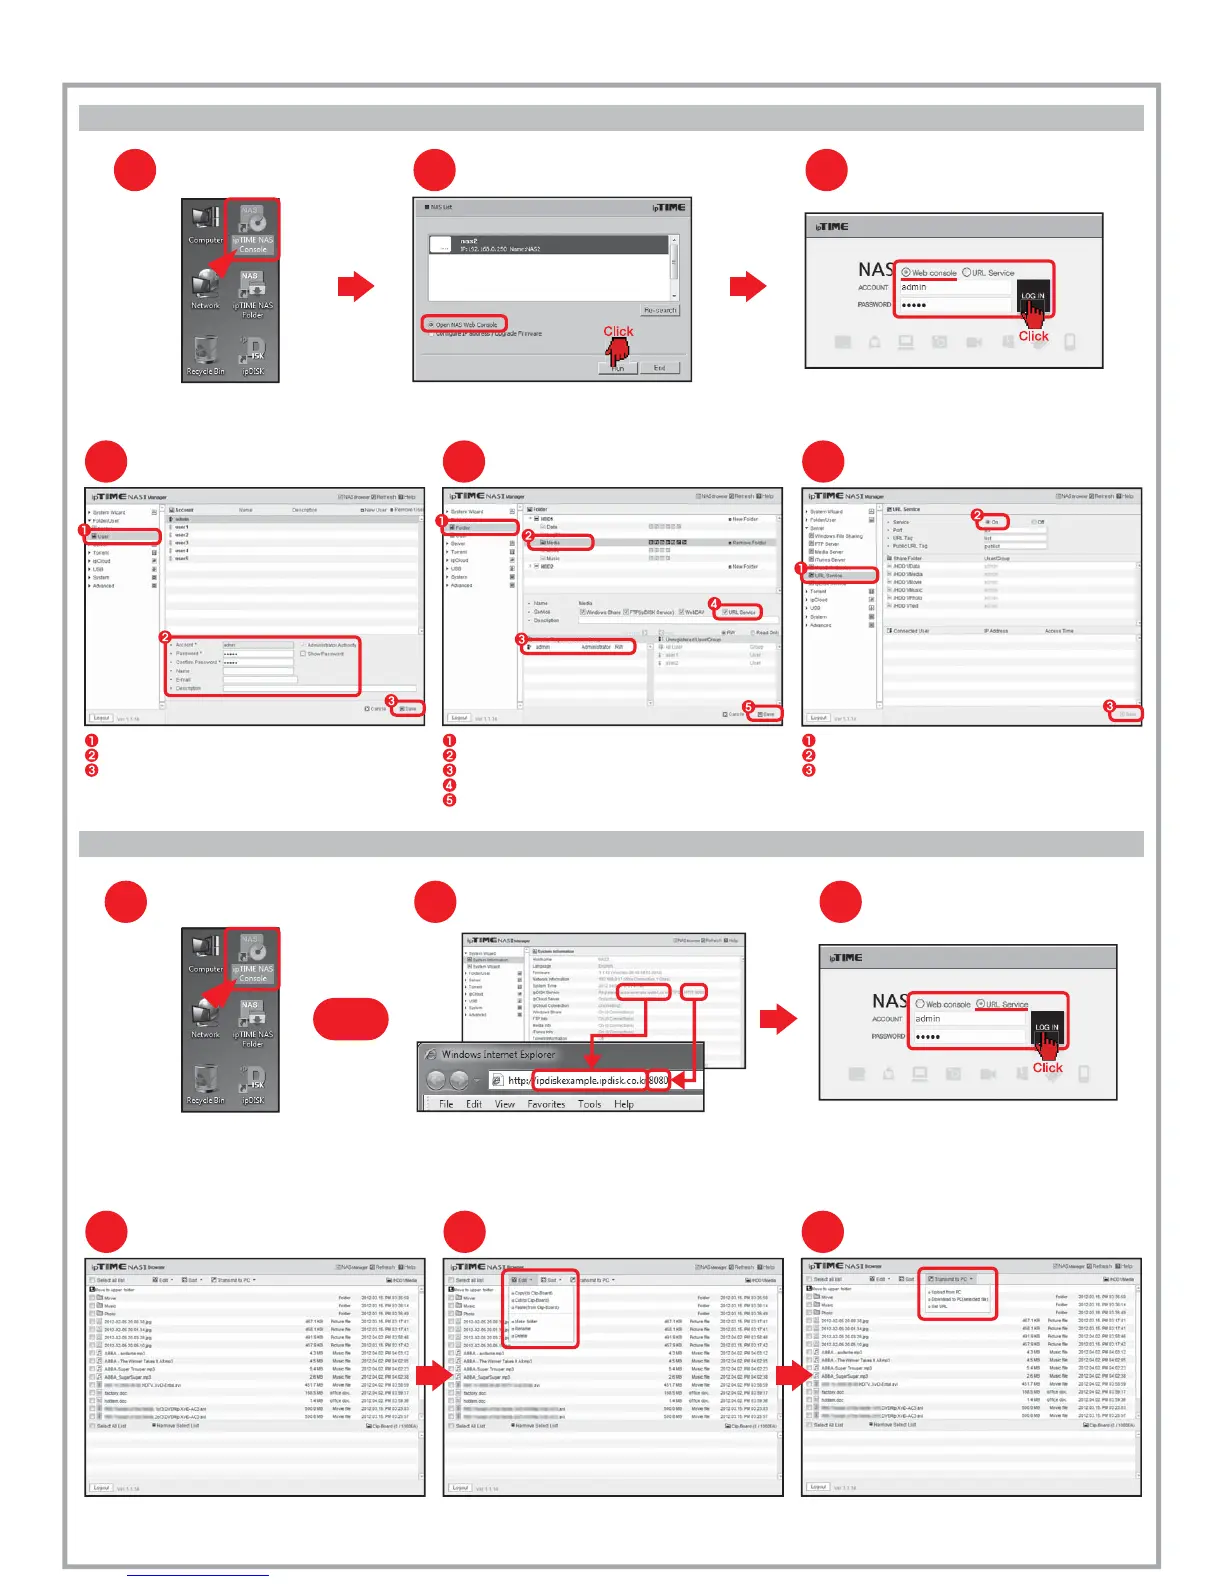
Before using URL service...
To use URL service, following setup need to be done through the web console.
B.
Using URL Service
[Notice] The file size is limited to 2GB when upload a file from PC.
PC transfer
65
Using NAS Service
Connecting URL Service
4
Click [NAS Browser] to enter NAS browser mode.
Use top-down menu to edit or sort files and folders. Use the [File Transfer] menu to up/download files to/from PC.
Running ipTIME NAS Console
Double click the [ipTIME NAS Console] icon
in the desktop window.
1
Select the NAS from the searched list.
Choose [Open NAS Web Console] and click the [Run].
Opening NAS web console
2
Login
3
Choose Web console and enter the user account and password.
Click the [LOG IN] to start the web console.
Running [ipTIME NAS Console]
(in the local network)
Double click [ipTIME NAS Console] in the desktop window.
Select the NAS and click [Run] from the NAS list
1
Enter the ipDISK service URL and HTTP port number
in the address field of internet browser as above.
Connecting Web Console (via the internet)
2
or
Login
3
Select URL service radio button and enter the user account
and the password.
Click [LOG IN] to open the web console.
:
Select the menu [Server] > [URL Service] in the left menu browser.
Make the service as on.
Click [Save] to finish setup.
6
Checking URL service
Select the menu [Folder/User] > [User] from the left menu browser.
Check the user accounts.
Click [Save] to finish setup.
Checking Accounts
4
Select the menu [Folder/User] > [Folder] from the left menu browser.
Select the folder to be used for URL service.
Check the user for this folder.
Make sure the [URL Service] is checked for the selected folder.
Click [Save] to finish setup
Checking the Folder for URL service
5