Using Public URL
Seven.
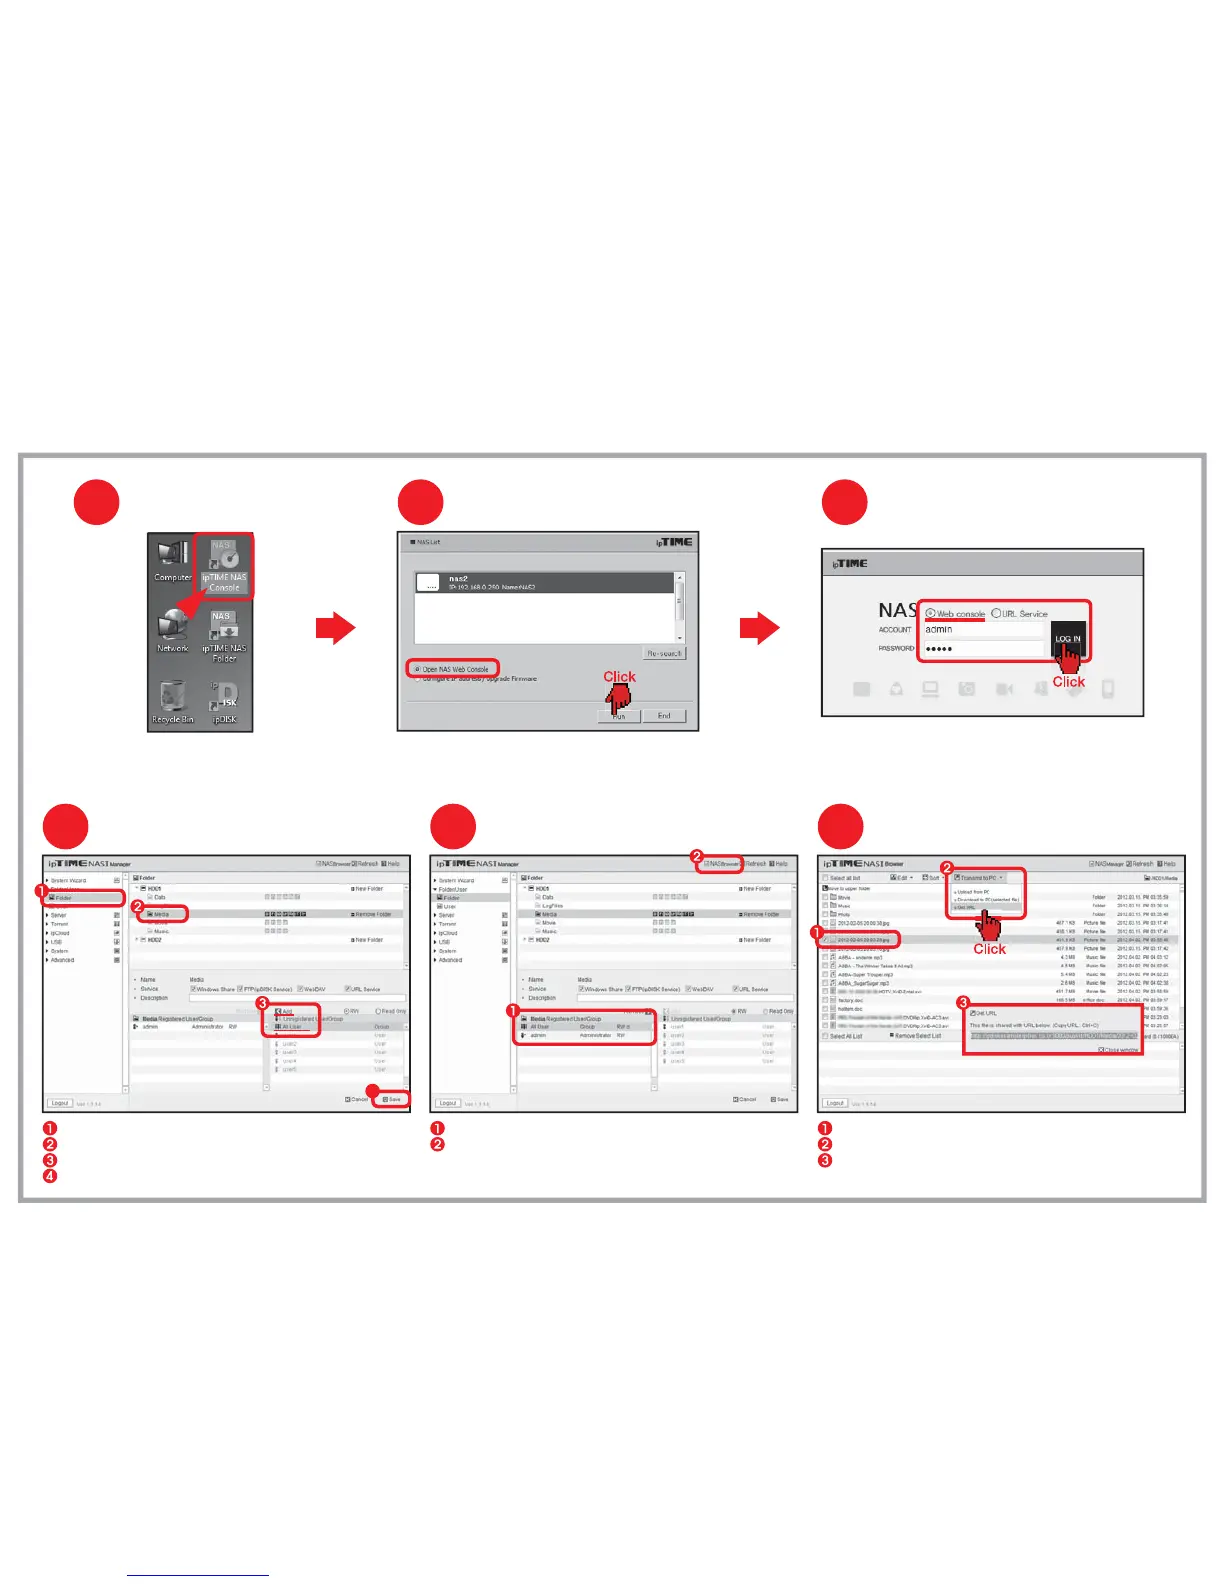
Make sure [All User] is added to the user list.
Click [NAS Browser] to enter NAS browser mode.
Select the menu [Folder/User] > [Folder] from the left menu browser.
Select the folder to be used for Public URL service.
Add [All User] for the user list for the folder
Click [Save] to finish setup.
Select the file for getting public URL.
Run [File Transfer] > [Get URL of file] from the top-down menu.
The public URL string for selected file will be displayed in popup window.
Getting Public URL
65
Changing to NAS Browser mode
Adding All User Attribute
4
4
Running ipTIME NAS Console
Double click the [ipTIME NAS Console] icon
in the desktop window.
1
Select the NAS from the searched list.
Choose [Open NAS Web Console] and click the [Run].
Opening NAS web console
2
Login
3
Choose Web console and enter the user account and password.
Click the [LOG IN] to start the web console