W
W
a
a
t
t
e
e
r
r
S
S
y
y
s
s
t
t
e
e
m
m
s
s
,
,
L
L
L
L
C
C
www.123filter.com
- Page 8 of 12 -
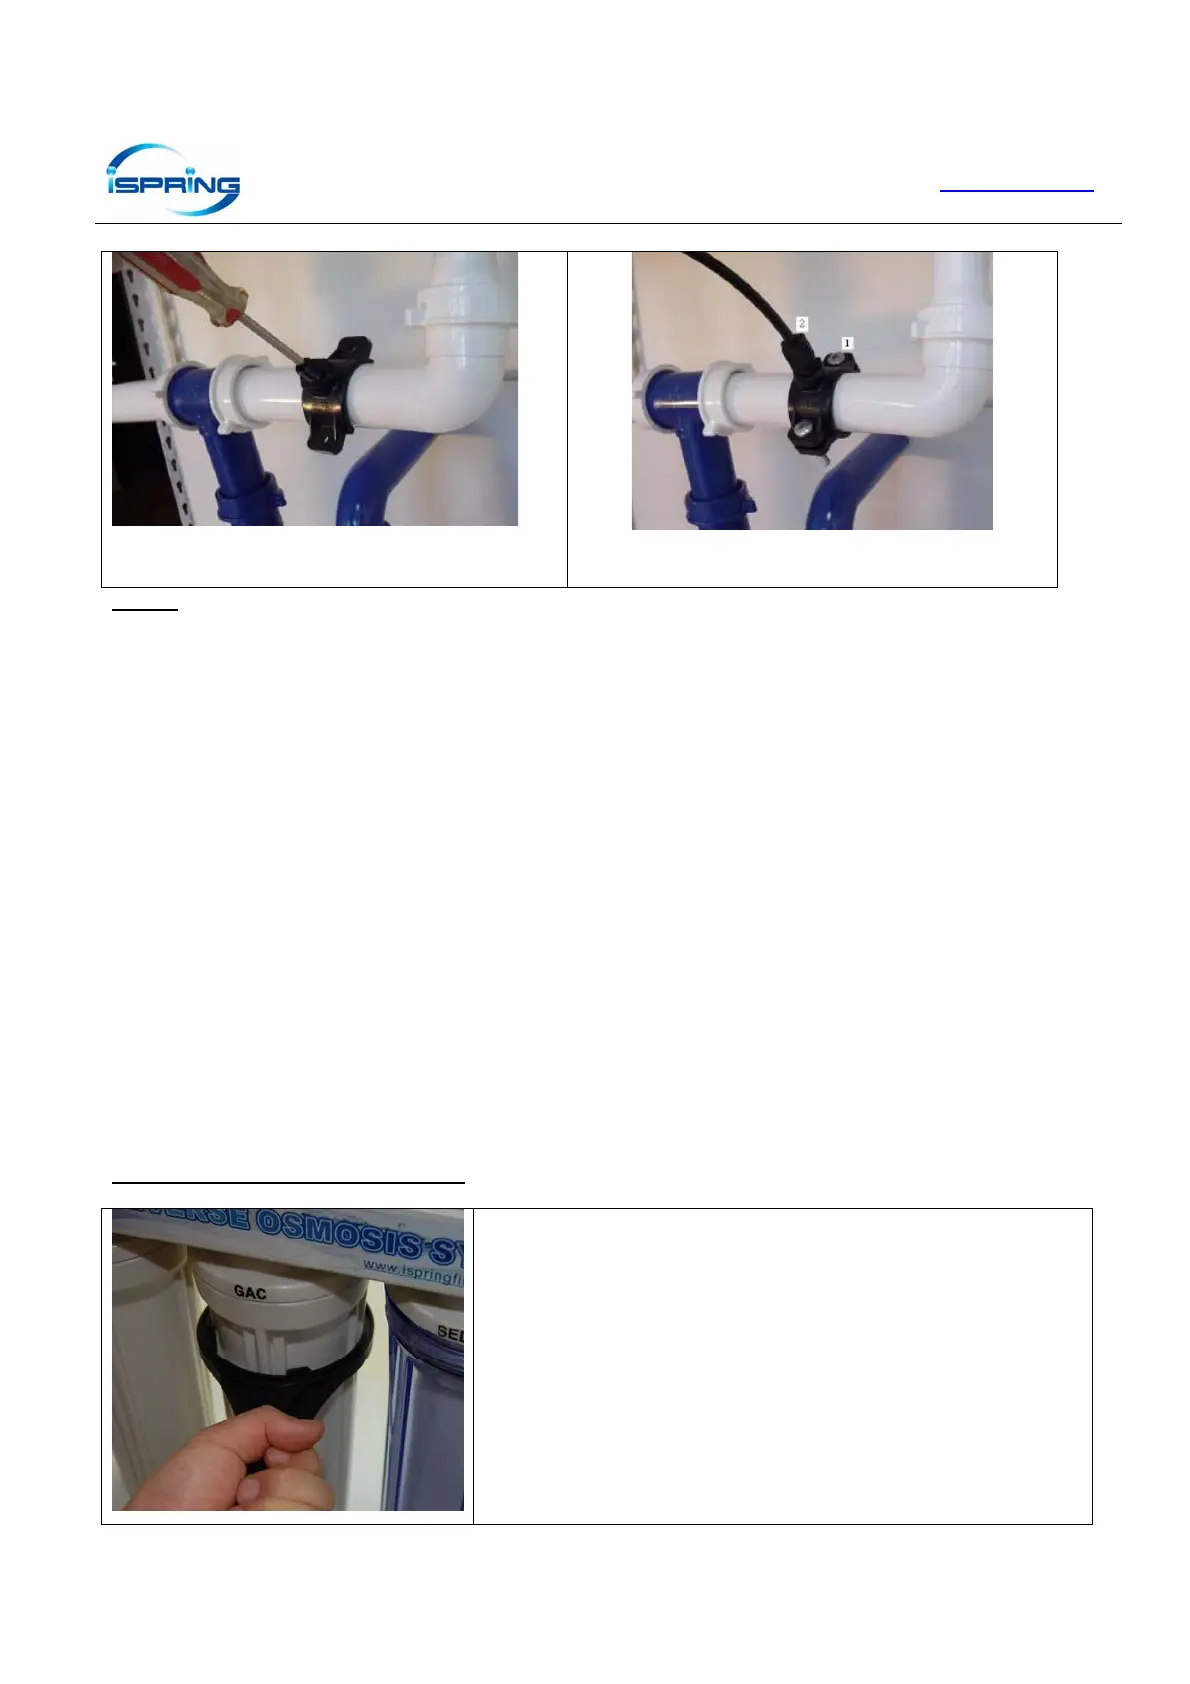
Align the drilled hole in the drain pipe with the drain saddle using
a drill bit or narrow screwdriver
Put the complementary piece and clamp them together with the
two bolts. (1) Tighten the two bolts evenly
(2) Connect tubing
STEP 5: SYSTEM START-UP
1. Make sure all tubings are not kin ked.
2. Turn Tank Valve to OFF position.
3. For Model RCW7, RCW5, RCW7DT only: There is a manual flush valve located next to the drain line (close to FLOW
restrictor). Turn the valve paralleled to the tubing (OPEN), to flush new system or new filters. For all other systems, skip
this step.
4. Turn RO faucet lever to continuous flow position. Lever points up or turn counter clock-wise for upgraded faucets.
5. Turn cold water supply main valve on slowly. Also turn input ball valve ON. When the system is pressurized, check for leaks.
If a leak is found, tighten the connection.
6. Plug in the electricity for Booster pump (for systems with electric booster pump only).
7. Plug in electricity of the UV lamp (for systems with UV only).
8. Wait 5 minutes, the water should start dripping out of the RO faucet, and then wait 10 more minutes to allow water to flow
through the system, and air inside the system can be purged.
9. Turn Tank Valve to ON position, lever is parallel to the tubing.
10. For Model RCW7, RCW5, RCW7DT only: Close the manual flush valve. This flush valve should remain closed under
normal use. For all other systems, skip this step.
11. Turn the RO faucet lever to OFF. Now the purified water will start filling the storage tank.
12. Wait 2 hours for the storage tank to be filled up.
13. DO NOT DRINK THE FIRST BATCH OF WATER PRODUCED BY THE SYSTEM.
14. After storage tank is full, turn the RO faucet lever to continuous flow position, to discharge the first batch of water. It takes
about 5 minutes to completely discharge the tank. When the tank is discharged, you
will notice just a steady trickle of water
coming out.
15. After discharging the tank or about 5 minutes, turn the RO faucet to OFF position. Now the RO system is refilling the tank.
16. After the tank is filled up again, you can start enjoy the purified water. Job Well Done!
**NOTE: Check for leaks daily for the first week after installation.**
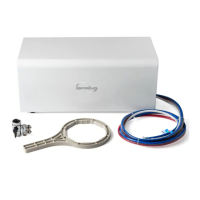
CHANGING FILTERS PROCEDURES
• Shut off the system by turning off the water supply, and turn off the tank valve, open
the spigot to depressurize
• Prepare a towel under the unit for water spills
• Use a filter wrench (part no. 566) or use hands to open the filter housing, unscrew it
from right to left. To open is clockwise looking from the top.
• Throw away the used filter, and clean the inside of the housing by rinsing or
scrubbing it with dish soap.
• Check condition of the O-ring. It should be replaced every 3 years to prevent leak
• Place the new filter inside the filter housing. For carbon filters, the rubber gaskets
should be on both ends.
• Put some Vaseline or silicon-based O-ring lubricant on the side of the housing
thread and the O-rings (optional procedure)
• Use a filter wrench or both hands to screw the housing back by turning it from left to
right (Don’t lay down the unit when turning it, the unit should be standing upright to
prevent the o-ring or filters from misalignment)
• Repeat the above steps for other filters