www.123filter.com | (678) 261-7611 sales@ispringfilter.com | Rev 03/14 | p9/10
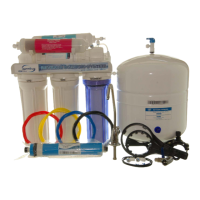
-Step 7: Tubing Hook up
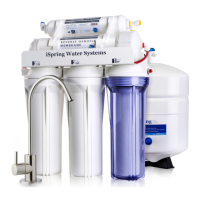
7.1 When facing the Water System with the iSpring logo on the front plate, look for the elbow fitting
connecting to the vertical
sediment filter located on the
right hand side (clear housing).
Connect the RED tubing to this
elbow fitting and the other end
will connect to the Feed Water
Adapter (AFW) on your cold
water line.
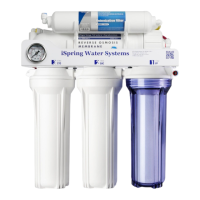
7.2 Insert the BLACK tubing into
the flow restrictor, which lays
beside the membrane housing
and further connects to the drain
saddle to flush out the waste
water.
7.3 On the right side of the Post
Carbon Filter (labeled T33 or
FT15), insert the YELLOW
tubing into the t-fitting, and the
other end to the ball valve of the
Tank.
7.4 Insert the BLUE tubing (links to
RO faucet) into the elbow fitting
at right end of T33 Filter. For the
optional Ice Maker Kit, replace
elbow fitting with the T-fitting.
7.5 You may organize the tubings,
but make sure to leave enough length so the filter system can be moved around the cabinet easily
when replacing filters.
7.6 You may hang the system on the cabinet wall using two 1.5” screws. Furthermore, a basket can be
put under the system in case of any leaks, and a Flood Alarm can be used together for greater
home and cabinet protection.
-Step 8: System Start Up
8.1 Turn Tank Shut-off Valve to OFF (cross) position.
8.2 Turn on Cold Water Supply Valve and Feed Water Adapter, and check system for leaks.
8.3 Turn on RO Drinking Faucet. Within 5 minutes, RO water should start dripping. Let it run for 5 -
10 minutes. This flushes the system except the tank.
8.4 Shut off RO Drinking Faucet, turn on Tank Shut-off Valve and allow the tank to fill for two hours.
8.5 After two hours, turn on RO Drinking Faucet to flush out all the water in the tank. The water out of
the faucet should be much stronger stream since the water is coming from the pressurized tank.
The tank has flushed when the water flow has changed back to a real weak flow.
8.6 Repeat the steps 8.3 – 8.5 one to three times until RO water is clear.
8.7 An optional step would be to compare the TDS level between original tap water and RO
water. If the tap water is 100, the RO water should be less than 10. Visit 123filter.com
to
purchase a TDS Meter.
**NOTE: Check for leaks daily for the first week after installation.**
 Loading...