EasyManua.ls Logo

Ivation IVADM45 - User Manual

Ivation IVADM45
1 page
Print Icon
Loading...
DEHUMIDIFIER WITH
AUTO HUMIDISTAT
User Manual
Introduction
Thank you for purchasing our Dehumidier with Auto Humidistat, and welcome to the
Ivation™ family. This user manual is meant to oer you a brief walkthrough of the device’s
features and usage protocols. We hope you nd this manual helpful. For additional
information and technical support, please feel encouraged to contact our help team at
info@myivation.com.
Important Instructions
Intended Use
This device is intended for use in the removal of excess moisture from small rooms such as
studies, walk-in closets and bathrooms. Other than the removable water tank, this device
is not user serviceable and should not be disassembled. Any use other than that
described above will lead to damage to the product and may present additional risks.
How Does it Work?
The Dehumidier works by way of thermoelectric cooling, which uses what’s known as the
Peltier eect to create a heat ux between the junction of two dierent types of materials.
Using no compressors or moving parts, the device quietly pulls moisture from the air
around it, removing muskiness and dampness from the room.
Safety Instructions
If damage is incurred as a result of non-compliance with these operating instructions,
manufacture’s guarantee will be voided. Ivation™ assumes no liability for personal injury
or damage to property caused by incorrect handling or non-observance of the safety
instructions.
1. Keep unit in upright position whenever in use.
2. To avoid electric shock, avoid opening unit.
3. Always turn device o when not in use.
4. Avoid using power adapter in excessively wet area.
5. Ensure that inlet and outlet grilles are unobstructed.
6. Use both hands when handling unit to avoid tilting.
7. Keep device away from reach of children.
Box Contents
1 x Dehumidier
1 x Water Tank
1 x Power Cord
1 x User Manual
IVATION HOME
1
Parts & Controls
1 On/O Switch
2 Green “On” LED
3 Yellow “Full” LED
4 RH Level Display
5 RH Up/Down Buttons
6 Air Inlet Grill
7 Dry Air Outlet Grill
8 Carrying “Handle” Opening
9 Removable Water Tank
10 Tank Pull-Out “Handle”
11 Water Displacement Hole
w/Plug
12 Hydraulic Cut-O
13 AC/DC Power Adapter
14 DC Power Socket
15 Rubberized Stability Feet
Operation
Basics:
- To remove excess moisture from small rooms, place Dehumidier in preferred area.
- Insert smaller end of AC/DC Power Adapter (#13) into DC Power Socket (#14).
- Connect other end to wall socket.
- Toggle On/O Switch (#1) to On position.
- To turn unit o at any time, toggle On/O Switch (#1) to O position rst, then unplug
AC/DC Power Adapter (#13).
Setting Relative Humidity Levels:
The Dehumidier features an advanced humidistat function. Dehumidiers without a
humidistat stay on and work hard non-stop even if RH levels drop as low as 20%. This
wastes energy and wears out the power adapters. With this Dehumidier’s humidistat
function, you can set your desired relative humidity level in the range of 40%-80%. When
RH levels increase beyond your set level by a value of 5%, the machine automatically
turns on. When RH levels decrease below your set level by a value of 5%, the machine
automatically turns o. Note: You can override the humidistat and restart the machine
by pressing and holding the DOWN button for 5 seconds once the machine turns o.
By default, the unit is set to 50% RH.
To set your desired level:
- Toggle On/O Switch (#1) to On position.
- Wait a few seconds until RH Level Display (#4) reads current RH level.
- Depress the RH Up/Down Buttons (#5) to select your desired RH level.
- Display will ash ten times, then revert to showing current environment RH.
2
9
10
15
1
6
4
5
8
14
11
12
7
2
3
13
Emptying Water Tank:
- The Dehumidier will automatically turn o once tank is full.
- The Yellow “Full” LED (#3) will turn on.
- Before removing water tank, toggle On/O Switch (#1) to O position.
- Insert two ngers into Tank Pull-Out Handle (#10) and gently pull out.
- Pull out plug from Water Displacement Hole (#11).
- Pour collected water out from tank into sink or toilet.
- Reinsert plug and slide tank back into device until it clicks.
- Device is now ready for use again.
3
Technical Specifications
Capacity: Approximately 25 Ounces/Day at 86°F, 80% RH
Water Tank Capacity: 2 Liters
Cooling Element: Thermoelectric Peltier Module
Fan: 90mm x 90mm High-Speed, Long-Life DC Brushless Motor w/Turbo Blades
Power Adapter: 12v DC 6Amp
Power Consumption: 72w
Water Level Detector: Auto-O When Full w/Yellow “Full” LED
Working Environment: Over 59°F, Over 40% RH
Dimensions: 13.75” x 8.58” x 7”
Total Cord Length: 127” (10’ 7”)
Maintenance
Always turn the Dehumidier o and disconnect power cord before cleaning unit. Use a
piece of soft cloth to clean product surface, or use soft-bristled brush to wipe dust o air
inlet grills.
Distributed by
C&A Marketing, Inc.
2 Bergen Turnpike
Ridgefield Park, NJ 07660
info@myivation.com
MADE IN CHINA
IVATION is a trademark of
C&A IP Holdings, LLC
©2014 All Rights Reserved
Question and Answer IconNeed help?

Do you have a question about the Ivation IVADM45 and is the answer not in the manual?

Overview

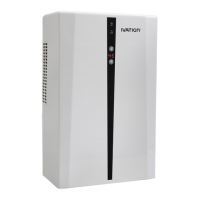
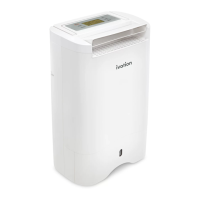
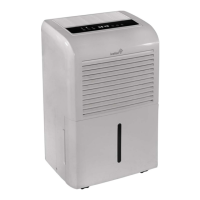
This document describes the Ivation Dehumidifier with Auto Humidistat, a device designed to remove excess moisture from small rooms such as studies, walk-in closets, and bathrooms. It operates using thermoelectric cooling, leveraging the Peltier effect to create a heat flux between different materials. This method allows the dehumidifier to quietly pull moisture from the air without compressors or moving parts, effectively reducing muskiness and dampness in the room.

The dehumidifier is intended for its stated purpose of moisture removal and is not user-serviceable beyond the removable water tank. Disassembly of the unit is not recommended.

Usage Features:

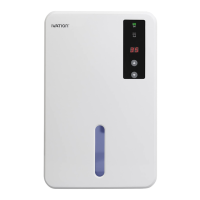
The device is equipped with several controls and indicators for ease of use:

  • On/Off Switch: To power the unit on or off.
  • Green "On" LED: Illuminates when the device is operating.
  • Yellow "Full" LED: Indicates when the water tank is full.
  • RH Level Display: Shows the current relative humidity level.
  • RH Up/Down Buttons: Used to adjust the desired relative humidity level.

To begin operation, the dehumidifier should be placed in the preferred area of the room. The smaller end of the AC/DC Power Adapter (13) is inserted into the DC Power Socket (14), and the other end is connected to a wall socket. The On/Off Switch (1) is then toggled to the "On" position. To turn the unit off, the On/Off Switch (1) should be toggled to the "Off" position first, followed by unplugging the AC/DC Power Adapter (13).

A key feature of this dehumidifier is its advanced humidistat function. Unlike basic dehumidifiers that run continuously, this unit allows you to set a desired relative humidity level within a range of 40%-80%. The device automatically turns on when the RH levels increase beyond your set level by 5% and turns off when RH levels decrease below your set level by 5%. This intelligent operation conserves energy and extends the lifespan of the power adapters. By default, the unit is set to 50% RH.

To set your desired humidity level:

  1. Toggle the On/Off Switch (1) to the "On" position.
  2. Wait a few seconds for the RH Level Display (4) to show the current RH level.
  3. Use the RH Up/Down Buttons (5) to select your desired RH level. The display will flash ten times to confirm the selection, then revert to showing the current environmental RH.

An override function is available: if the machine turns off due to the humidistat, you can press and hold the DOWN button for 5 seconds to restart it.

Emptying the Water Tank:

The dehumidifier is designed to automatically turn off when its water tank is full, and the Yellow "Full" LED (3) will illuminate to indicate this. To empty the tank:

  1. Toggle the On/Off Switch (1) to the "Off" position.
  2. Insert two fingers into the Tank Pull-Out Handle (10) and gently pull out the removable water tank (9).
  3. Remove the plug from the Water Displacement Hole (11).
  4. Pour the collected water out from the tank into a sink or toilet.
  5. Reinsert the plug and slide the tank back into the device until it clicks into place.
  6. The device is then ready for use again.

Safety Instructions:

To ensure safe operation and prevent damage, several safety guidelines must be followed:

  • Always keep the unit in an upright position when in use.
  • To avoid electric shock, do not attempt to open the unit.
  • Always turn the device off when not in use.
  • Avoid using the power adapter in excessively wet areas.
  • Ensure that the air inlet and outlet grilles are unobstructed.
  • Use both hands when handling the unit to avoid tilting.
  • Keep the device out of reach of children.

Maintenance Features:

For cleaning, always turn the dehumidifier off and disconnect the power cord before proceeding. The product surface can be cleaned with a soft cloth. For the air inlet grilles, a soft-bristled brush can be used to wipe away dust.

Ivation IVADM45 Specifications

General IconGeneral
ModelIVADM45
Moisture Removal Capacity45 pints per day
Water Tank Capacity1.6 gallons
Filter TypeWashable Air Filter
Energy Star CertifiedYes
Operating Temperature41°F - 95°F
TypeDehumidifier
Coverage AreaUp to 3000 square feet
FeaturesAdjustable Humidistat, Auto Restart
Drainage OptionContinuous drainage or manual
ControlsDigital Controls
Dimensions15.4 x 11 inches
Warranty1 year limited warranty
RefrigerantR-410A

Related product manuals