thinning the paint when used with a spray gun.
The viscosity cup (9) will help you to determine •
the correct viscosity of paint to be used. To determine
the correct viscosity, ll the viscosity cup (9) to the
brim with the paint. Measure the amount of time it
takes for the cup to empty back into the can (g.1).
The table shows recommended times for dierent
types of material.
MATERIAL SECONDS
Plastic & latex paint 24-28
Water based paint 20-25
Primers 24-28
Varnishes 20-25
Oil based paints 18-22
Enamel paints 18-22
Aluminum paints 22-25
Car undersealing 25-35
Wood sealers 28-35
Wood preservatives No thinning required
Wood stains No thinning required
If the paint takes longer than the recommended
time to empty, then further thinning is required.
Mix in a small quantity of the appropriate thinner
and use the viscosity test until the correct
thickness is achieved.
Some spray able materials contain particles and
lumps. These materials should be strained before
filling the paint container.
Switching on and o
Before connecting the device to the electric power
supply, make sure that the main supply voltage is
230V/50Hz.
Always use the correct supply voltage: the power
supply voltage must match the information quoted
on the tool identication plate.
Switching on
Fill the paint cup (5) with the correctly thinned 1.
and strained paint.
Connect the spray gun to the mains supply. 2.
Aim the spray gun at a piece of scrap material 3.
and operate the on/o switch (3) until paint is
spraying.
Operating instructions
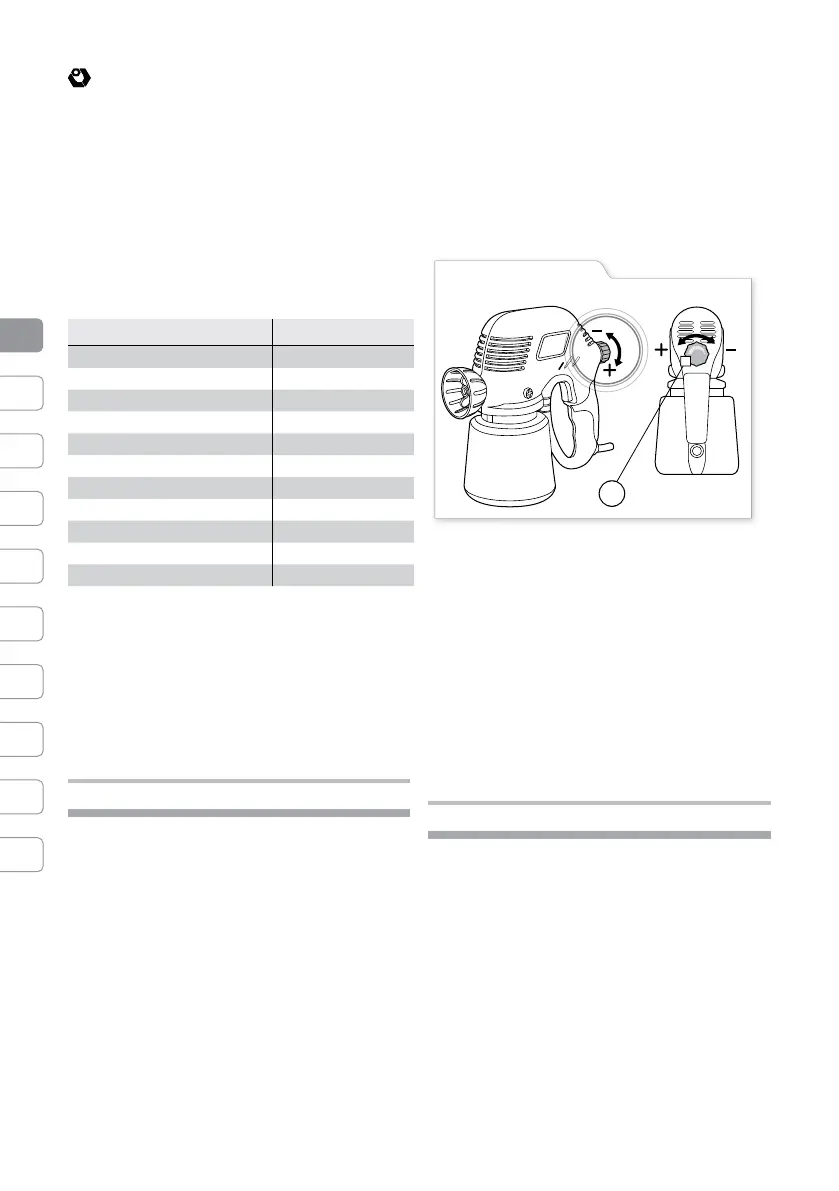
Adjust the uid adjustment knob (2) until the •
required volume of paint is spraying.
Adjustment of the uid adjustment knob (2) will
aect the spray pattern. Turn the uid adjustment
knob in a clockwise direction to reduce the ow and
anti-clockwise to increase the ow (g.2).
A poor spray pattern will concentrate the paint in
the centre of the spray and give a blotchy nish.
A good spray pattern will give even distribution of
paint throughout the pattern.
Switching o
Release the on/o switch (3) to stop the spray gun.•
ATTENTION! Immediately switch o the spray gun
when there is:
• interruption in the mains plug, mains lead or
mains lead damage.
• defect in the ON/OFF switch (3).
• smoke or stench of scorched isolation.
Spraying techniques
To obtain the best results, keep your spray gun •
level and parallel to the surface at all times.
Keep the nozzle 25 - 30 cm from the surface and •
spray evenly from side to side or up and down (g.3-4).
Do not spray at an angle as this will lead to paint •
runs on the surface.
Use smooth and even strokes. •
When spraying large areas, use a criss-cross •
pattern (g.5).
Never start or stop the spray gun while it is aimed •
at the surface to be sprayed.
Evenly control the speed of movement of the •
spray gun. A fast speed of movement over the
surface will give a thin coat and a slow speed will
give a heavy coat.
 Loading...