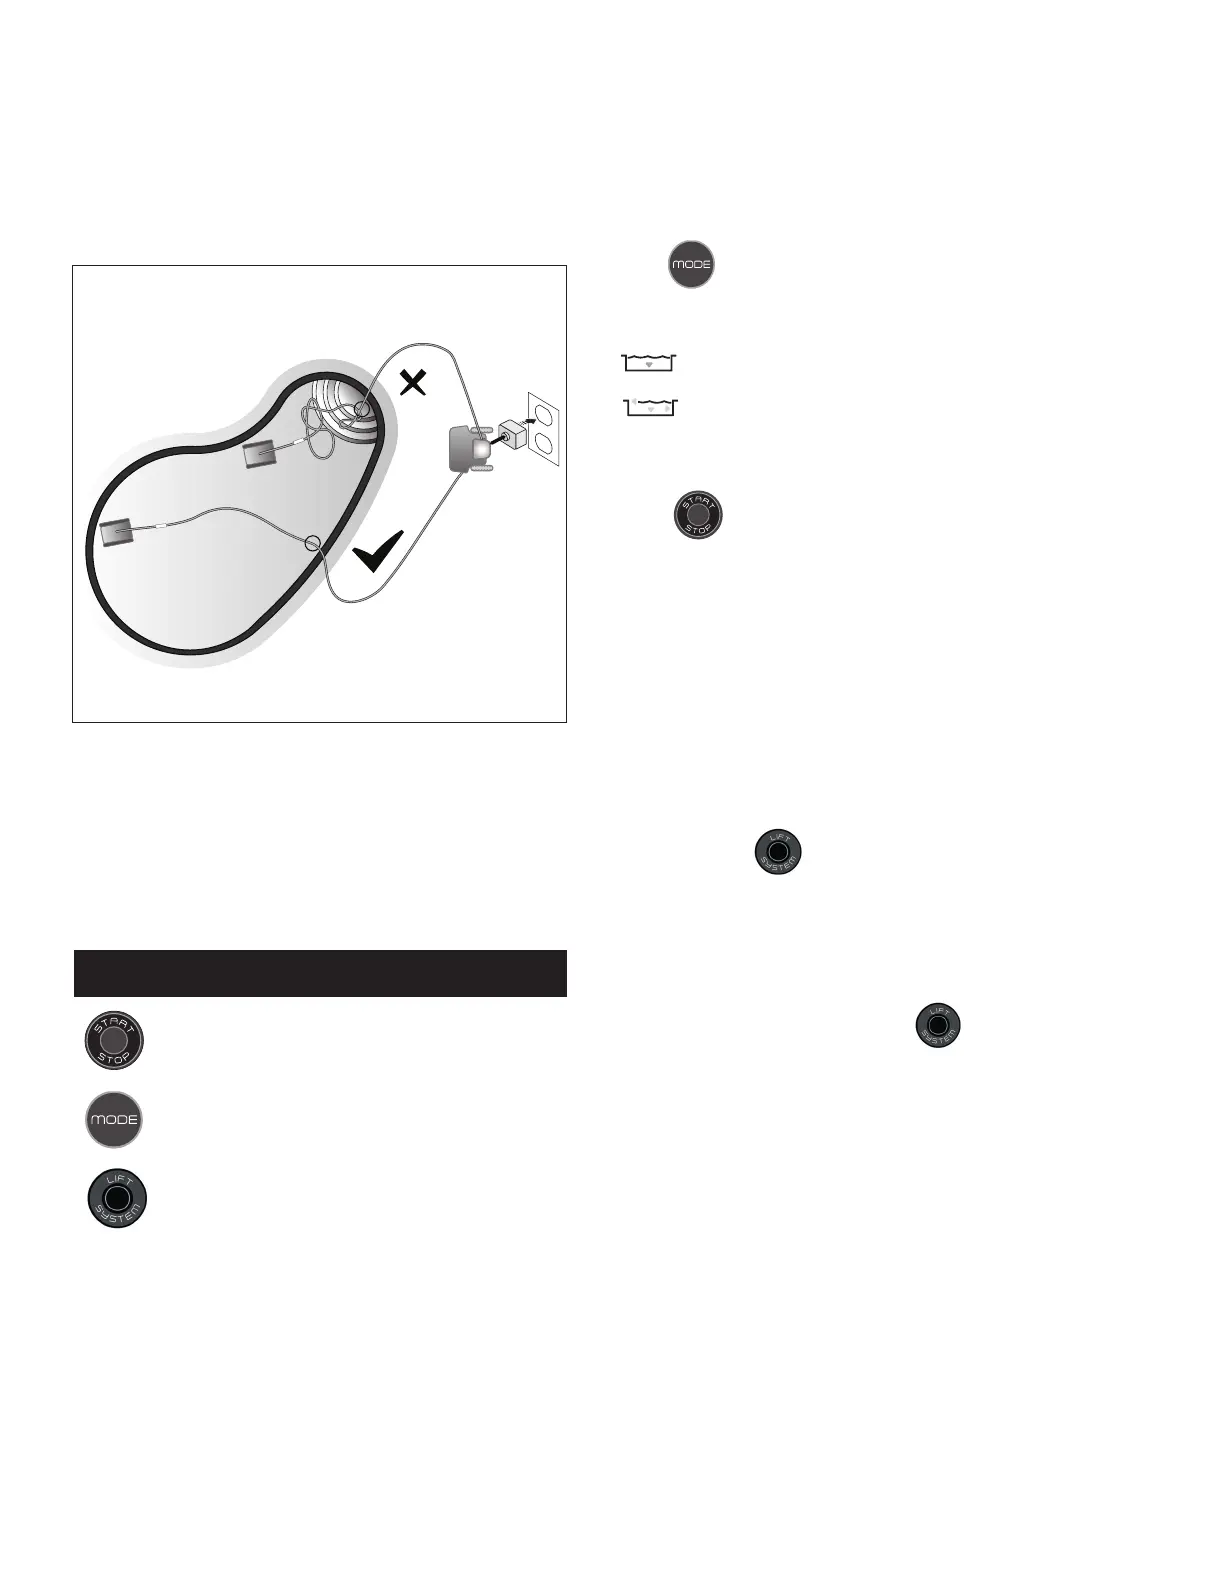
4. Place all of the oating cable in the water to
allow free movement in your pool from the
central point. Spread out the oating cable
ensuring there are no kinks or coils in the
cable (Figure 5).
Figure 5. Pool Entry Point for Optimal
Patterning
caddy /
control unit
cleaner
cleaner
Recommended
entry point
Not
Recommended
WARNING: Do not use
an extension cord
4.2 CONTROL BOX BUTTONS
The control box can be used to initiate basic cleaning
features.
Button Functions
Start/Stop cleaning
Select cleaning mode
Remove cleaner from the pool
4.3 START / STOP CLEANING AND
SELECT CLEANING MODE
The factory default cleaning mode is set to Floor, Wall,
Waterline.
Use
to change cleaning surface setting.
Toggle between modes:
Floor Only (1h 30 min)
Floor, Wall, Waterline (2 hours 30 minutes)
With the cleaner submerged in the water,
press
to begin operation.
Press again to interrupt and cancel an in-progress
cleaning cycle.
4.4 REMOVAL FROM POOL
The Lift System is designed to assist in retrieving the
robot from the pool. Lift System can be activated at
any time during or after a cleaning cycle.
1. Press any button to engage cleaner controls.
2. Press
on the control box to begin the
automated procedure to bring the cleaner to
the wall.
NOTE: To stop the procedure at any time, press
and release the button again.
3. Next, Press and HOLD to rotate the
cleaner.
4. Once the cleaner is facing the wall of your
choice for retrieval, release the button.
5. Cleaner will drive forward and up the wall
it is facing. It will wait at the waterline to be
retrieved.
6. When in reach, remove the cleaner from the
pool using the handle. The cleaner will quickly
expel water to allow for lighter, easier removal
(Figure 6).
8
ROBOTIC CLEANER
 Loading...