26
B
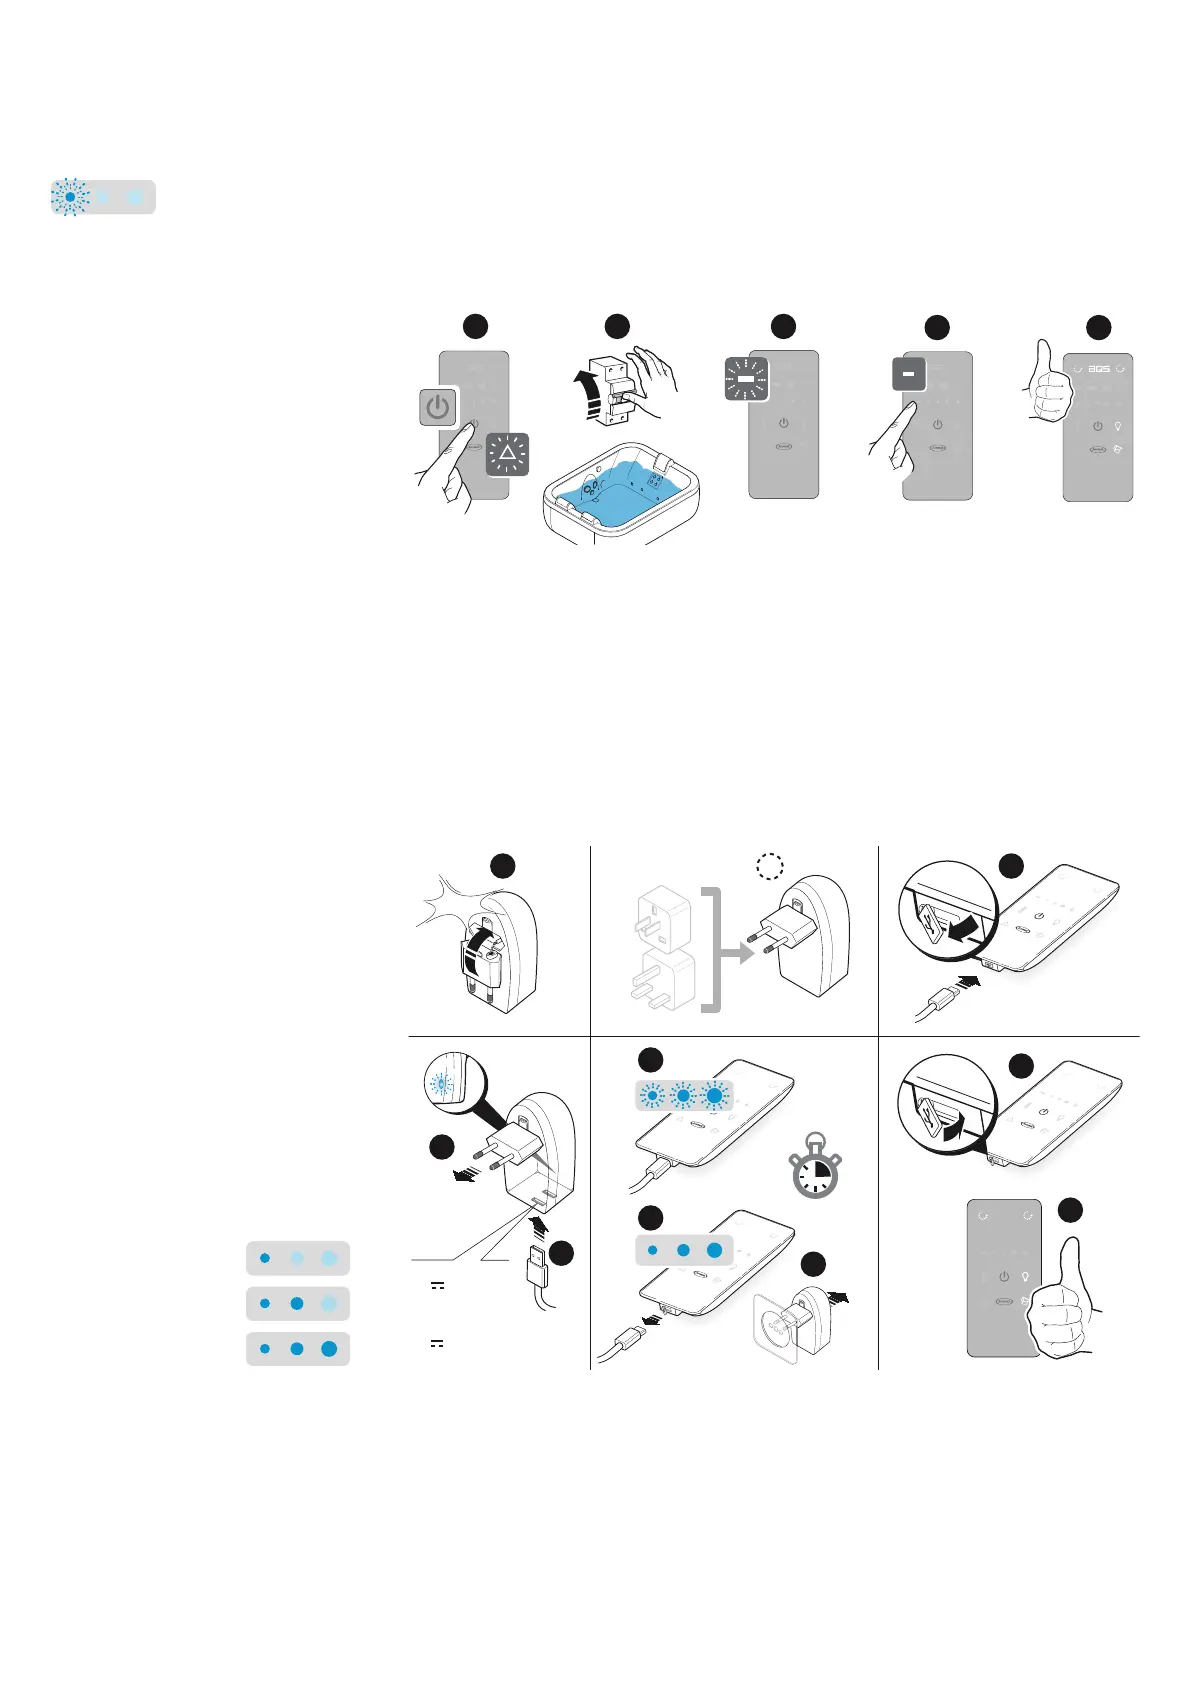
efore using the tub, the J.touch remote control must be set up to communicate with the
tub computer.
QTurn on the remote control by holding down the key displayed for a few seconds: the
battery level will be displayed (ref. "Charging the J.touch remote control") and the "alarm"
symbol will ash.
Turn on the switch installed on your system, located above the tub.
1 2
1 2
1 2
1
2
3
4
5
1 2
Q If the "–" key ashes, keep it pressed down until the symbols denoting the various
functions light up (g.5): the remote control is now ready.
If the "–" key does not light up, the remote control directly assumes the nal congu-
ration ("ready to use". g.5).
QConnect the feeder to the remote control using the USB cable provided; connect the
feeder to a socket (complete charging requires approximately 10 hours).
1
2
1
2
2
5
4
100-240V
50/60 Hz
125 V ~ 5 A max
250 V ~ 2,5 A max
1 USB port:
5 V
2,1 A max
2 USB ports:
5 V
1,05 A max
1
3
9
click!
~ 10 h
8
6
7
1
2
1
2
1 2
10
QOnce charging is complete, reposition the USB cover (g.9).
Where not used, disconnect the battery charger from the socket.
Preliminary checks
Charging
the J.touch remote control
Charging must be carried out in a
dry area at room temperature
During charging, the LED lights next
to the "+" and "-" keys, come on in
sequence; once they stop ashing,
charging is considered complete.
If the conguration is not successful
switch o and then on again the
tub and repeat the procedure
If the remote control
fails to activate or where the smallest
LED light ashes, the battery must be
charged (refer to the Chapter. "Charg-
ing the J.touch remote control")
The "alarm" symbol should appear
a few seconds after having powered
the tub; where it does not come on,
try and repeat the procedure or refer
to the chapter "Troubleshooting..."
battery charge levels
~ 30%
~ 65 %
100%