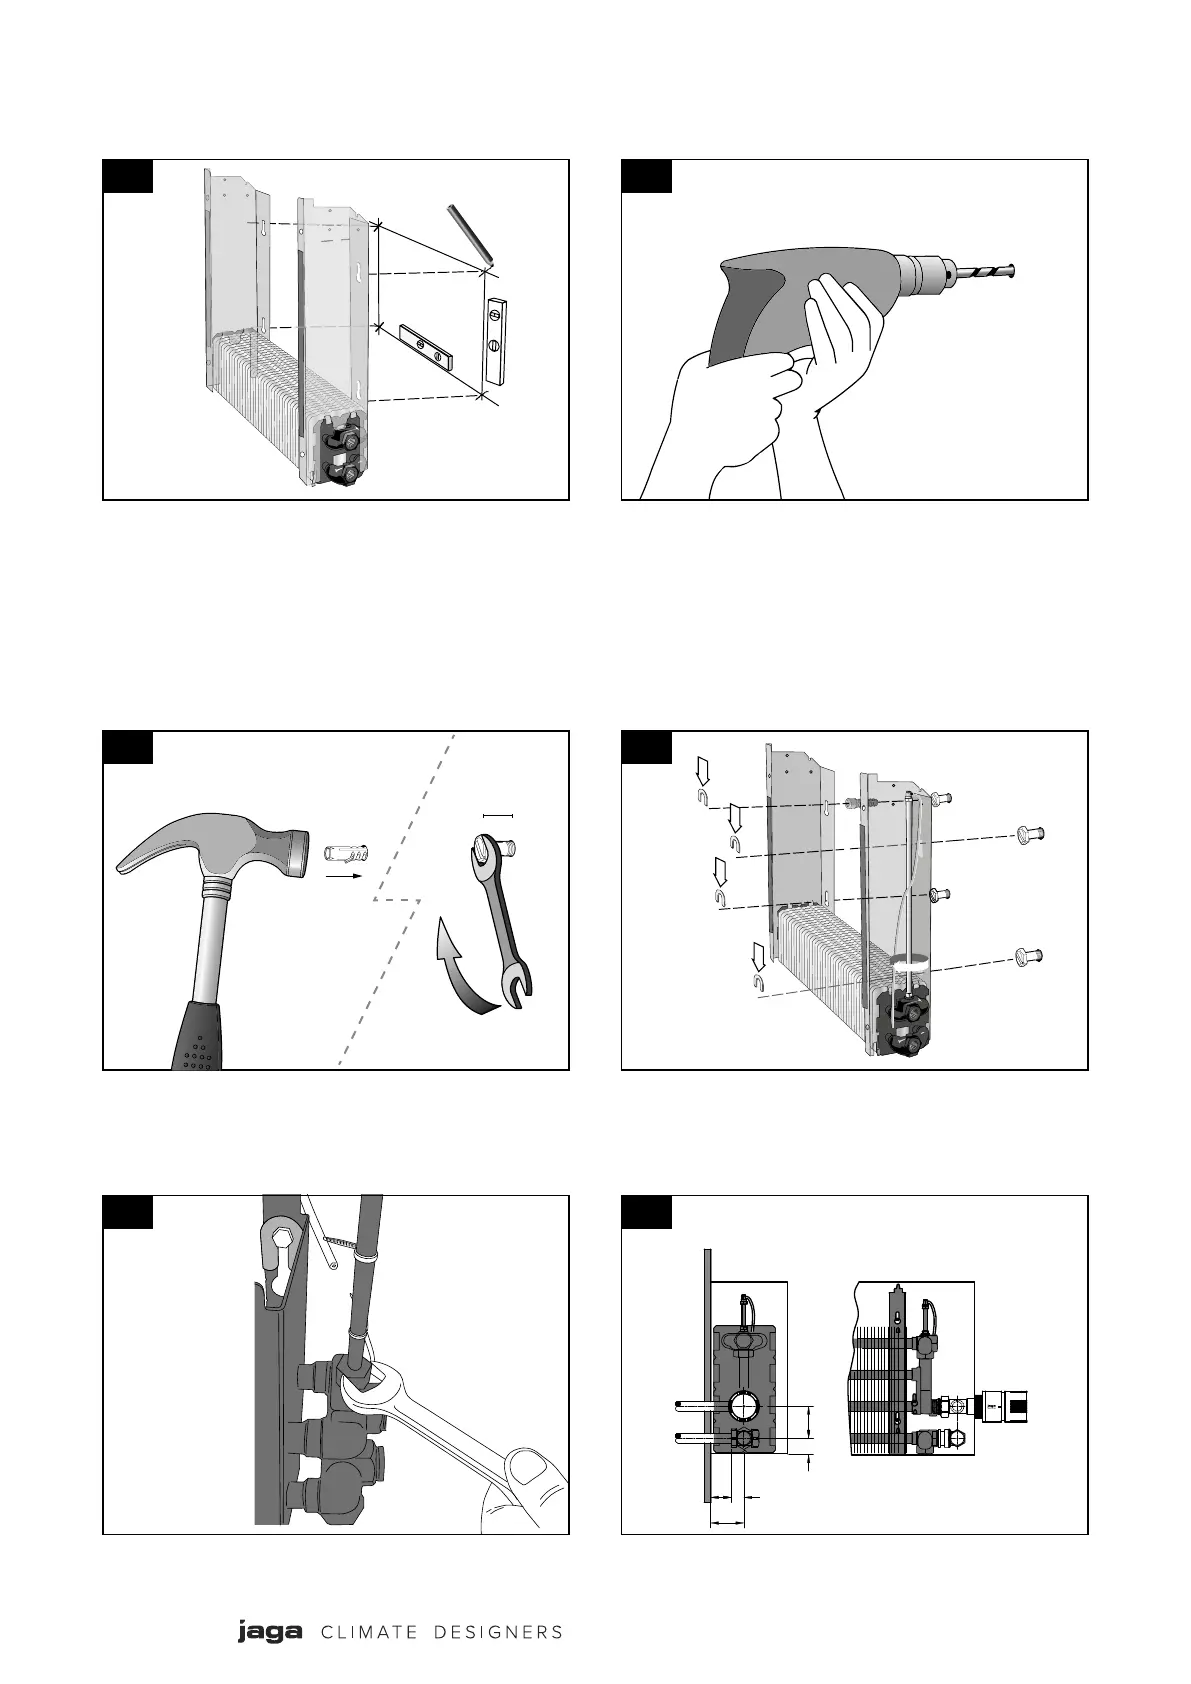
EasyManuals Logo

Jaga STRADA User Manual

Jaga STRADA
16 pages
To Next Page IconTo Next Page
To Previous Page IconTo Previous Page
Page #6 background imageLoading...
Page #6 background image
6
|
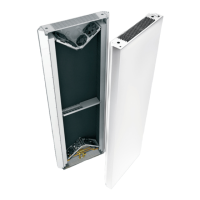
Example with Jaga valve: to the wall.
50
Without TRV.
25
A
24
d
11a
The valves can now be fitted as per the option chosen;
as illustrated.
10
Fit the air vent to the top /th connection and moderately tighten.
09
Fix the element assembly to the wall with the fixings provided.
Depending on the wall construction, other fixings may be required.
Insert wall plugs into the holes, then insert screws and tighten
leaving mm protruding.
08
10mm
06 07
Drill mm holes at the marked centres.

Other manuals for Jaga STRADA

Questions and Answers:

Question and Answer IconNeed help?

Do you have a question about the Jaga STRADA and is the answer not in the manual?

Jaga STRADA Specifications

General IconGeneral
MaterialSteel
Operating Pressure10 bar
InstallationWall-mounted
ControlThermostatic
FinishPowder coated
Connections1/2"
MountingBrackets included

Related product manuals