7
|
Example with Jaga valve: to the floor.
25
50
60
2750
d
11b 12
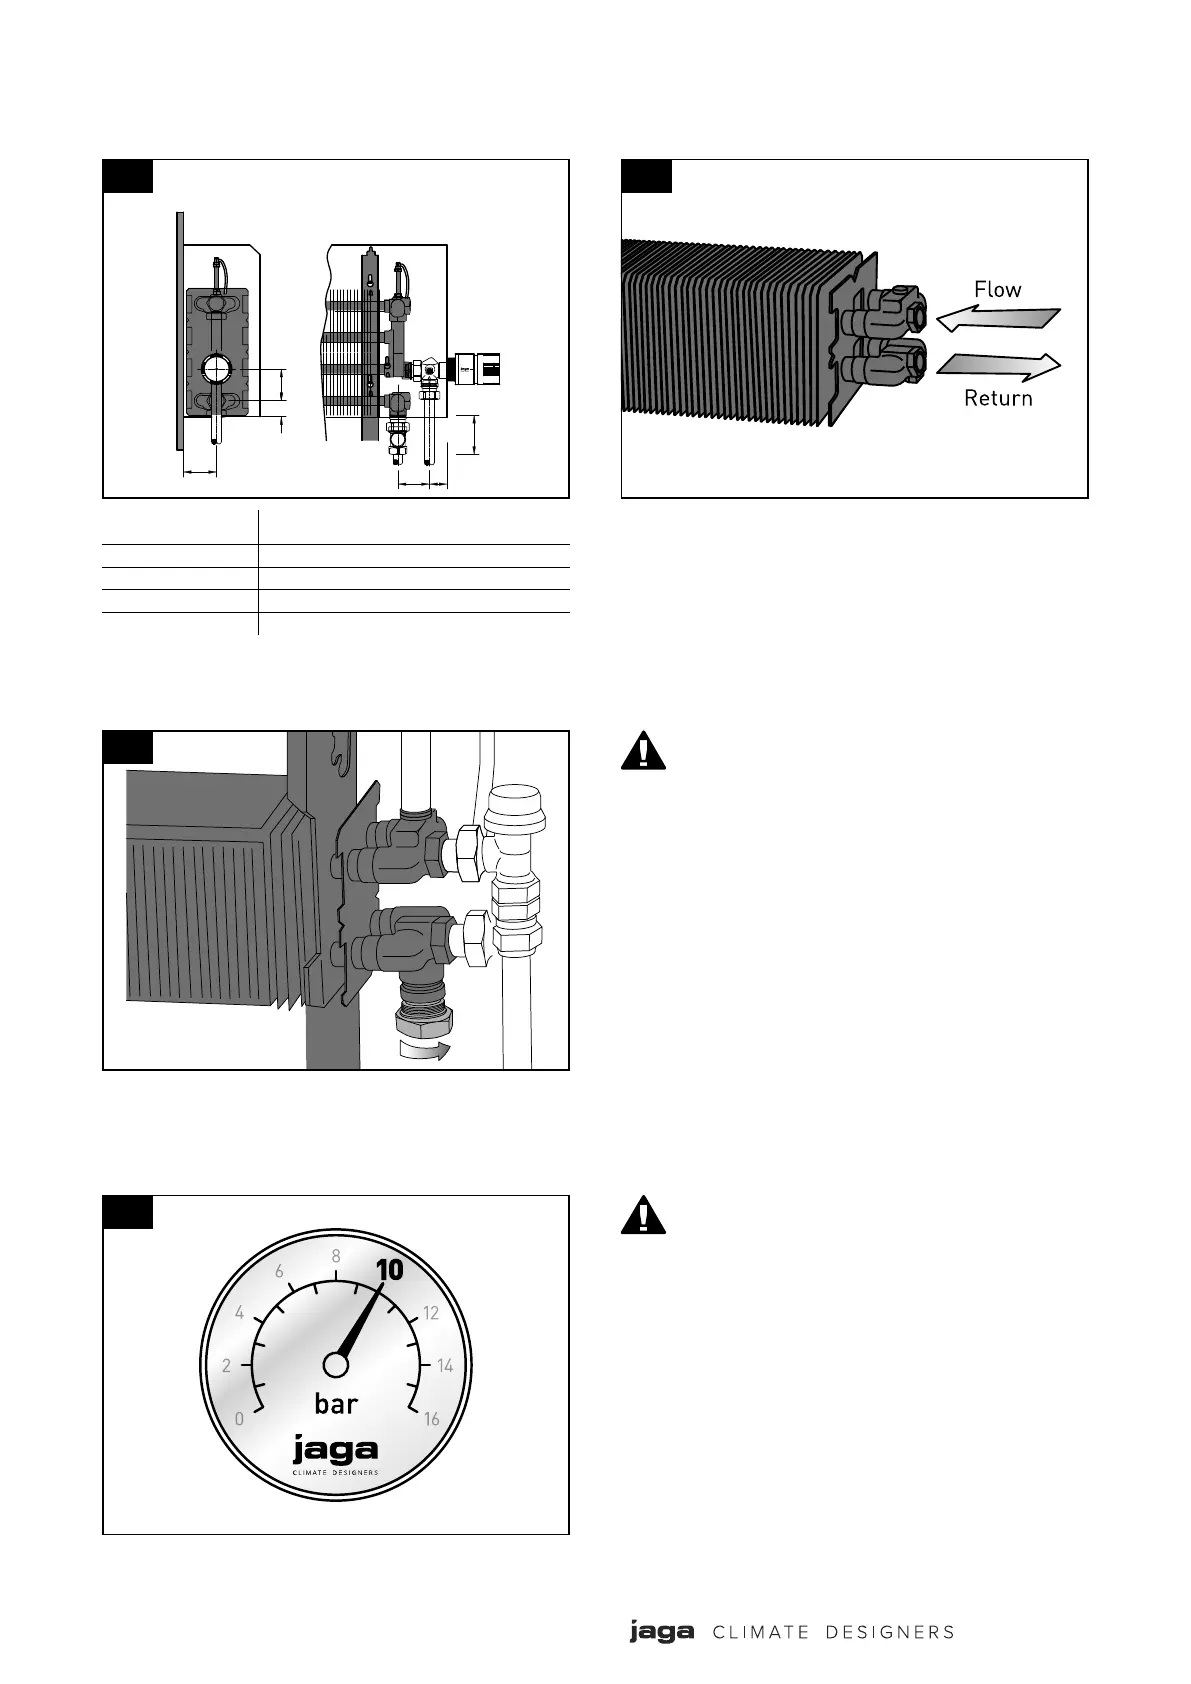
It is important for correct operation that the thermostatic radiator
valve is fitted to the flow, into the higher connection of the
element. The lockshield valve should be connected to the return,
into the lower connection.
Tpe
Connection
to foor d (mm)
Connection
to w A (mm)
/
/
/
13
The blanking plug can now be fitted to the unused connection.
If incorrectly connected, the heating
performance will be reduced and the
thermostatic radiator valve may
vibrate / chatter.
14
The installation is now complete and can be pressure tested to a
maximum bar.
Important Note:
Once the radiator has been fully pressure
tested, the system should be cleaned
and flushed in accordance with the
relevant standard.
The radiator should not be left empty
(after the cleaning and flushing) for any
prolonged period.