Page 7Diatomaceous Earth Pool Filters - DEV Series Filter
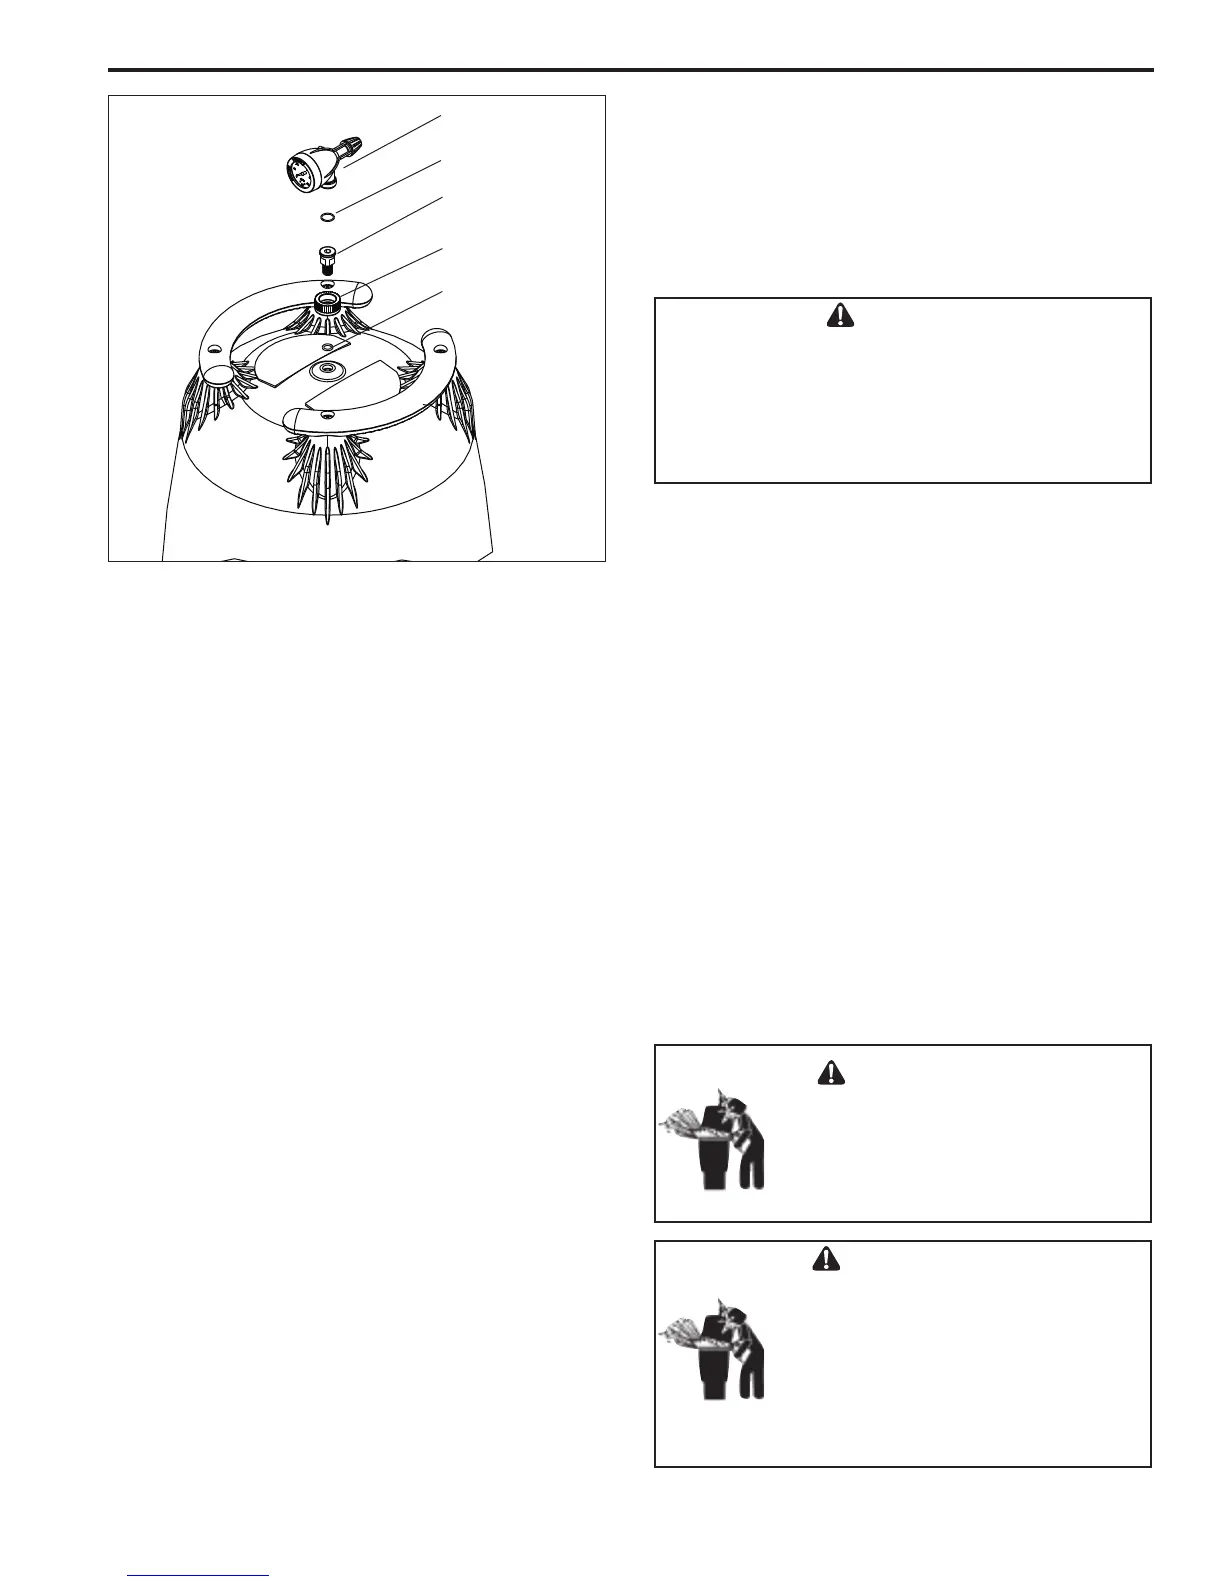
Figure 5. Pressure Gauge/Air Release Assembly
a. Place the smaller, thicker o-ring onto the
threads of the tank adapter (see Fig. 5). Slide
the tank adapter through the coupling nut and
into the fi lter tank. Use the fl ats on the tank
adapter to tighten. Do not overtighten.
b. Place the larger, thinner o-ring onto the
gauge housing. Thread the housing into the
coupler on the tank adapter.
c. Orient the gauge/air release assembly in the
desired position. Raise and thread the locknut
onto the bottom of the gauge/air release
assembly. Hand tighten the nut only. Using
a wrench to tighten the nut may damage the
nut, gauge or air release assembly.
5. To reduce pressure losses, 2" (minimum) piping is
recommended for plumbing the system.
6. For best effi ciency use the fewest possible number
of fi ttings. This will prevent a restriction in the
water fl ow.
7. Make all plumbing connections in accordance
with local plumbing and building codes. Filter
connections are provided with an o-ring seal. To
avoid damage to the o-rings, use only a silicone
base lubricant on the o-rings. Do not use pipe joint
compound, glue or solvent on inlet/outlet union
coupling nuts.
8. Keep piping tight and free of leaks. Pump suction
line leaks may cause air to be entrapped in fi lter tank
or loss of prime at the pump. Pump discharge line
leaks may show up as dampness or jets of water.
9. Support the inlet/outlet pipes independently to
prevent any undue strains on the fi lter's two (2)
or three (3) port diverter valve.
10. Connect the pipes using the unions supplied with
the fi lter. Do not use tefl on tape or pipe dope on
any unions. Assemble the unions dry and hand
tighten.
CAUTION
Be sure that all provisions for wastewater disposal
meet local, state or national codes. During any
backwashing or draining process, 100 gallons or
more of pool water will be discharged. Do not
discharge water where it will cause fl ooding or
damage.
3.5 Clamp Installation, DEV Series
1. Be certain that the o-ring seat is clean and that the
o-ring is in position in the lower tank half. Press
the fi lter lid onto the lower half, sandwiching the
o-ring between the two (2) halves.
2. Holding the ends of the fi lter clamp apart, position
the hinged segment of the fi lter clamp over both
upper and lower tank fl anges. Bring the ends of the
fi lter clamp together.
3. Place the "T" nut and threaded rod assembly into
the clamp. Be sure the "T" nut is seated in the
clamp in the proper orientation. See Figure 6.
4. Use a 9/16" socket on the tightening nut until the
clamp ring halves touch each other, or are within
1/16" (See Fig. 7) but do not overtighten as the
clamp can break. If unable to tighten as indicated,
do not operate the fi lter and call a service
technician immediately.
WARNING
Follow these instructions carefully.
Improper clamp installation can cause
product failure or also cause the fi lter lid
to be blown off, which can result in death,
serious injury, or property damage.
WARNING
NEVER start pump while standing
within fi ve (5) feet of the fi lter. Starting
the pump while there is pressurized air
in the system can cause product failure
or also cause the fi lter lid to be blown
off, which can cause death, se ri ous per-
sonal injury or property damage.
Housing
O-Ring
Tank Adapter
Tank Adapter to
Housing Coupler
O-Ring