2+3)0$
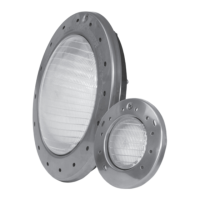
Section 2. Jandy WaterColors
LED Light Operating
Instructions
2.1 To Operate the Light and Change
Colors
Turn the light ON. The time the light is turned on,
the color sequence begins with the Alpine White. To
change the color, turn the light OFF and then ON within
three (3) seconds. Continue turning OFF and ON until
the desired light color mode is reached. See Table 1 for
the color mode sequence.
Table 1. Jandy WaterColors Lights Sequence
Sequence Order Color Modes
6 &<(-/)0H8-,)
4 A[G0?<C)
# ;.N+<,0?<C)
E ;+*-NN)+/0?<C)
$ A(*-/30^*))/
% IK)*+<:0^*))/
Q IK)*+<:0>.=)
R _+3)/,+
J U-.<),
6" A<.V0;.<.*0A(<+=8
66 L+=,0;.<.*0A(<+=8
64 &K)*-D+0,8)0?)+C,-@C<
6# L+,07C)=:+G
6E 1-=D.07)D8
NOTE H8)/0,8)0<-38,0-=0,C*/):0'LL0@.*0K.*)0,8+/0
=)M)/0OQP0=)D./:=S0-,0V-<<0*)K+-/0-/0,8)0D.<.*0=),0
,8+,0-=0DC**)/,<G0+D,-M)50H8)/0,8)0<-38,0-=0,C*/):0
N+D[0'WS0,8)0<-38,0V-<<0N)0./0,8)0=+K)0D.<.*0=),5
2.2 To Reset to the Beginning of the
Color Sequence
Turn the light OFF, wait four (4) to six (6) seconds, then
turn ON, the light will return to the beginning of the
color cycle (Alpine White).
NOTE X@0+/0&BC+9-/[0>A0D./,*.<0=G=,)K0-=0N)-/30C=):0
,8)0D.<.*0=),0D+/0N)0=)<)D,):0C=-/30,8)0-/:..*0
D./,*.<<)*5
NOTE
7.0=G/D8*./-Y)0D.<.*=0./0KC<,-(<)0F+/:G0
H+,)*;.<.*=09-38,0=G=,)K=0V-*):0,.0=)(+*+,)0
=V-,D8)=S0()*@.*K0,8)0+N.M)0+D,-./=0./0
+<<0.@0,8)-*0=V-,D8)=0=-KC<,+/).C=<G500&<<0
F+/:G0H+,)*;.<.*=09-38,=0V-<<0=G/D8*./-Y)0
+C,.K+,-D+<<G0-@0+D,-M+,):0NG0,8)0=+K)0=V-,D8500
W.0.,8)*0+DD)==.*-)=0+*)0*)BC-*):5
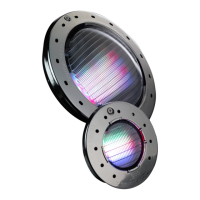
Section 3. Replacing Light Engine
(PCB)
WARNING
&<V+G=0:-=D.//)D,0(.V)*0,.0,8)0D.<.*0<-38,0+,0,8)0
D-*DC-,0N*)+[)*0N)@.*)0=)*M-D-/30,8)0<-38,50L+-<C*)0,.0:.0
=.0D.C<:0*)=C<,0-/0:)+,80.*0=)*-.C=0-/ZC*G0,.0-/=,+<<)*S0
=)*M-D)K+/S0(..<0.*0=(+0C=)*=0.*0.,8)*=0:C)0,.0
)<)D,*-D+<0=8.D[5
1. Turn off the main electrical switch or circuit
breaker, as well as the switch, which operates the
underwater light.
2. Be sure to have the following items:
$ A new lens gasket, P/N R0451101 for the large
light or P/N R0400501 for the small light.
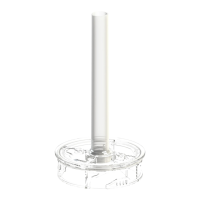
$ A light engine. See Table 2 for speci cation.
WARNING
>)(<+D)0<-38,0)/3-/)0V-,80,8)0=+K)0,G()50L+-<C*)0
,.0*)(<+D)0,8)0<-38,0)/3-/)0V-,80,8)0=+K)0,G()0V-<<0
:+K+3)0,8)0<-38,0+==)KN<G0+/:0K+G0D+C=)0+/0
)<)D,*-D+<08+Y+*:0*)=C<,-/30-/0:)+,80.*0=)*-.C=0-/ZC*G0
,.0(..<0.*0=(+0C=)*=S0-/=,+<<)*=S0.*0.,8)*=0:C)0,.0
)<)D,*-D+<0=8.D[S0+/:0K+G0+<=.0D+C=)0:+K+3)0,.0
(*.()*,G50?)0=C*)0,8)0(.V)*0-=0=V-,D8):0'LL0N)@.*)0
*)K.M-/30.*0-/=,+<<-/302;?50&<<.V02;?0,.0D..<0N)@.*)0
*)(<+D-/3505
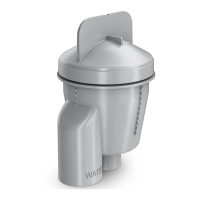
3. To remove the light assembly, unscrew the special
pilot screw at the top of the face ring, remove light
assembly from niche and gently place assembly
on the deck. It is not necessary to drain down the
pool. See Figure 1.
Model Fixture
Voltage
Light Engine (PCB)
Part Number
Jandy WaterColors
Large Light
640U.<,0&; >"EQE"""
Jandy WaterColors
Large Light
64"0U.<,0&; >"EQE6""
Jandy WaterColors
Small Light
640U.<,0&; >"EQ#J""
Jandy WaterColors
Small Light
64"0U.<,0&; >"EQ#J""
Table 2. Light Speci cations