2+3)0Q
6. Reassemble the xture.
a. If not already done, remove the gasket from the
a. If not already done, remove the gasket from the
glass lens and install a new gasket, P/N R0451101
glass lens and install a new gasket, P/N R0451101
for the large light and R0400501 for the small
for the large light and R0400501 for the small
light, on the lens. On the small light, remove the
light, on the lens. On the small light, remove the
diverger from the lens.
NOTE0 &0/)V0<)/=03+=[),0KC=,0N)0C=):0)+D80,-K)0,8)0
<-38,0-=0*)+==)KN<):500
WARNING
Risk of Electrical Shock or Electrocution.0&<V+G=0
-/=,+<<0+0/)V0<)/=03+=[),0V8)/)M)*0:-=+==)KN<-/30
,8)0<-38,0OF+/:G0;.<.*09-38,0^+=[),02]W0>"E$66"60@.*0
<+*3)0<-38,0+/:02]W0>"E""$"60@.*0=K+<<0<-38,P50L+-<C*)0
,.0:.0=.0K+G0()*K-,0V+,)*0,.0<)+[0-/,.0,8)0+==)KN<GS0
V8-D80D.C<:0D+C=)`
O+P00&/0)<)D,*-D+<08+Y+*:0*)=C<,-/30-/0:)+,80.*0=)*-.C=0
-/ZC*G0,.0(..<0.*0=(+0C=)*=S0-/=,+<<)*=S0.*0.,8)*=0:C)0,.0
)<)D,*-D+<0=8.D[S0.*0
ONP00&0K+<@C/D,-./0.@0,8)0F+/:G0H+,)*;.<.*=09-38,S0
V8-D80<-[)V-=)0D.C<:0*)=C<,0-/0=)*-.C=0-/ZC*G0,.0(..<0.*0
=(+0C=)*=S0-/=,+<<)*=S0.*0NG=,+/:)*=S0.*0-/0:+K+3)0,.0
(*.()*,G5
b. While holding the fixture upright, place the glass
b. While holding the fixture upright, place the glass
lens with the gasket on top of the fixture. Please
lens with the gasket on top of the fixture. Please
note that the lens gasket is not symmetrical.
note that the lens gasket is not symmetrical.
Therefore, it must be installed correctly so that
Therefore, it must be installed correctly so that
the lens can seal to the fixture housing. Place the
the lens can seal to the fixture housing. Place the
gasket on the lens so that the thick molded side
gasket on the lens so that the thick molded side
of the gasket will mate with the housing when the
of the gasket will mate with the housing when the
lens is installed.
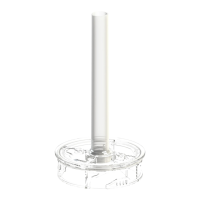
See Figure 4. On the small light,
See Figure 4. On the small light,
replace the diverger by tucking the tabs between
replace the diverger by tucking the tabs between
the lens and gasket.
NOTE0 ?)0=C*)0,.0@+D)0,8)0:C<<0=-:)0.@0,8)0:-M)*3)*0
:.V/0,.V+*:=0,8)02;?5
c. Position the lens and gasket on the fixture. Place
c. Position the lens and gasket on the fixture. Place
the face ring assembly over the lens and align the
the face ring assembly over the lens and align the
pilot screw with the small arrow mark on the face
pilot screw with the small arrow mark on the face
of the lens. Note that the small arrow mark on the
of the lens. Note that the small arrow mark on the
face of the lens and the pilot screw of the face ring
face of the lens and the pilot screw of the face ring
must be aligned with the arrow located on fixture
must be aligned with the arrow located on fixture
label that reads, ]Arrow on this label must line up
label that reads, ]Arrow on this label must line up
with the pilot screw on the Face Ring^. See
with the pilot screw on the Face Ring^. See
Figure 5.
Figure 2. Small Light Engine (PCB) Replacement
and Wiring
AC1 AC2
?<+D[0O64UP
?<C)0O64"UP
H8-,)0O64UP
>):0O64"UP
^*))/0
WG<./
H+=8)*
WC,
9-38,0
I/3-/)
A)DC*)0
L-*=,
64"U0H-*-/364U0H-*-/3
H8-,)
^*))/
?<+D[
F%
F4
F#
F4
H8-,)
^*))/
?<+D[
WG<./
H+=8)*
WC,
WC,
A)DC*)0
L-*=,
A)DC*)0
L-*=,
Figure 3. Large Light Engine (PCB) Replacement and Wiring