TruFit Bubbler | Owner’s Manual
ENGLISH
Page 9
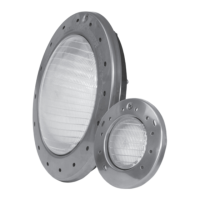
2.2 Installing the TruFit
TM
Bubbler Housing
1. The TruFit Bubbler is designed to be installed during the gunite phase
of pool building.
2. Two conduits should be run to the Bubbler body:
a. 1.5” PVC Pipe for water supply and
b. 1” conduit for Pool Light Power Cord.
NOTE: Do NOT use 90 degree ttings. Only 45 degree or sweep elbows
are to be used.
3. The 1.5” PVC pipe supplying the water to the Bubbler should have
a gate valve or ball valve installed to adjust the water supply ow to
create desired water/lighting eect.
4. The conduit for the TruFit Bubbler power cord must run from the
bubbler directly to a 12 VAC Transformer that is NRTL Listed/
Certied for swimming pool use.
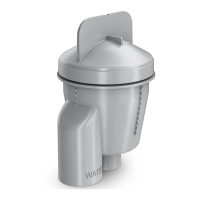
5. With the large construction cap on, install the Bubbler Housing onto
the pipe so that the disired nished surface is above the lower indicator
(B) and bellow the top of the cap (A). See gure 4
Important: After gunite you need to “cove” around the TruFit Bubbler
Housing. This is so that the Large Construction Cover can be removed
and the adjustable sleeve can be installed and trimmed to be ush with
the interior surface.
6. Dig a cove around the top of the TruFit Bubbler Housing.
7. Trim Adjustable Sleeve to be ush with the interior surface.
NOTE: Threaded inserts on the adjustable sleeve are only used for vinyl/
berglass installations.
8. Install the Small Construction Cover before plastering. This will
ensure that the threads remain clean and that no debris falls into the
Bubbler Housing.
9. Backll the “cove” area around the Bubbler Housing. After plastering,
remove the Small Construction Cover.
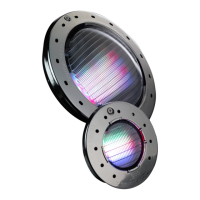
10. Install the Jandy
®
HydroCool Nicheless Pool Light.
 Loading...