This document is a service manual for the JR 1218S, providing detailed instructions for its mechanical adjustments and service access. It covers various aspects of the device's operation, maintenance, and repair.
Function Description
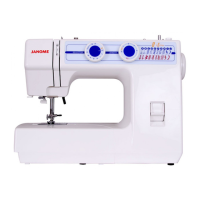
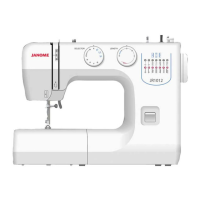
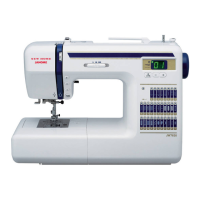
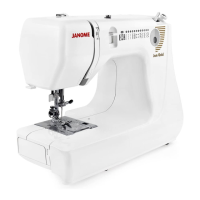
The JR 1218S appears to be a sewing machine, given the terminology used throughout the manual, such as "needle thread tension," "bobbin tension," "presser bar," "feed dog," "needle bar," "shuttle hook," "stitch patterns," "buttonhole," and "motor belt." The manual details how to adjust these components to ensure proper sewing functionality. It supports various stitch patterns, including zigzag and stretch stitches, and features a buttonhole function. The machine likely operates with a motor, as indicated by the "motor belt tension" section.
Important Technical Specifications
While specific model numbers for components are not provided, the manual outlines critical technical specifications related to adjustments:
- Upper Thread Tension: Standard range is 65-95g when pulling cotton thread #50 with the tension dial set at "3."
- Bobbin Thread Tension: Standard range is 45-55g when pulling cotton thread #50.
- Presser Bar Height: The distance between the presser foot and the needle plate should be 6.0 mm (0.24").
- Needle Swing: The needle swing should start 2-3 mm above the needle plate after the needle exits the right side of the needle hole during maximum zigzag width.
- Clearance Between Needle and Hook (Method 1): The clearance between the needle and shuttle race should be -0.05 to +0.10 mm. Additionally, the clearance between the needle and needle plate should be 0.15 mm or more.
- Clearance Between Needle and Hook (Method 2): Same clearance as Method 1 (-0.05 to +0.10 mm). The rotary play of the tip of the shuttle driver should be 0.3 mm or less.
- Feed Dog Height: When the feed dog is at its highest position, its height from the needle plate should be 0.75-0.90 mm.
- Needle Bar Height: When the tip of the shuttle hook meets the left side of the needle in its ascending travel, the distance between the top of the needle eye and the tip of the shuttle hook should be 2.9-3.5 mm.
- Needle Timing to Shuttle: When the tip of the shuttle hook meets the left side of the needle at the left needle position in ascending travel, the height of the needle point from its lowest point should be 1.45-1.95 mm.
- Buttonhole Length: Buttonholes should be approximately 3mm longer than the length set by the R foot.
- Cam Follower Clearance: The clearance between the zigzag cam and the cam follower should be about 0.3 mm.
- Motor Belt Deflection: The belt deflection should be 7-9 mm when pressing the middle of the motor belt with approximately 300 grams of pressure.
Usage Features
The manual focuses on the mechanical adjustments rather than direct user operation. However, it implicitly describes features such as:
- Pattern Selector Dial: Used to select various stitch patterns, including maximum zigzag width and specific patterns for clearance adjustments (e.g., "⊃", "D").
- Stitch Length Control: Used for adjusting stitch length, particularly for stretch stitches and buttonholes.
- Presser Foot Lifter: Used to raise the presser foot.
- Handwheel: Used to manually control needle movement and feed dog position during adjustments.
- Buttonhole Function: The machine is capable of sewing buttonholes, with specific adjustments for feed balance and length.
- Bartack Feed: The machine supports bartack stitching for buttonholes, with adjustments for forward and backward feeding.
Maintenance Features
The service manual is primarily a guide for maintenance and repair, detailing how to access and adjust various components:
- Service Access: Instructions are provided for removing the face cover, belt cover, base plate, front cover, and rear cover, which are essential steps for accessing internal components for maintenance.
- Thread Tension Adjustment: Procedures for adjusting both needle thread tension and bobbin tension to ensure optimal stitch quality.
- Presser Bar Adjustment: Instructions for setting the correct height and alignment of the presser bar and foot.
- Needle Swing and Drop Adjustment: Procedures to ensure the needle moves correctly and drops into the needle plate at the right position.
- Needle and Hook Clearance Adjustment: Two methods are provided for adjusting the critical clearance between the needle and the shuttle hook, which is vital for preventing skipped stitches and thread breakage.
- Feed Dog Height Adjustment: Steps to set the proper height of the feed dog for consistent fabric feeding.
- Needle Bar Height and Timing Adjustment: Instructions for setting the correct height of the needle bar and timing the needle's movement with the shuttle hook.
- Distorted Pattern Correction: A procedure to adjust stretch stitch patterns if they are distorted due to differences in forward and backward feeding.
- Buttonhole Feed Balance and Bartack Feed Adjustment: Specific adjustments to ensure even stitch density and correct feeding during buttonhole and bartack operations.
- Buttonhole Function Length Adjustment: A method to adjust the final length of the buttonhole.
- Cam Follower Disengagement Adjustment: Ensures the pattern selector dial operates smoothly and selects patterns correctly by adjusting the clearance of the cam follower.
- Motor Belt Tension Adjustment: Instructions for setting the correct tension of the motor belt to prevent noise, overload, or belt jumping.
- Wiring Diagram: A simple diagram showing the wiring for the machine socket unit, indicating connections for the motor and lamp, useful for electrical troubleshooting.
The manual emphasizes the importance of checking adjustments after each procedure and provides notes on potential issues (e.g., backlash, smooth rotation, hook timing) to ensure proper functioning of the machine.