Do you have a question about the Janome Memory Craft 10000 and is the answer not in the manual?
Details on how the manual is organized, including colored tabs and text coding for easy reference.
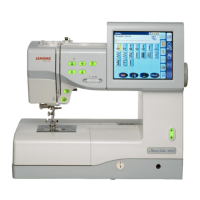
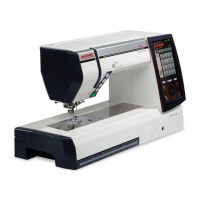
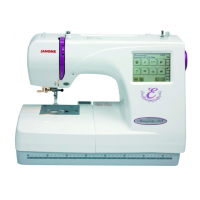
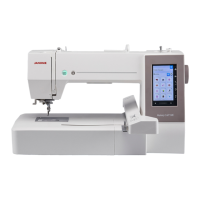
Identifies and labels all external components and parts of the sewing machine for user familiarization.
Describes how to attach/detach the extension table for free arm sewing operations.
Details the process of attaching the extension table for a flat-bed sewing surface.
Explains the function of the Start/Stop button for initiating and pausing sewing operations.
Describes how to use the Reverse button for backstitching and securing seams.
Details the Auto-Lock function for automatically securing stitches at the end of patterns.
How to control the needle position (up or down) for precise fabric placement.
Instructions for using the automatic needle threader to quickly thread the needle.
How to adjust the sewing speed using the dedicated control lever for optimal sewing.
Adjusting the sewing speed using the lever for user-defined preferences.
Varying sewing speed by the pressure applied to the foot pedal.
Procedure for safely removing the bobbin from the bobbin holder.
Correctly placing the spool of thread and spool holder for bobbin winding.
Using the additional spool pin for winding bobbins without unthreading the machine.
Guide on how to attach the knee lifter to the sewing machine.
Instructions for operating the knee lifter to control the presser foot.
Instructions for attaching the specific foot designed for sewing buttons.
Details on how to attach the Embroidery Foot P for special embroidery tasks.
Explains the function of keys used to select different sewing modes like Ordinary and Embroidery.
How to access the Ordinary Sewing Mode and its available stitch categories.
How to access the Embroidery Mode and its available design categories.
Function of the key for connecting the sewing machine to a personal computer.
How to open previously saved stitch patterns or embroidery designs.
Accessing and customizing machine settings for user preference.
Obtaining on-screen tips and information about machine functions.
Accessing and adjusting stitch width, length, and thread tension parameters.
Overview of keys for selecting stitches within the Ordinary Sewing Mode.
Accessing the window for 16 popular utility stitches.
Accessing options for buttonholes, button sewing, darning, and eyelets.
Accessing multi-page window for satin and decorative stitches.
Accessing multi-page window for decorative stitches.
Accessing the monogramming window with different fonts and styles.
Accessing a visual guide for 12 common sewing applications.
Using the zigzag stitch to overcast raw fabric edges to prevent raveling.
Attaching the zipper foot and sewing the left side of a zipper.
Attaching the zipper foot and sewing the right side of a zipper.
Steps for preparing fabric and sewing zippers, including basting and finishing.
Using the quilting bar with the zigzag foot for creating parallel rows of quilting.
Using the sensor buttonhole for automatic sizing based on the button.
Sewing square buttonholes with manual size setting and memorization.
Sewing buttonholes with rounded ends, suitable for fine fabrics.
Buttonholes for fine, delicate fabrics with rounded ends.
Sewing keyhole buttonholes, suitable for thicker buttons and heavier fabrics.
Sewing rounded keyhole buttonholes for thicker buttons on medium fabrics.
Sewing durable tailored buttonholes with reinforced bartacks and rounded ends.
Using buttonholes suitable for stretch fabrics, also as decorative elements.
Buttonholes for knit fabrics, usable as decorative stitches.
Creating buttonholes with a handmade, heirloom appearance.
Making welted (bound) buttonholes for suits and blazers, also on leather.
Guide on how to securely attach buttons with shanks using the machine.
How to adjust eyelet size using the manual adjusting screen and keys.
Details on the standard size embroidery hoop for PC card designs.
Details on the large size embroidery hoop for combined and large designs.
Accessing and selecting pre-loaded embroidery designs from the machine.
Using the monogramming feature to create personalized designs with various fonts.
Sewing designs from PC Design Cards inserted into the machine.
Using the optional card reader to access designs from memory cards.
Utilizing editing functions like resizing, rotating, and combining designs.
Aligning the hoop and needle with the fabric's center mark before sewing.
Starting and managing the embroidery sewing process.
Steps for correctly inserting a PC Design Card into the machine slot.
Procedure for safely removing a PC Design Card from the machine.
Starting the embroidery process after positioning the design and fabric.
Adjusting stretch stitch patterns that are compressed or drawn out.
Correcting distortions in stitch patterns for letters and numbers.
Adjusting stitch balance for auto buttonholes if rows are uneven.
Steps for reassembling the hook race components after cleaning.
| Type | Computerized Sewing and Embroidery Machine |
|---|---|
| Embroidery Designs | 100 |
| Maximum Stitch Width | 9 mm |
| Maximum Stitch Length | 5 mm |
| Display | LCD Touch Screen |
| USB Connectivity | Yes |
| Weight | 33 lbs |
| Dimensions | 20 × 12 × 14 inches |
| Embroidery Area | 6.7" x 7.9" (170mm x 200mm) |
| Embroidery Speed | 650 stitches per minute |
| Memory | Yes |
| Monogramming Fonts | 3 |
| Automatic Thread Cutter | Yes |
| Knee Lifter | Yes |