EasyManua.ls Logo

Jensen A600HLX - User Manual

Jensen A600HLX
15 pages
Print Icon
To Next Page IconTo Next Page
Loading...
®
40Hz
40Hz
0dB
0dB
12dB
12dB
40Hz
40Hz
400Hz
400Hz 400Hz
400Hz
8V
8V
.3V
.3V
REAR
LPF
FULL
HPF
BASS
FULL
HPF
LPF
FRONT
BASS
LEVEL
LEVEL
R-CHX
L-CHX
R-CHX
L-CHX
2CH
4CH
3CH
POWER
PROTECT
channel bridgeable
400
MOSFET Power Supply
4
3
5
60
125
60
125
2
4
3
5
60
125
60
125
2
4
MODE
Amplifier Installation and Operation
Installation Assistance
1.800.323.0221
Introduction
Thank you for purchasing a Jensen amplifier. The HLX series
amplifiers offer extreme value and performance. Proper
installation is essential for optimal performance and long-term
reliability. Please read through this manual first to familiarize
yourself with your amplifier and its functions.
Warranty Service
If your Jensen amplifier should ever require service, you will
need to have the original dated receipt. If you ever need to
return the unit for any reason, always include the receipt with the
product.
A400HLX
A600HLX
REC002_A4n600HLX_E 1/9/02, 4:13 PM1

Questions and Answers

  • W
    wilsonbrianAug 4, 2025
    Why Jensen A600HLX Car Amplifier not turning on?
    • A
      Alicia RaymondAug 4, 2025
      If your Jensen Car Amplifier isn't turning on, it could be due to several reasons: * There's no power to the +12V terminal. In this case, you should repair the wire or connections. * There's no power to the remote wire when the radio is on. Check the connections to the radio with a test light. * The fuse is blown. You should check the fuse and replace it if necessary.
  • L
    Lisa BartonAug 7, 2025
    What to do if the protect light comes on and my Jensen Car Amplifier shuts down?
    • P
      Pamela HarrisAug 7, 2025
      If the protect light is on and your Jensen Car Amplifier shuts down, here's what you can check: 1. The amplifier might be in thermal protection. Let it cool down before trying to turn it back on. Consider adding a fan to keep it cool, especially if you're using subwoofers. 2. There might be a faulty speaker connection or crossover. Inspect the speakers and crossovers for loose or bad connections. 3. The battery voltage might be low. Ensure you're getting between 10.8-15.6 volts to the amplifier, measured with a digital multimeter at the amplifier. 4. The speaker impedance might be less than 2 ohms per channel. If using 4 ohm speakers, ensure no more than two are wired in parallel per channel. The amplifier won't operate into 2 ohms bridged.
  • C
    Collin BaileyAug 12, 2025
    How to eliminate engine noise in Jensen A600HLX?
    • A
      Angela GarciaAug 12, 2025
      To eliminate engine noise (ignition noise/static or alternator whine) in your Jensen Car Amplifier, try these solutions: * Reroute the RCA cables away from the main power wires. * Reroute RCA cable. * Ensure the amplifier is grounded to a clean, solid part of the chassis/frame.
  • L
    Latoya BrewerAug 16, 2025
    Why does my Jensen A600HLX Car Amplifier keep blowing fuses?
    • J
      James BurnettAug 16, 2025
      If your Jensen Car Amplifier keeps blowing fuses, it could be due to: * Power wires hooked up incorrectly, so check the power wire connections. * Speakers that are blown or defective, so check the speakers.
  • R
    ronaldrossAug 20, 2025
    What to do if sound coming from only one speaker with Jensen A600HLX?
    • R
      Russell HudsonAug 21, 2025
      If you're only getting sound from one speaker with your Jensen Car Amplifier, consider the following: * The speaker may be defective, replace the speaker. * There may be poor connections to the speaker wire, check the connections. * The RCA input cable may be defective, replace the cable. * The input level control may be adjusted too high, adjust the input level control.
  • V
    Valerie JohnsonAug 25, 2025
    Why is my Jensen Car Amplifier's radio volume too sensitive?
    • K
      Kathleen BaileyAug 26, 2025
      If your Jensen Car Amplifier's radio volume is too sensitive, it's likely because the input level control is adjusted too high. Adjust the input level control to a lower setting.
  • E
    Elizabeth VasquezAug 29, 2025
    Why does the radio volume need to be turned up too high for my Jensen Car Amplifier to work?
    • J
      John WilsonAug 29, 2025
      If the radio volume needs to be turned up too high for your Jensen Car Amplifier to work, it's likely that the input level control is adjusted too low. Adjust the input level control to resolve this.

Summary

Amplifier Installation Guide

Preparation and Safety

Essential pre-installation steps including battery disconnection and tool gathering.

Mounting and Wiring

Guidance on amplifier placement, secure mounting, and proper wire routing.

Amplifier Wiring Procedures

Power and Ground Connections

Detailed instructions for connecting the +12V power, ground, and fuses.

Remote Turn-On Lead

Connecting the remote terminal (REM) for amplifier activation.

Audio Input and Output Setup

Connecting Audio Sources

How to connect low-level (RCA) and high-level inputs from the head unit.

RCA Output for System Expansion

Utilizing RCA outputs to link multiple amplifiers for expanded audio systems.

Speaker Configuration Options

Speaker Wiring Layouts

Diagrams and instructions for various speaker setups including stereo and bridged configurations.

Tri-Mode Operation Setup

Guide to tri-mode operation, including passive crossover requirements and impedance matching.

Controls and Indicators Overview

Crossover Frequency Adjustment

How to set the high-pass and low-pass crossover filters for desired sound frequencies.

Amplifier Status Lights

Understanding the meaning of the Power and Protect LED indicators.

Amplifier Input Mode Selection

Configuring Input Channels

Setting the amplifier for 4-channel, 3-channel, or 2-channel (bridged) input modes.

Final Testing and Calibration

Level and Bass Control Adjustment

Calibrating input level and bass boost for optimal audio performance.

Post-Installation Checks

Performing critical tests on power, speakers, and reconnecting the battery.

Troubleshooting Common Issues

Problem Diagnosis and Solutions

A comprehensive guide to identifying and resolving common amplifier operational problems.

Technical Specifications

Amplifier Performance Details

Key performance metrics, power outputs, and dimensions for the A400HLX/A600HLX.

Warranty and Service Information

Limited One-Year Warranty

Details on warranty coverage, exclusions, and how to obtain service in USA and Canada.

Overview

This document is an installation and operation manual for the Jensen A400HLX and A600HLX 4-channel amplifiers. It provides detailed instructions for installation, wiring, and troubleshooting, along with technical specifications and warranty information.

Function Description

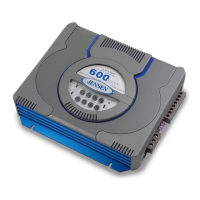
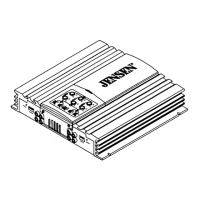
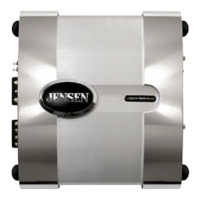
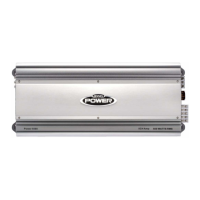
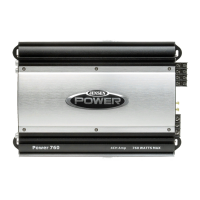
The Jensen A400HLX and A600HLX are 4-channel car audio amplifiers designed to enhance the sound system in a vehicle. They feature a compact design, allowing for flexible mounting options such as under a seat or in the trunk. These amplifiers are equipped with a PWM (Pulse Width Modulation) MOSFET power supply and discrete amplifier design with complementary high-current Bi-polar output stages, ensuring efficient power delivery and high-quality audio.

The amplifiers offer versatile input options, including traditional low-level RCA inputs and high-level inputs, making them compatible with a wide range of head units, even those without dedicated RCA outputs. They also include pre-amp outputs for connecting additional amplifiers, providing flexibility for system expansion.

Key controls are conveniently top-mounted for easy access and adjustment. These include continuously variable high-pass/low-pass crossovers with a frequency range of 40Hz to 400Hz, allowing users to tailor the audio output to specific speaker types (full-range, woofers, or subwoofers). A crossover mode selector switch further enhances this flexibility. Additionally, the amplifiers feature a continuously variable bass boost centered at 45Hz, providing up to 12dB of bass enhancement, and an input level control to match the amplifier's input sensitivity with the head unit's output. The A600HLX model also includes a remote level control, which can be mounted under-dash or in-dash, allowing for convenient adjustment of rear speaker levels or bass levels when driving subwoofers.

The amplifiers are designed with protection circuitry, including thermal, short circuit, and low impedance protection, indicated by a dual-status LED diagnostic indicator (green for power, red for protection mode). This ensures the longevity and reliability of the amplifier and connected speakers.

Important Technical Specifications

A400HLX/A600HLX 4-Channel Amplifiers (Common Specifications):

  • Frequency Response: 20 Hz-20 kHz ± 0.5 dB
  • Signal to Noise Ratio @ Rated Power: >100 dB
  • Channel Separation @ Ref. Power: >65 dB, 1 kHz
  • THD & IMD @ Ref. Power into 2 ohms: <0.8%
  • Speaker Impedance: 2-8 ohms
  • Input Impedance: 47 k ohms
  • Bass Boost Center Frequency: 45Hz
  • Crossover: 12 dB/octave, Butterworth
  • Power Requirement: 14.4 VDC (10.8-15.6 VDC allowable)

A400HLX Specific Power Output @ 14.4 VDC, 20-20 kHz:

  • (4 ohms): 50 Watts per channel RMS, < 0.5% THD
  • (2 ohms): 75 Watts per channel RMS, < 0.8% THD
  • (4 ohms) bridged: 150 Watts per channel RMS, < 0.8% THD
  • Dimensions: 3" x 11.125" x 10" (76mm x 283mm x 254mm)

A600HLX Specific Power Output @ 14.4 VDC, 20-20 kHz:

  • (4 ohms): Front: 50 Watts per channel RMS, < 0.5% THD; Rear: 100 Watts per channel RMS, < 0.5% THD
  • (2 ohms): Front: 75 Watts per channel RMS, < 0.8% THD; Rear: 150 Watts per channel RMS, < 0.8% THD
  • (4 ohms) bridged: Front: 150 Watts per channel RMS, < 0.8% THD; Rear: 300 Watts per channel RMS, < 0.8% THD
  • Dimensions: 3" x 11.125" x 13" (76mm x 283mm x 330mm)

Usage Features

  • Installation Flexibility: The compact design allows mounting under a seat or in the trunk. Proper air circulation around the amplifier is crucial to prevent overheating.
  • Wiring Options: The manual provides detailed diagrams for power, ground, and remote turn-on connections, emphasizing the use of appropriate wire gauges (8 gauge minimum for power, 18 gauge for remote). It also illustrates various speaker wiring configurations:
    • 4 Speakers: Standard 4-channel operation.
    • 2 Speakers + Bridged Subwoofer: Combines stereo speakers with a bridged subwoofer.
    • 2 Subwoofers/Bridged Mono (A400HLX): For driving two subwoofers in bridged mono mode.
    • Tri-mode (A400HLX): Allows driving a pair of front speakers and subwoofer(s) from a single amplifier, requiring passive crossovers (not included) to prevent damage.
  • Input Modes: The amplifiers can be configured for three different input modes:
    • 4 Channel: Standard 4-channel operation with all RCA inputs connected.
    • 3 Channel: Stereo/mono operation, with front channels in stereo and rear channels internally bridged for mono.
    • 2 Channel (A400HLX): Bridged stereo operation, requiring a two-channel input.
  • Controls:
    • Crossover (X-OVER): Selectable between HPF (High Pass Filter) for full-range/separate speakers, LPF (Low Pass Filter) for woofers/subwoofers, or FULL (full range, crossover inactive).
    • Level Control: Matches the amplifier's input sensitivity to the head unit's output, adjustable to prevent distortion.
    • Bass Boost: Increases bass volume at 45Hz by up to 12dB, to be used carefully.
    • Remote Level Control (A600HLX): Allows remote adjustment of rear speaker or bass levels.
  • Diagnostic Indicator: A dual-status LED (green for power, red for protection) provides immediate feedback on the amplifier's operational status.

Maintenance Features

  • Troubleshooting Guide: The manual includes a comprehensive troubleshooting table to diagnose common issues such as no power, distorted sound, blown fuses, engine noise, or protection circuit activation. It offers corrective actions for each problem, including checking wiring, fuses, input levels, and speaker connections.
  • Fuse Replacement: Emphasizes the use of only blade-type fuses with specified amperage (A400HLX: 2 x 25 AMP; A600HLX: 2 x 35 AMP).
  • Ground Connection: Stresses the importance of a clean, unpainted metal surface for the ground connection to ensure good electrical contact and prevent ground loops.
  • Battery Disconnection: Advises disconnecting the battery negative terminal before starting any installation work for safety.
  • Warranty Service: Provides information on warranty length (one year), persons protected (original owner with proof of purchase), what is covered (defects in material and workmanship), and how to obtain service (contact Jensen customer service or an authorized repair station). It also outlines what is not covered (damage from accident, misuse, improper installation, etc.) and clarifies payment responsibilities for labor and shipping.

Jensen A600HLX Specifications

General IconGeneral
BrandJensen
ModelA600HLX
CategoryCar Amplifier
LanguageEnglish

Related product manuals