12
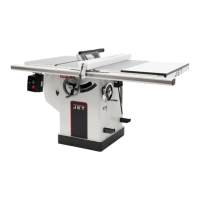
Mounting Rails & Extension Table
With the extension wings properly aligned, the
rail and fence assembly can now be mounted to
the saw. Refer to the XACTA
Fence II
Commercial 30/50 Owner's Manual (Part No.
M-708950Z) for mounting instructions for the
rails, fence and optional wooden extension
table.
Switch Installation
Referring to Figure 9:
Hardware: Switch Brace
Tools: 8mm hex wrench, 8mm wrench
1. Remove the hex nut from the flat head
screw that secures the left extension table to
the front rail (B).
2. Place switch assembly bracket (A) behind
the front rail (B) and just inside the front
edge of the left extension wing.
3. Replace the hex nut, securing the front rail,
extension table and switch assembly. Hand-
tighten only at this time.
4. Loosen the hex cap screw (C) and slide the
open tab of the switch brace (E) onto the
screw (C) and washer (D). Hand-tighten only
at this time.
5. Remove the nut and star washer (F) from
the screw at the bottom of the switch plate
on the back of the switch assembly.
6. Fasten the switch brace to the switch
bracket assembly with the star washer and
nut.
7. Align the switch and tighten all hardware.
Figure 9
Electrical Connections
A qualified electrician must
complete all electrical connections! Failure
to comply may result in serious injury!
The machine must be
properly grounded while in use to protect the
operator from electric shock! Failure to
comply may result in serious injury!
If a plug is provided with your machine, do not
modify the plug. If it will not fit your electrical
receptacle, have a qualified electrician install the
proper connections to meet all electrical codes.
XACTA
Saw Deluxe table saws with stock
numbers 708674 and 708676 are rated at 230V
only. Saws with stock number 708680 are rated
at 230/460V, and come from the factory
prewired 230V.
To switch from 230V to 460V (machines with
stock number 708680 only):
1. Disconnect the machine from the power
source, (unplug).
2. Open the saw cabinet door.
3. Remove the cover from the motor junction
box.
4. Change wires following the diagram on the
inside of the cover.
5. Replace the cover and close the cabinet
door.
6. Replace the magnetic on-off switch with part
#JTAS10-23B (available through your
authorized JET distributor or by calling JET
at the number on the cover).
Confirm power at the site is the same as the saw
before making any electrical connections.
Review the electrical schematics on page 27-27.
The on and off switch is thermally protected. If
the saw motor is overloaded, or a momentary
interruption of electrical current is sensed, the
saw will shut off. Allow a few minutes for the
saw to cool down and reset by pushing the off
button.
Using extension cords can cause a loss in
power to your machine. It is best if the saw is
plugged directly into an outlet on a dedicated
circuit.
 Loading...