www.jetsonbike.com 18
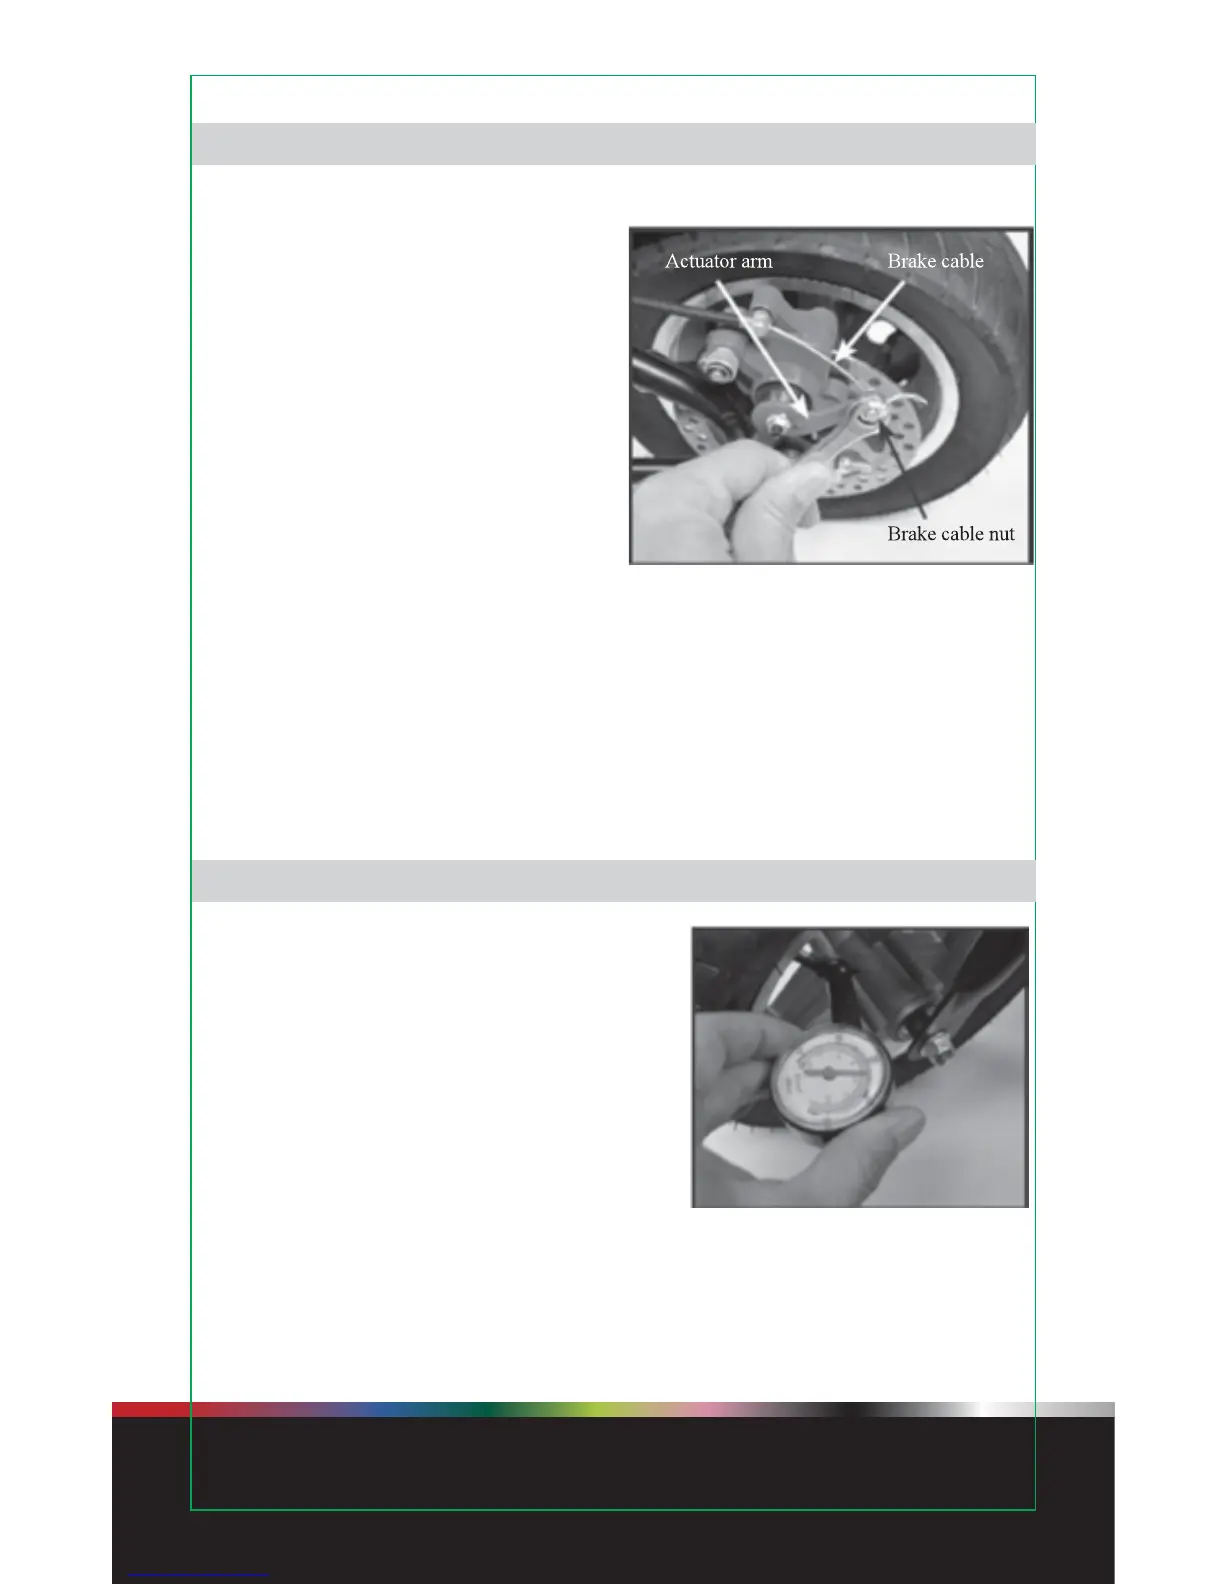
OPTION 2: Adjust using the actuator arm on the brake caliper.
If you are not able to get enough adjust-
ment using the barrel adjuster, you may
need to adjust the brake using the actuator
arm on the rear caliper.
1. Adjust the barrel adjuster on the brake
lever all the way in, and tighten the set ring.
2. Locate the rear brake actuator arm
where the brake cable is connected to the
rear brake caliper.
3. Using a 10mm wrench, loosen the brake
cable nut that secures the cable to the
actuator arm so that the cable can slide
freely through the bolt.
4. Slide the actuator arm forward until it stops,
then back it off about a half of an inch, making sure the cable slides freely through the
bolt.
5. Holding the actuator arm in position, carefully re-tighten the cable bolt until it is
snug.
6. Check the brakes and make sure they work properly.
NOTE: Be sure the brake is not TOO TIGHT, which will impede performance
and cause excessive wear on the brake.
It is very important to check the tire pressure
before every ride. Running on low tire pressure
can create a dangerous situation as the bike will
not handle properly and could cause the rider to
lose control.
To check the tire pressure, locate the air stems
inside the rims on each wheel and remove the
black plastic cap. Using a tire gauge, check to
make sure that there is at least 20, and no more
than 36 lbs of pressure in each tire.
ADJUSTING THE BRAKE (CONTINUED)
CHECK THE TIRE PRESSURE
MAINTAINING YOUR JETSON JR.