EasyManua.ls Logo

JL Audio JD 400/4 User Manual

JL Audio JD 400/4
20 pages
To Next Page IconTo Next Page
Page #1 background imageLoading...
Page #1 background image
OWNER’S MANUAL
400W 4-Channel Class D Amplifier
Thank you for purchasing a JL Audio amplifier for
your automotive sound system.
Your amplifier has been designed and manufactured to exacting
standards in order to ensure years of musical enjoyment in your vehicle.
For maximum performance, we highly recommend that you have
your new amplifier installed by an authorized JL Audio dealer. Your
authorized dealer has the training, expertise and installation equipment
to ensure optimum performance from this product. Should you
decide to install the amplifier yourself, please take the time
to read this manual thoroughly so as to familiarize yourself
with its installation requirements and setup procedures.
If you have any questions regarding the instructions in this
manual or any aspect of your amplifier’s operation, please contact your
authorized JL Audio dealer for assistance. If you need further assistance,
please contact the JL Audio Technical Support Department
at technical@jlaudio.com/support.
Question and Answer IconNeed help?

Do you have a question about the JL Audio JD 400/4 and is the answer not in the manual?

JL Audio JD 400/4 Specifications

General IconGeneral
Channels4
Frequency Response10 Hz - 22 kHz
Dimensions12.75 x 9.5 x 2.25 in
THD+N< 0.05%
Damping Factor> 100
Input Sensitivity200 mV - 4 V
Power Output (4 Ohm)75W x 4
Power Output (2 Ohm)100W x 4
Bridged Power (4 Ohm)200W x 2
CrossoverVariable
Fuse Rating30 A (ATC / Blade-type)

Summary

Serial Number

Installation Applications

Planning Your Installation

Key considerations before proceeding with the amplifier installation process.

Safety Considerations

Essential safety precautions to ensure a secure and proper amplifier installation.

What Is Included

Lists the items provided in the JD400/4 amplifier package.

Product Description

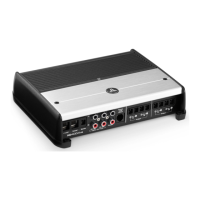
Overview of the JD400/4 amplifier's features and technology.

Typical Installation Sequence

Power Connections

Instructions for connecting the power supply wires to the amplifier.

Turn-On Options

+12V Remote Turn-On

Describes using a +12V remote turn-on signal to control amplifier power.

DC Offset-Sensing

Details automatic turn-on/off via detecting a DC signal on the audio input.

Signal-Sensing

Explains automatic turn-on/off by detecting an audio signal.

Input Section

Input Voltage Range

Explains selecting the correct input sensitivity range for signal sources.

Input Sensitivity Controls

Filter Controls

Preouts

Speaker Outputs

Bridging Considerations

Status LEDs / Protection Circuitry

System Configurations

Bi-Amplified Systems

Setting up the amplifier for bi-amplified audio systems.

Crossover Setup for Bi-Amplified System

Configuring crossover settings for bi-amplified system setups.

Multi-Amplifier Systems

Servicing Your Amplifier

Instructions and advice for obtaining service for the amplifier.

Appendix A: Input Sensitivity Level Setting

Appendix B: JD400/4 Specifications

Appendix C: Troubleshooting

Limited Warranty - Amplifiers (USA)

Related product manuals