12 JLA Limited 113538-7
Installation Procedures _______________
Installation should be performed by competent professional
in accordance with local, state, and country codes. In the
absence of these codes, the installation must conform to
applicable American National Standards: ANSI Z223.1-
LATEST EDITION (National Fuel Gas Code) or ANSI/NFPA
NO. 70-LATEST EDITION (National Electrical Code).
Location Requirements _______________
Before installing the dryer, be sure the location conforms to
local, state, and country codes. In the absence of such codes
or ordinances the location must conform with the National Fuel
Gas Code ANSI.Z223.1 LATEST EDITION.
The dryer must be installed on a sound level floor capable of
supporting its weight. Carpeting must be removed from the
floor area that the dryer is to rest on.
The dryer must not be installed or stored in an area where it
will be exposed to water and/or weather.
Provisions for adequate air supply must be provided as noted
in this manual (refer to Fresh Air Supply Requirements
section).
Clearance provisions must be made from combustible
construction as noted in this manual (refer to Dryer Enclosure
Requirements section).
Provisions must be made for adequate clearances for servicing
and for operation as noted in this manual (refer to Dryer
Enclosure Requirements section).
The dryer must be installed with a proper exhaust duct
connection to the outside as noted in this manual (refer to
Exhaust Requirements section).
The dryer must be located in an area where correct exhaust
venting can be achieved as noted in this manual (refer to
Exhaust Requirements section).
IMPORTANT: The dryer should be located where a
minimum amount of exhaust ducting will be necessary.
The dryer must be installed with adequate clearance for air
openings into the combustion chamber.
CAUTION: This dryer produces combustible lint and
must be exhausted to the outdoors. Every 6 months,
inspect the exhaust ducting and remove any lint
buildup.
IMPORTANT: The dryer must be installed in a location/
environment, which the ambient temperature remains
between 40° F (4.44° C) and 130° F (54.44° C).
Unpacking / Setting Up ________________
Remove protective shipping material (i.e., plastic wrap and
optional shipping box) from the dryer.
IMPORTANT: Dryer must be transported and handled in an
upright position at all times.
The dryer can be moved to its final location while still attached
to the skid or with the skid removed. To remove the skid from
the SD35, SD50, or SD80, locate and remove the 2 bolts
securing the base of the dryer to the wooden skid. One is
located at the center rear and the other is at the center front
and is accessed by opening the lint door.
With the skid removed, use caution and assure all four leveling
legs are fully retracted if the dryer is to be slid into its final
position.
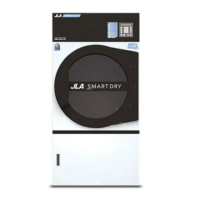
Leveling Dryer
The dryer is equipped with four leveling legs, one at each
corner of the base. For optimum performance the dryer should
be level front-to-back and side-to-side.
Reversing the Main Loading
and Lint Door Hinge Side
The dryer is shipped with the main and lint door hinges on the
right-hand side as standard. The swing of the doors is field
reversible. If required, the front panel can reversed so that
the doors hinge on the left-hand side.
Procedure for reversing the Front Panel:
1. Disconnect the power to the dryer.
2. Remove the main loading door from the front panel by
removing the top hinge block. A 3/16” Allen wrench is
required. Support the door while removing the top hinge
block so that it does not fall. Now lift the door off the
bottom hinge.
3. Remove the bottom hinge block. Remove the plastic
washer from the bottom hinge block and place it in the
same location on the top hinge block.
4. Remove the lint door from the dryer. Open the lint door
and remove the four screws retaining the lint door hinges.
5. Remove the three screws retaining the front panel at the
bottom. Swing the bottom of the front panel away from
the dryer about three inches. Reach behind the front
panel and disconnect the door switch plug located in the
lower right corner.
6. Open the control door and remove the four screws
retaining the front panel at the top. Be careful that the
front panel does not fall when the last screw is removed.
7. Remove the front panel from the machine and place it
face down on a flat surface.
8. There is a trim piece at the bottom of the front panel.
Remove the four screws retaining the trim piece.
Reposition the trim piece on the top of the panel and install
the retaining screws.
9. Back on the dryer there is a second plug for the door
switch, located inside the upper left corner of the dryer.
This plug is similar to the one in the power right
disconnected earlier, except there is a jumper on this plug.
Remove the jumper and install it on the plug in the lower
right.
10. Reinstall the front panel on the dryer with the trim piece
on the bottom. Check that the mounts for the door hinge
are on the left-hand side. Be sure to connect the door
switch plug now in the upper left corner of the dryer.
11. Reinstall the retaining screws, top and bottom.
12. Reinstall the lint door with the hinges on the left-hand
side.