8 - Easy Stitch
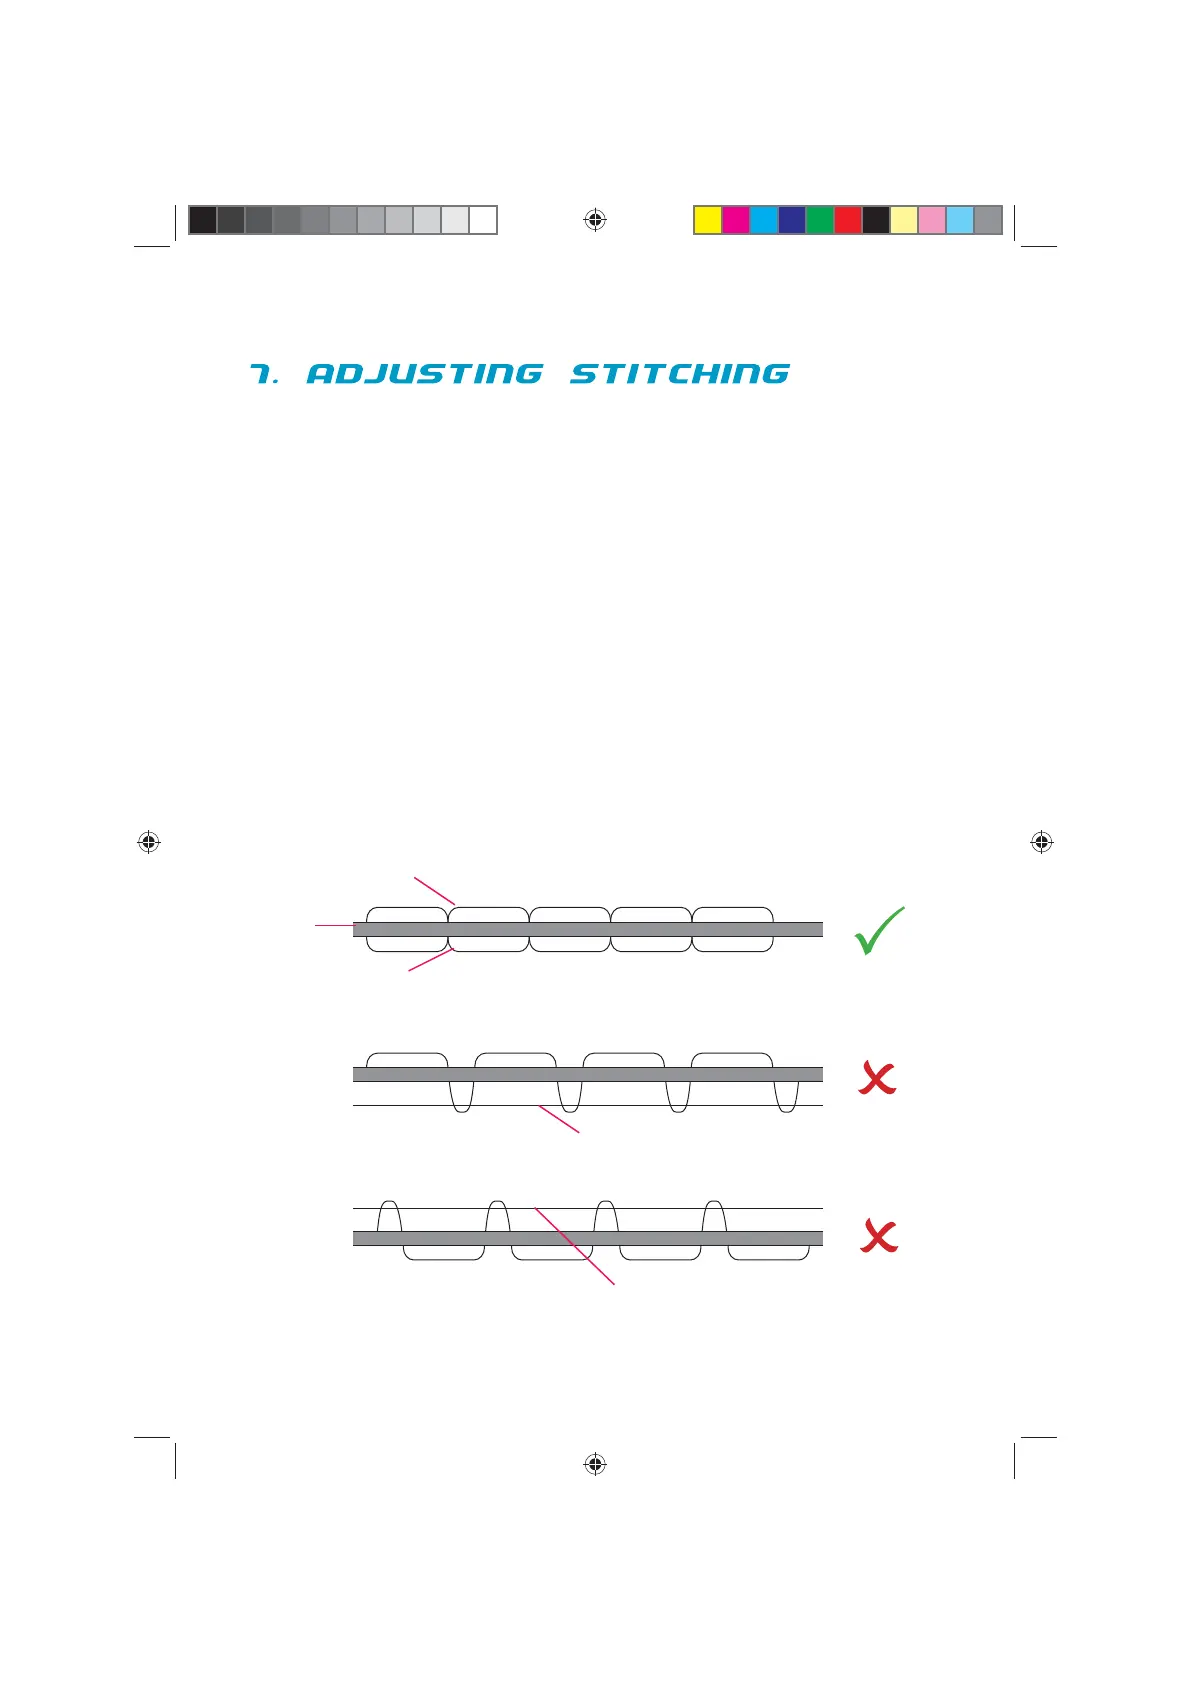
As shown in the diagram below, normal stitching has top and bottom
threading.
If the bottom threading looks like a straight line, this indicates the top
thread is too loose. Please turn the thread clamp clockwise to increase
pressure until the stitching returns to normal.
However, when the top thread looks like a straight line indicating an over-
tight top thread, slowly turn the thread clamp anti clockwise to reduce
pressure until the stitching is back to normal.
Please Note: When adjusting the stitching, check whether
the top thread has come out. If so, replace back into position.
TOP THREAD
BOTTOM THREAD
CLOTH
BOTTOM THREAD OVER - TIGHT
TOP THREAD OVER - TIGHT
ES_Inst.indd 8
14/11/07 09:12:12