6
User guide
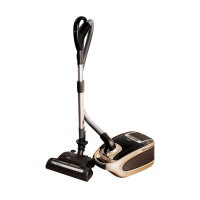
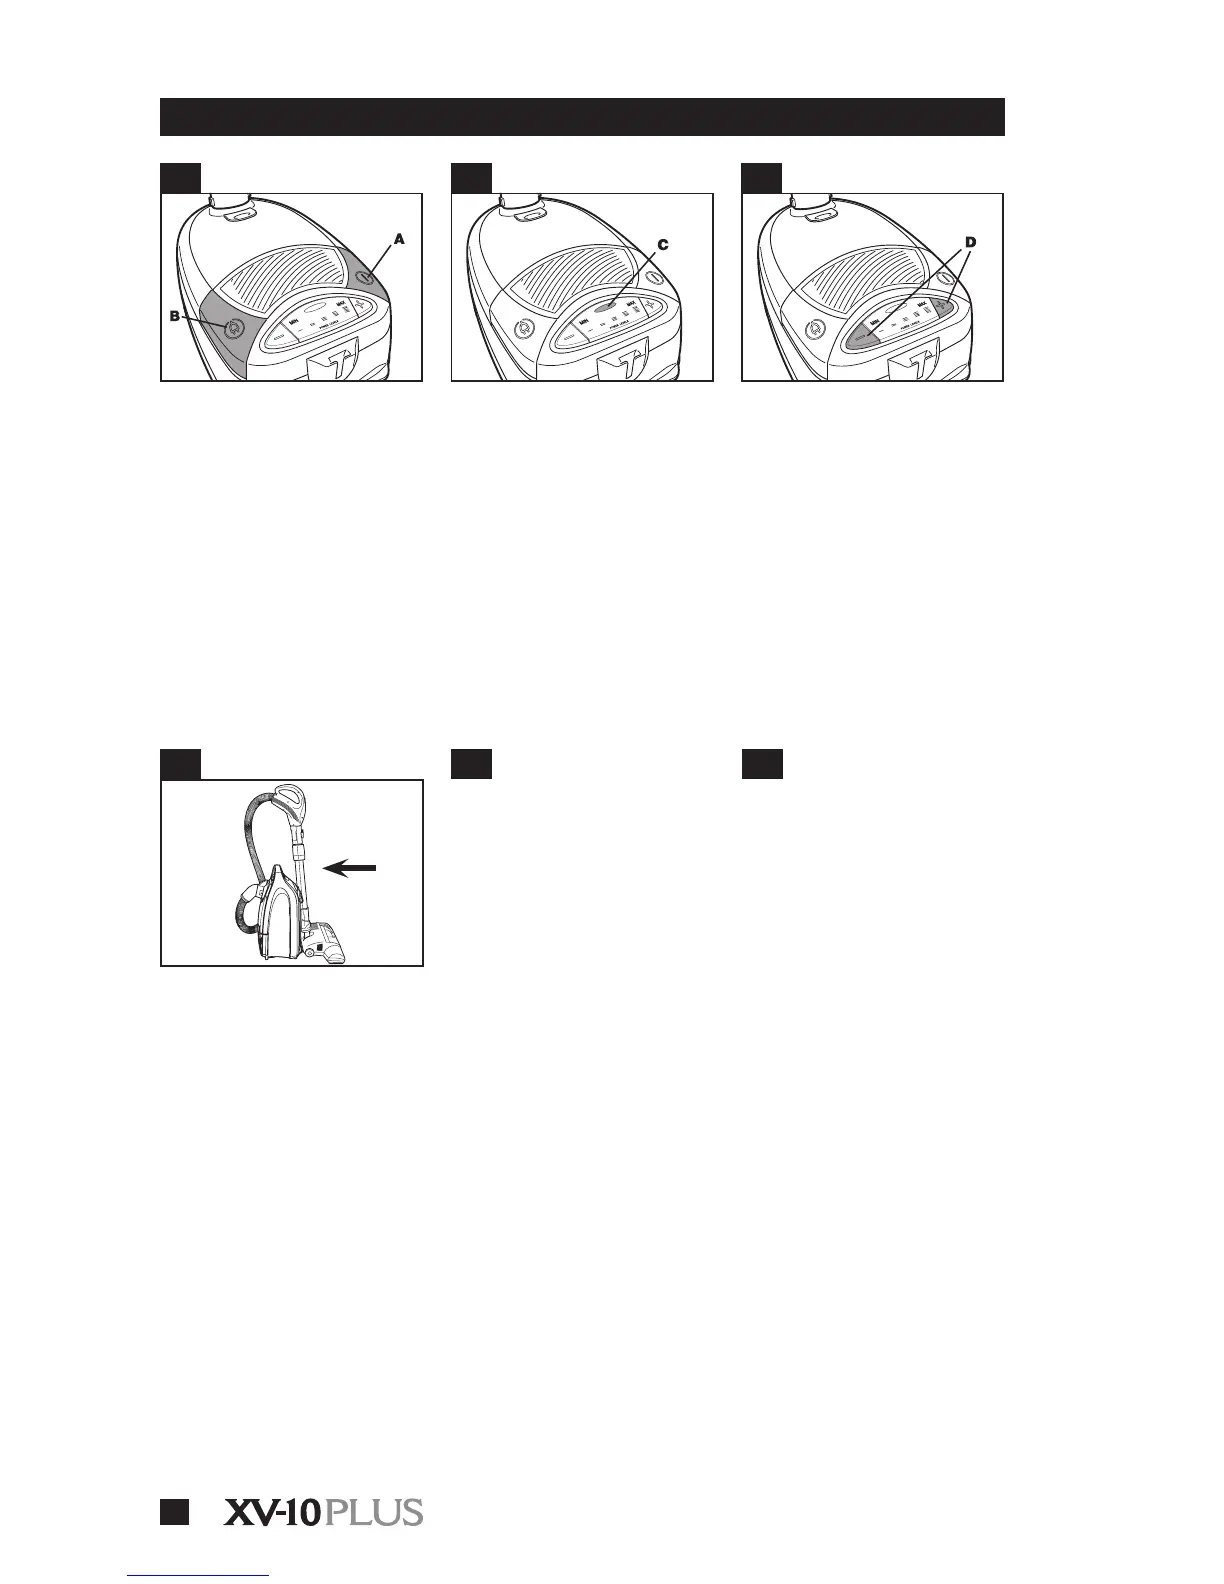
ON/OFF switch
• After assembling vacuum, plug the
cord into an electrical outlet. Turn the
vacuum ON by pressing the ON/OFF
pedal ( A ). To turn vacuum OFF press
the pedal again.
Note : The Cord Winder Pedal ( B )
is on the other side.
Variable suction
control
• The variable suction control ( D ) is
located on the top rear of the canister.
• Push the ( – ) button to reduce suc-
tion and to clean lightly soiled areas
or delicate fabrics. Push the ( + ) but-
ton for maximum cleaning power in
heavily soiled areas.
Polarized plug
• To reduce the risk of electric shock,
this appliance has a polarized plug
( one blade is wider than the other ).
This plug will t in a polarized outlet
only one way. If the plug does not t
fully in the outlet, reverse the plug. If
it still does not t, contact a qualied
electrician to install the proper outlet.
• DO NOT CHANGE THE PLUG IN ANY
WAY.
Wand storage clip
• To save storage space, stand the
cleaner on end and hook wand stor-
age clip on botlom ot cleaner. The
nozzle must be positioned down as
show.
• Lift up on wand to remove storage
clip from cleaner.
Check bag indicator
• When the indicator light comes on
( C ), open the canister and check
the lter bag. See page 8 for details
and instructions on how to replace a
lter bag.
4.1
4.4
4.3
4.6
4.2
4.5
IMPORTANT :
4- OPERATION
Thermal protector
• An internal thermal protector has
been used in your cleaner to prevent
overheat ing if a large item or clog
gets caught in the nozzle or at the
opening of the bag.
• When the blockage is not
removed, the thermal protector will
trip and cleaner will stop run ning.
• If this happens, turn cleaner OFF
and disconnect cleaner from elec-
trical outlet. Then disconnect noz-
zle and remove obstruction. Within
30 minutes the thermal protector
will cool and auto matically reset
and cleaning may resume.
• If cleaner does not operate, allow
addi tional time for thermal protec-
tor to reset.
Note : The canister must remain
unplugged during the 30 minute
cooling period.