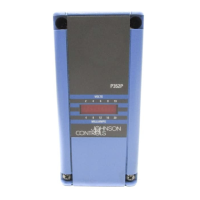
P470 Electronic Pressure Control with Display Product/Technical Bulletin 7
Changing Setpoint Values and Anti-short
Cycle Delay Time-Interval
Follow these steps to change the P470 control setpoint
values and anti-short cycle delay time-interval:
1. Press the Menu button once and the display
changes to a flashing ci1 (Cut-in Setpoint 1).
• If you want to change Cut-in Setpoint 1,
proceed to Step 3.
• If you want to change another setpoint value or
the anti-short cycle delay time-interval,
proceed to Step 2.
Note: After 30 seconds of inactivity, the control
reverts to the operating pressure display.
2. Press the Up button once to go to Cutout Setpoint
1 (co1). Press the Up button again to go to
Cut-in Setpoint 2 (ci2), and again to go to Cutout
Setpoint 2 (co2), and once more to go to anti-
short cycle delay (ASd).
• You may press the Up button again to go back
to Cut-in Setpoint 1, or press the Down button
(repeatedly) to scroll through the parameters in
reverse order.
3. Once the parameter you want to change is flashing
on the display, press the Menu button once. The
current pressure setpoint value (or delay time-
interval) is displayed.
4. Press the Up or Down button to change the
setpoint value (or time-interval).
5. Press the Menu button to save the new value. The
display then returns to the operating pressure
display.
Note: If the Menu button is not pressed within
30 seconds after changing a setpoint or time-
interval value, the control reverts to the previously
programmed setpoint or time interval value.
Table 2: Specified Transducer Models, Required Jumper Positions with the Resulting Operating Pressure
Ranges, and Factory Settings at Startup
Transducer
Model
Number
1
Pressure
Connection
Fitting
Required
P6 Jumper
Positions
Control’s
Operating
Pressure
Range
Factory
Set
Cut-in
2
(in psi)
Factory
Set
Cutout
2
(in psi)
Minimum
Setpoint
Differential
Factory Set
Setpoint
Differential
P499RAP-101C
P499RAP-101K
1/8 in. NPT Male JMP1 Removed
JMP2 Removed
0–100 psi S1-40
S2-45
S1-20
S2-25
5 psi 20 psi
P499RCP-101C
P499RCP-101K
1/4 in. SAE Female
(Schrader® Fitting)
P499RAP-105C
P499RAP-105K
1/8 in. NPT Male JMP1 Installed
JMP2 Removed
0–500 psi S1-250
S2-220
S1-190
S2-160
20 psi 60 psi
P499RCP-105C
P499RCP-105K
1/4 in. SAE Female
(Schrader Fitting)
P499RAP-107C
P499RAP-107K
1/8 in. NPT Male JMP1 Removed
JMP2 Installed
50–750 psi S1-250
S2-220
S1-190
S2-160
20 psi 60 psi
P499RCP-107C
P499RCP-107K
1/4 in. SAE Female
(Schrader Fitting)
1. C suffix is transducer (only). K suffix is transducer with 2 meter long wiring harness.
2. S1 = Primary Setpoint Value and S2 = Secondary Setpoint Value.