TEC3000 Series On/Off or Floating Fan Coil and Zoning Thermostat Controllers with Dehumidification
Capability Installation Instructions
15
9. Enter the BACnet instance ID through the keypad.
10. Press Save.
11. Press to return to the previous screen.
12. Press BACnet Address.
13. Enter the BACnet address through the keypad.
14. Press Save.
15. After selecting N2 in Step 5, press Save.
16. Press to return to the previous screen.
17. Press N2 Address.
18. Enter the N2 address through the keypad.
19. Press Save.
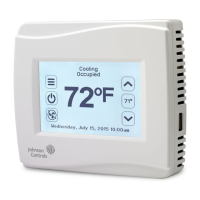
Configuring the Thermostat Controller
Use the Menu icon on the home screen to access and
change the basic operating parameters of the
thermostat controller. During normal operation, press
the Menu icon once to access the following
parameters:
• Faults Status
• Setpoints
• Schedule
• Display Settings
• Control Setup
• Network Setup
• Equipment Setup
• System Status
• Control Status
• Controller Information
• Commissioning
• Update
Installer Configuration Menu
The thermostat controller comes from the factory with
default settings for all configuration parameters. The UI
menu navigation and default settings are shown in
Table 6. Before any outputs turn on, the controller must
be configured for the equipment connected to it. You
need to start from the home screen to perform any of
the following tasks.
Screen Reset
The current screen returns to the home screen if the
current screen is not touched for 3 minutes.
Selecting the Unit Type
By default, the thermostat controller is configured for
4-pipe fan coil mode. To change to a 2-pipe or
Pressure-Dependent VAV mode:
1. Press the Menu icon.
2. Press Equipment Setup.
3. Press General.
4. Press Unit Type and select 2-pipe, 4-pipe, or VAV.
5. Press to save and to return to the
previous screen.
Note: Selecting VAV reboots the controller in order to
apply the change.
Selecting the Heating and Cooling Device
Type
By default, the thermostat is configured for On-Off (2-
position) control. This can be changed to Floating
(Incremental) mode when the Unit Type is not set to
VAV. For VAV mode, only floating actuators are
supported and this option is unavailable. To change the
Heating/Cooling Device Type:
1. Press the Menu icon.
2. Press Equipment Setup.
3. Press General.
4. Press Htg/Clg Device Type and select On-Off or
Floating. Changing this option reboots the
controller in order to apply the change.
5. Press to save and to return to the
previous screen.
When in Floating mode, the Actuator Stroke Time must
also be set to match the equipment. To set the actuator
stroke time:
1. Press the Menu icon.