68/69
Document 10000028013-DOC-000-00-EN
we know what‘s cooking
Testing electrically heated kettles
The kettle must be in the vertical position and in heating mode when this test is performed.
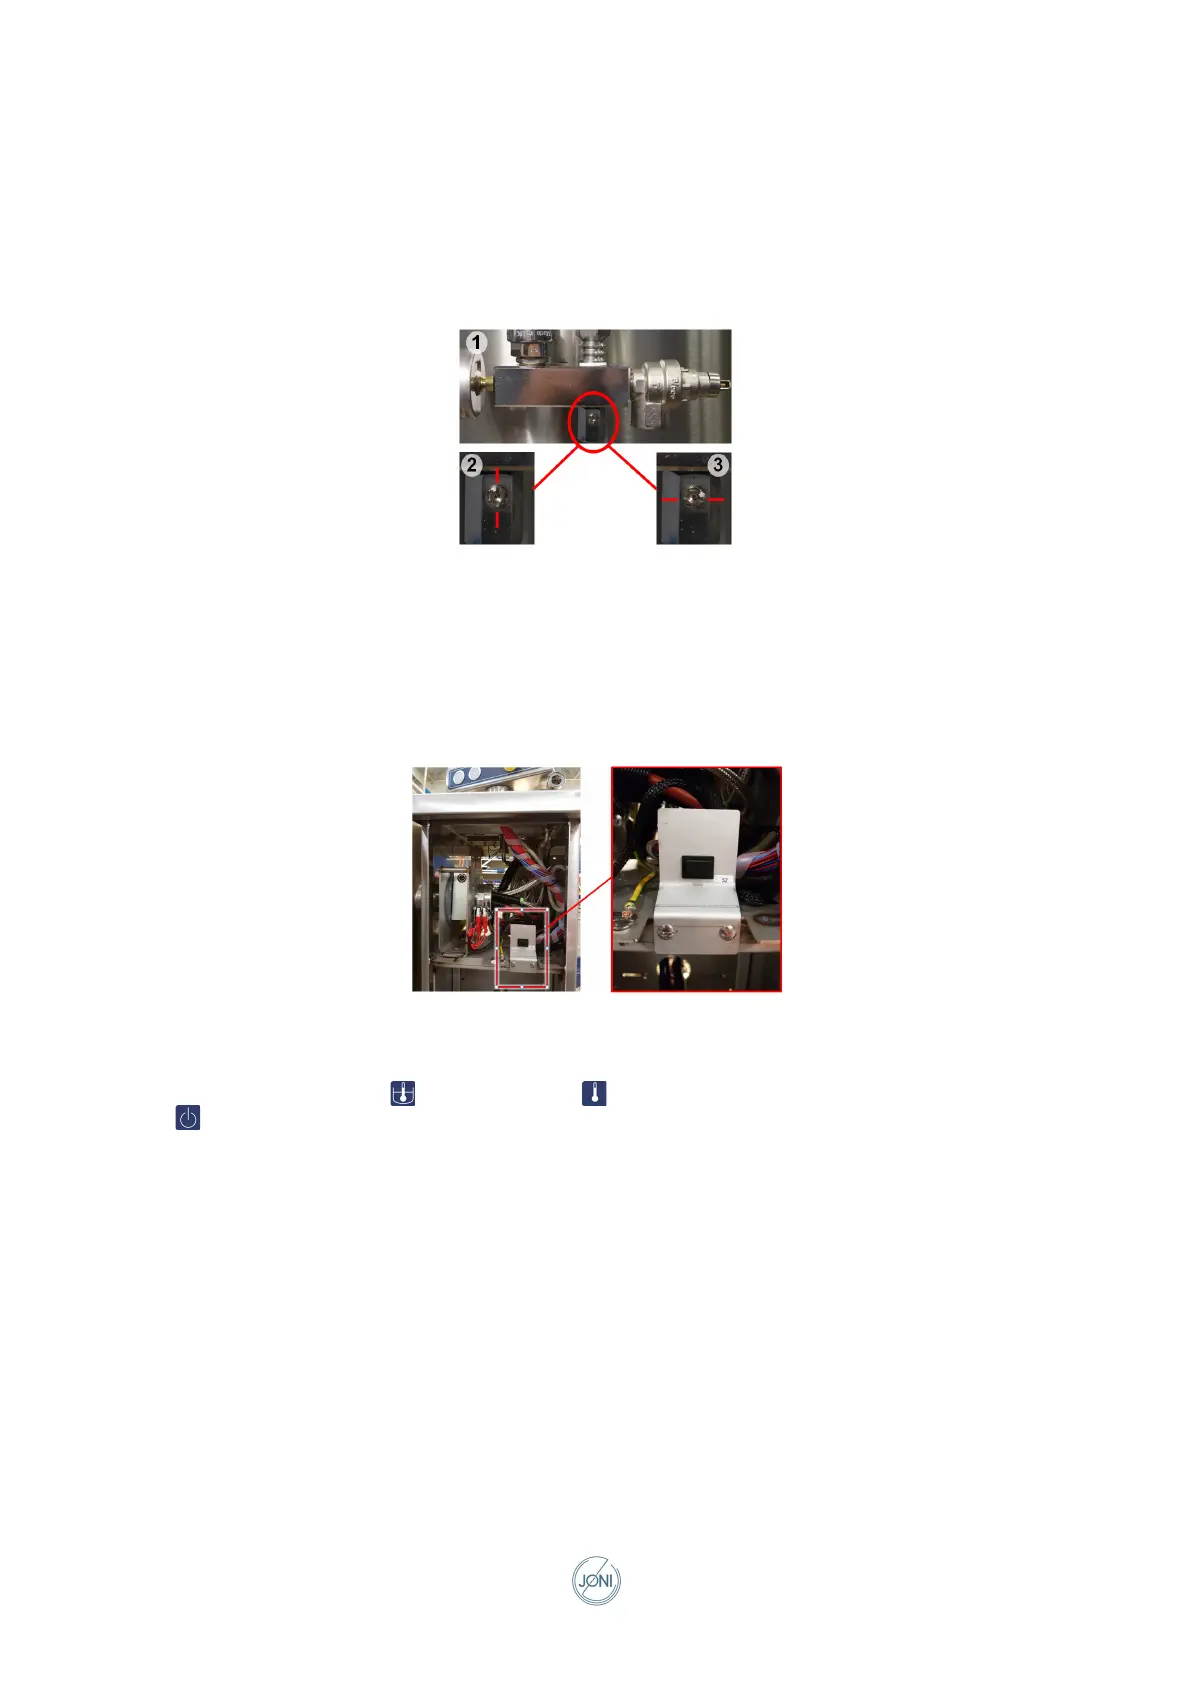
1) Install a separate control pressure gauge on the test flange at the rear of the kettle. Open the test
flange valve.
Make sure that the pressure gauge can be observed, while the test is being performed
Fig. 0-44 Test flange valve
1 Test flange valve
2 Test flange valve open
3 Test flange valve closed
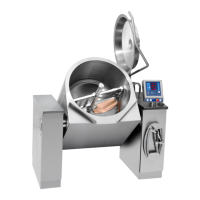
2) Remove the front cover for the mounting pillar, to gain free access to test button “S2”
The placement of the button differs from model to model, but it’s alway labeled “S2”
Fig. 0-45 Test button “S2”
3) Empty the contents of the kettle and turn the heat to its highest setting. Wait until the pressure in the
steam jacket is 0.9 – 1.0 bar.
4) Press heat function key (AutoTemp 56) or (AutoTemp 16, 32 and 36) and heating on/off key
simultaneously and hold the two keys down throughout the entire process. After 5 seconds, the
LED will start to flash rapidly.
Heat will now be supplied to the kettle.
5) Deactivation of the safety pressure switch is indicated by the temperature flashing in the display. This
occurs at approximately 1.2 bar.
6) Press test button “S2” and also hold this down throughout the rest of the process.
7) Continue the heating process by holding down all three keys. The safety valve should now activate
at around 1.3 bar.
8) Continue heating and check that the pressure does not exceed 1.43 bar.
9) Release the test button “S2” when you are certain that the pressure is no longer rising.
10) Release the two other keys.
11) Wait for the kettle to cool down. When the safety pressure control activates at approximately 0.8 bar,
the safety valve will close. The kettle will then be ready for use again.