aaaaaoaaaaaooaaaoaaoaaaaaaooaaoooooataa
@
Heading
line off
setting
Has
the same
function as the
[HL
OFF]
key.
While this switch
is clicked, the heading lines
(HL)
display will be turned ofi.
@
CPA
RING indicator
selection
Turn on
and off the CPA
RING display.
When the vector mode
is TRUE, the CPA RING cannol be turned
on.
@
MAP
SHrFT
This is used to mode maps
made
by users.
@
DEPTH
This displays the
depth
received
from external
devices.
The
I
u
I
button can be
used
to turn on and
offthe depth
graph
display.
@
DAY/NIGHT
setting
This button selects the
day or
night mode. The mode changes each
time this button is clicked.
There are
four
settings:
DAY1--+
DAYZ
-+
NIGHTI
-+
NIGHT2.
€D
PANEUBRILL
VIDEO/BRILL
ARPA setting
The modes PANEL, ViDEO,
and
ARPA, which
adjust
luminosity, are
switched.
The mode changes each
time
this button is clicked.
There are three settings:
PANEL-+VIDEO-+ARPA.
@
Brillianceadjustment
Each
time this switch is
clicked,
it will
go
to the next of four
(BRILL VIDEO)
or
five
(PANEL,
BRILL
ARPA) brilliance
settings.
@
Process
setting function
(FUNC)
selection
Sets
the
process
setting
mode. OFF,
FUNC1,
FUNC2, FUNC3,
FUNC4,
or FUNC5
can
be
selected.
@,
@, @
,
@
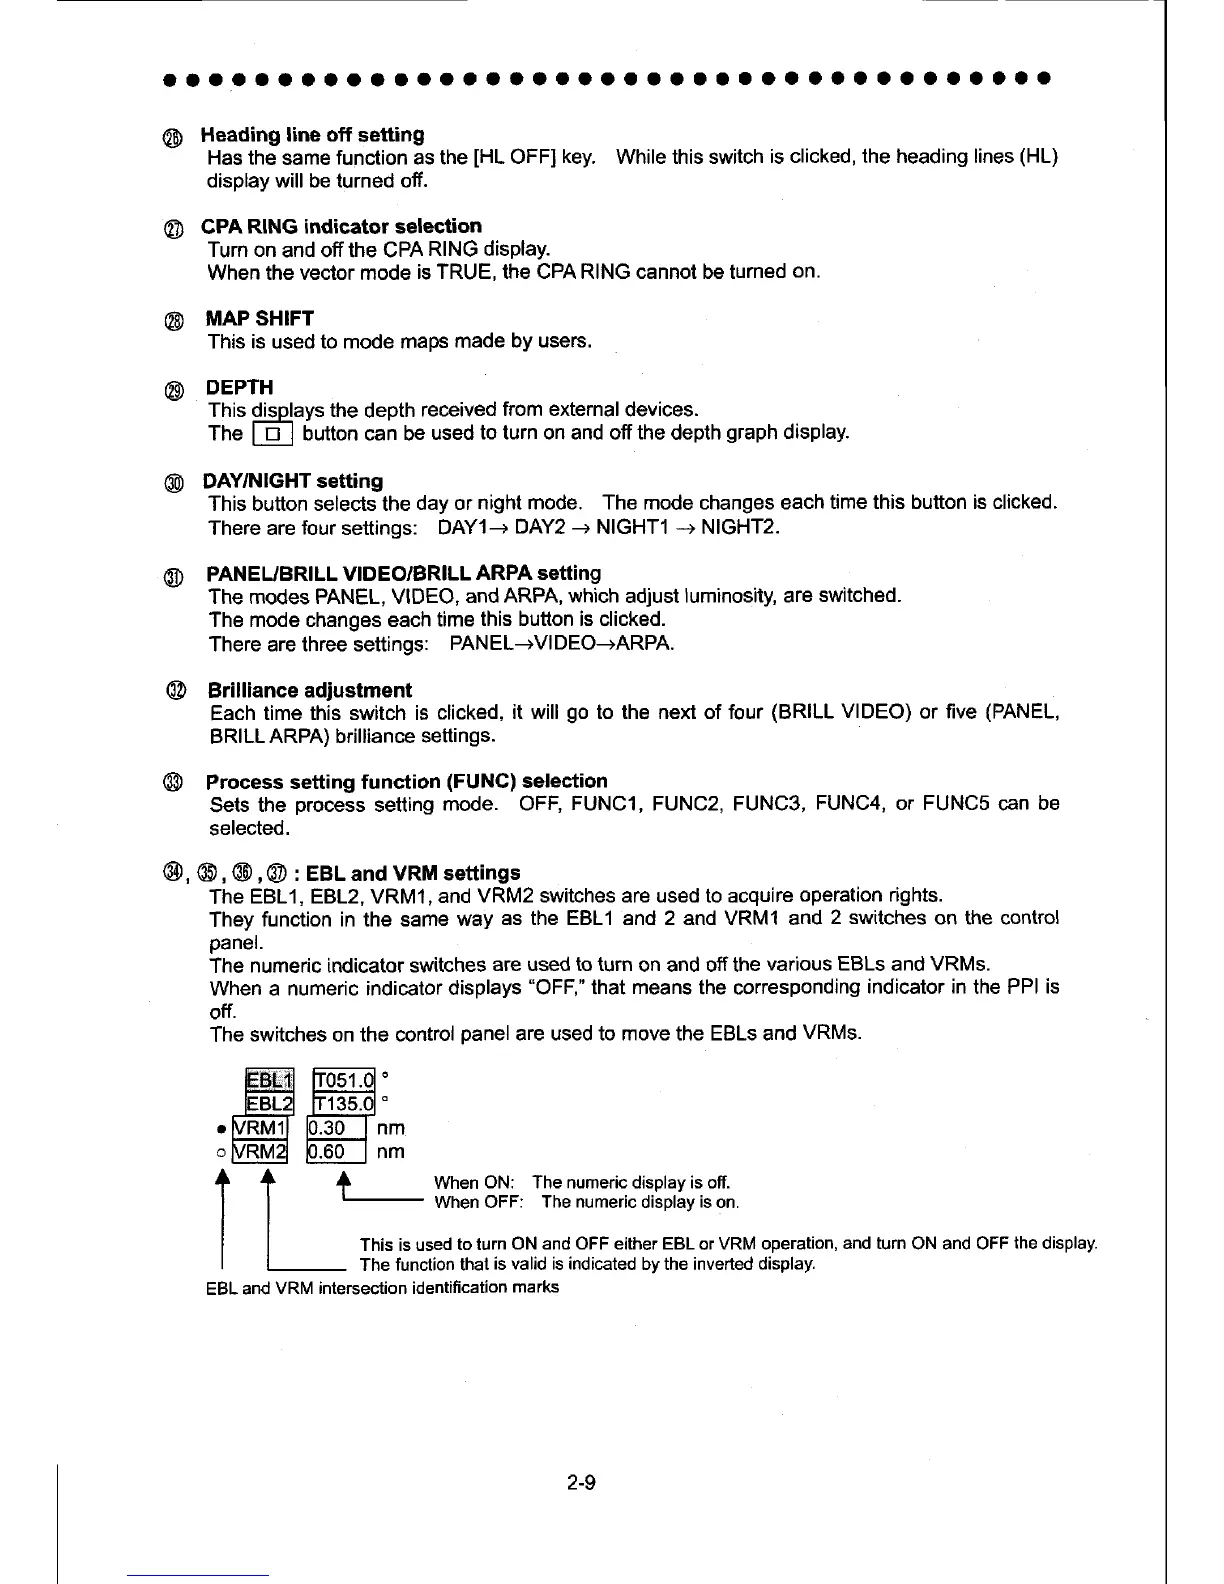
: EBL and
VRM settings
The
EBL1, EBL2, VRM1,
and
VRM2 switches are used to acquire
operation rights.
They
function in the same
way
as the EBLI and 2 and VRM1 and
2 switches
on the control
paner.
The
numeric indicator switches
are used to turn
on and off the
various EBLs
and
VRMs.
When
a numeric indicator
displays
"OFF,"
that
means
the corresponding
indicator in
the PPI
is
off.
The
switches on the control
panel
are used to move the EBLs and
VRMs.
nm
nm
o
+
When
ON: The numeric display is off.
When OFF:
The numeric
display
is
on.
This is used
to turn
ON and OFF either EBL
or
VRM operation,
and turn
ON and OFF
the
display.
The
function thal
is valid is indicated
by the inverted
display,
EBL
and
VRM intersection identification
marks
2-9
 Loading...