Do you have a question about the JRC JMA-5322-9 and is the answer not in the manual?
High voltage warnings for electronic equipment, emphasizing dangers during maintenance and the need for specialists.
Immediate actions to take when finding a victim of electric shock, including turning off power and performing artificial respiration.
Detailed steps for providing artificial respiration and checking vital signs for victims of electric shock.
Explanation of danger, warning, and caution symbols used in the manual and on equipment for safety.
Illustrations and meanings of common safety symbols like electric shock and prohibition.
Critical safety warnings regarding internal inspection, repair, and high voltage hazards.
Overview of the radar system's capabilities, including signal processing, measurements, and display features.
System monitors its functions and reports deterioration via alarms for continuous self-diagnosis.
Allows display of radar performance metrics like output power and receiving sensitivity.
Enables switching between multiple radars via an interswitch unit for flexible operation.
Identification of different screen areas and their associated information like PPI, digital data, and own ship status.
Overall sequence of operations from power-on to system stop, emphasizing safe panel interaction.
Procedure for safely powering on the radar, including preheating the magnetron before transmission.
Procedure to adjust the LCD monitor's brilliance for optimal visibility in various ambient lighting conditions.
Instructions for increasing or decreasing the radar display range for target observation.
Guidance on using automatic or manual tune modes to optimize signal reception and target clarity.
Procedure for adjusting radar gain to improve target visibility and reduce noise.
Instructions on using sea clutter suppression to reduce unwanted echoes from waves.
Guidance on using rain and snow clutter suppression to reduce interference from precipitation.
Procedure to acknowledge and silence audible and visual alarms.
Instructions on using the trackball to control the cursor for various operations like target selection and measurement.
How to use on-screen software buttons for quick access to functions without opening menus.
Navigating the radar's menu structure, including opening, closing, and selecting menu items.
Procedures for entering numeric values, latitude/longitude, and character data using the input screens.
Explanation and operation of the Interference Rejection feature to minimize unwanted signals from other radars.
Guidance on selecting appropriate pulse lengths for different conditions to optimize range resolution and clutter suppression.
How to use the Target Enhance function to enlarge and improve the visibility of targets.
Explanation of video processing modes to reduce noise and highlight targets, including when to use PROC Off.
Instructions for switching between North-up, Course-up, and Head-up display modes for different operational needs.
Procedure for switching between True Motion and Relative Motion display modes for target tracking.
How to use the Off Center function to reposition the own ship on the display for better observation.
Instructions for changing the length of radar trails and erasing trail data for collision avoidance.
Procedure to erase specific portions of radar trails to clear the display.
How to use the zoom function to enlarge specific areas of the radar display for detailed observation.
Function to hide or display range rings and the ship's heading line for improved target visibility.
Temporarily hide graphics like TT/AIS symbols and NAV lines to improve radar video clarity.
Procedure to switch between different display color and brilliance modes for optimal viewing.
Instructions for adjusting the radar's true bearing to match the master gyro for accurate navigation.
How to switch between speed sensors or manually input own ship's speed for accurate tracking.
Procedure to set magnetic compass correction values for accurate heading data.
Instructions for setting drift direction and speed for accurate course and speed calculations.
Configuration of GPS settings, including position, satellite exclusion, geodetic system, and antenna height.
How to check the reception status of GPS, DGPS, and WAAS signals for system accuracy.
Procedure for setting radar alarm zones (sectors) and sensitivity levels for collision avoidance.
How to display own ship's track data on the radar screen, including map display settings.
Procedure for creating and plotting marks and lines on the user map using latitude/longitude.
How to configure the display of user map elements by type, color, and font size.
Instructions for manually entering own ship position and moving or deleting marks/lines on the user map.
Managing user map entries by displaying, adding, editing, and clearing marks and lines.
How to manually adjust chart positions on the user map and clear corrections.
Managing user map data by loading, unloading, saving, and erasing files from a memory card.
How to display the destination mark received from external navigation equipment on the radar.
Procedure for selecting and displaying route data received from other navigation systems like ECDIS.
Configuration of radar signal processing parameters like video latitude, noise rejection, and dynamic range.
Settings for radar trails, including mode, reference level, reduction, process, interval, and erase functions.
Configuration of scanner unit settings such as PRF fine tuning, stagger trigger, PRF modes, and ice class standby.
Adjusting cursor parameters like EBL/VRM control, cursor length, and cursor pattern for precise operation.
Customizing radar display appearance by setting colors and brilliance for different elements and modes.
Procedure for adjusting the alarm sound volume for various system events and alarms.
Customizing user keys for quick access to frequently used menus or functions.
Configuring the display of navigation data such as wind, depth, and course information in multi-window formats.
Basic operation of the FUNC key for selecting and changing function modes like Coast, Deepsea, and Storm.
Overview of available function settings for customizing radar performance based on conditions.
Detailed explanation of how to use various function modes like Coast, Deepsea, Fishnet, and Storm.
Explanation of how factory-set, default, and user-saved function data is managed and utilized.
Procedure to save the current radar system configuration and settings for later recall.
How to load previously saved operating states to restore system configuration.
Managing data files on the flash memory card, including saving, loading, and copying information.
Procedure to copy JRC charts onto a CF card and select them for display.
Customizing chart display by setting colors and brilliance for land, sea, names, and tracks.
Instructions for inserting and displaying C-MAP cards, including setting display options for lines and depth.
Methods for adjusting chart position accuracy using coastlines and LAT/LON correction.
Procedure to save the current radar screen display to a memory card.
Setting up automatic screen saving to a memory card at specified time intervals.
How to erase saved screen data from the memory card, including folder and file management.
Configuring which screen elements (echo, trails, chart) are saved.
Setting communication ports for receiving signals from various sensors like GPS, Gyro, and AIS.
Overview of navigation tools like cursor, range rings, EBL, VRM, and PI for target measurement.
Detailed procedures for measuring target range and bearing using cursor, EBL, and VRM.
How the EBL bearing value is shown and the operable EBL is highlighted for adjustment.
Options for setting the EBL starting point to own ship's position, fixed radar display, or latitude/longitude.
How the VRM range value is shown and the operable VRM is highlighted for adjustment.
Procedure to display and operate parallel index lines for bearing and interval adjustments.
Explanation of limitations and considerations for using target acquisition and tracking functions.
Overview of target tracking and AIS functions, including initial settings and required options.
Detailed guide on using the target tracking function, including acquisition, vector display, and alarm settings.
Instructions for using the AIS function, including display settings, activation, deactivation, and information display.
Function to decide if targets are identical and display an association symbol, with caution about settings.
Explanation of how critical and general alarm messages for TT and AIS functions are displayed.
Settings and operations related to target ship tracks, including past position, track display, and file operations.
Using the trial maneuvering function to simulate own ship's course and speed for collision avoidance.
Explanation of the EPA function for displaying target vectors, calculating CPA/TCPA, and issuing alarms.
Discussion of collision avoidance challenges and navigational patterns in marine environments.
Explanation of symbols used for target tracking, including initial acquisition, dangerous targets, and lost targets.
How target vectors are presented in True or Relative modes, including vector length adjustment.
Table outlining different cursor modes like ACQ TT, AIS, TGT Data, and their respective functions.
Procedure to set the Closest Point of Approach (CPA) limit for collision decision.
How to set the vector time for targets directly on the display.
Procedure for acquiring targets manually or automatically using acquisition/activation zones.
How to cancel individual or all tracked targets to simplify the display.
Displaying detailed information for tracked targets, including identification, bearing, range, and speed.
Setting to display or hide target ID numbers, which identify targets in acquisition order.
Function to enter a name for each tracked target, either by inputting a new name or selecting from a database.
Using a target as a reference for own ship's speed when the speed sensor is malfunctioning.
Testing the target tracking function using video tests, simulator, status display, and gate display.
Limitations on AIS function usage related to speed sensor settings, current offset, and geodetic system.
How to turn the AIS display function on or off, with attention to automatic switching.
Procedure for activating AIS targets manually or automatically to display vectors and make collision decisions.
Displaying detailed or simple AIS target information, including ship name, course, speed, and navigation status.
Configuring AIS filters (Range, Sector, Zone) to prioritize or limit displayed targets.
Criteria for determining when AIS target data is lost, based on target status and time until data deletion.
Setting conditions for Lost and CPA/TCPA alarms for AIS targets.
Function to enable/disable target association and display symbols for identical or disappeared targets.
Details on CPA/TCPA alarms, including target categorization, symbols, and conditions for activation.
Explanation of the alarm issued when a new target enters the automatic acquisition zone.
Information on lost target alarms, their causes, and how to handle them.
Setting the display interval for past positions of tracked targets and AIS targets.
Making settings for tracks of tracked targets and AIS targets, including color and display on/off.
Setting the interval for saving target ship track data, with options for time and range.
Clearing target ship tracks by setting color or track number.
Managing target ship track data on a flash memory card, including loading, saving, and erasing files.
How to operate the trial maneuvering function, including setting parameters like course, speed, and vector time.
Explanation of symbols used in EPA (Electronic Plotting Aid) for target plotting and data display.
Explanation of radar propagation along the earth's curvature and its effect on detection range.
Factors affecting signal intensity from targets, including height, size, material, and coastline shape.
Understanding and coping with sea clutter, rain, and snow clutter using rejection functions and modes.
Identification and causes of false echoes like shadows, side lobe effects, secondary, multiple, and second time echoes.
Procedure for setting up and displaying SART signals for search and rescue operations.
How to display AIS-SART symbols on the radar screen and view numeric information.
Electrical adjustment procedures for service engineers during system installation, covering gyro, COM ports, and tuning.
Configuration settings for system operation, including COM port, sector blank, TNI blank, and language settings.
Procedures for adjusting system parameters like noise level, target tracking, MBS, and performance monitor.
Accessing maintenance functions like safety switch, memory initialization, data saving, and part replacement.
Procedure to adjust transmitter and receiver tuning for optimal signal reception.
Setting communication ports for inputting sensor signals and outputting data.
Creating sector blank areas to stop radar echoes in specific bearing directions.
Setting a TNI blank sector to stabilize tuning operation near radar antenna structures.
Setting the output value of bearing pulses from the antenna for improved positional accuracy.
Configuring the system for sub-display operation using slave mode.
Switching the system display language between English and Japanese.
Setting the local time, date, and time zone for accurate time display.
Inputting system installation details such as date, personnel name, and company name.
Configuring relay and ALR outputs for system alarms, including critical and normal alarms.
Configuring network settings for data reception from other JRC systems via JRC-LAN.
Setting route types and LAN port parameters for data transmission and reception.
Adjusting the noise level for signal processing to optimize target detection.
Adjusting vector constant and quantization level for improved target tracking performance.
Setting the target search area (gate size) for the target tracking function.
Turning the CPA limit ring display on or off to visually identify dangerous targets.
Adjusting Main Bang Suppression to reduce the circular video at the radar display's center.
Adjusting the performance monitor to check and maintain radar reception and transmission performance.
Using the safety switch to measure radar performance while the antenna is stopped.
Resetting system memory to factory settings to resolve operational instability.
Saving system settings to a flash memory card and restoring them after component replacement.
Clearing transmission and motor run times, and saving/restoring antenna time data.
Updating character strings for second language display using a flash memory card.
General maintenance procedures, including cleaning the equipment and air vents.
Specific maintenance procedures for scanner units and display units, including safety precautions.
Performing operational checks on the radar equipment to identify and investigate problems.
Guidelines and procedures for replacing major components like magnetron, motors, and LCD.
Procedures for aging a magnetron after long-term storage to ensure stable operation.
Step-by-step instructions for replacing the motor in the NKE-1130 scanner unit.
Important precautions for handling the LCD monitor carefully to prevent damage.
Explanation of battery status indicators (Low, Dead, No Battery) and recommendations for replacement.
Procedure for replacing the coin-cell backup battery, including handling and fixing it.
Information on identifying potential faults, including common causes and understanding system alarms.
Guidance on troubleshooting common issues like poor cable or connector contact.
Information on warranty repair, out-of-warranty service, and recommended maintenance.
List of critical alarm messages for Target Tracking (TT) and AIS functions, including descriptions and alarm numbers.
Instructions to follow local laws and regulations for the disposal of the unit.
Safety warnings and procedures for disposing of used lithium batteries, emphasizing insulation.
Procedure for returning used magnetrons to the dealer or business office after replacement.
Detailed technical specifications for the JMA-5312-6/6HS radar system.
Detailed technical specifications for the JMA-5322-7/9/6HS radar system.
Detailed technical specifications for the JMA-5332-12 radar system.
Technical specifications for the NKE-2103-6 scanner unit.
Technical specifications for the NKE-2254-7/9 scanner unit.
Technical specifications for the NKE-1130 scanner unit.
Technical specifications for the NKE-2254-6HS scanner unit.
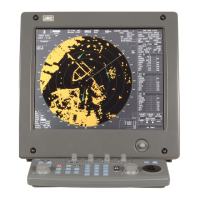
Specifications for the NCD-4530 display unit, including screen, modes, and markers.
Specifications for the NDC-1417 processor unit, covering structure, dimensions, and functions.
Specifications for the optional target tracking function, detailing its capabilities and parameters.
Specifications for the optional AIS process unit, covering activation, display, and track functions.
Specifications for the plotter unit, including normal and synthesis modes, projection, and scale.
Specifications for the NCE-5171 operation unit, detailing switches, functions, and display modes.
Specifications for the NJU-84 Performance Monitor, including dimensions and operating frequency.
List of available input signals from navigation equipment and sensors, including NMEA sentences.
List of available output signals from the radar system, including slave video and navigation information.
Standard equipment configuration, including scanner unit, display unit, cables, and spare parts.
Recommended distances between radar components and other onboard instruments for optimal performance.
General introduction to the Interswitch NQE-3141, its purpose, and basic setup.
Detailed procedures for operating the interswitch unit, including connection patterns and file management.
Reference information on preheat times, connection pattern notes, and slave display unit operation.
Step-by-step instructions for inserting various card types into the processor unit's card slots.
| Type | Marine Radar |
|---|---|
| Rotation Speed | 24 RPM |
| Display | LCD |
| Frequency | 9410 MHz ±30 MHz |
| Range | 96 nautical miles |