23.
ADJUSTING
THE
THREAD
TRIMMER
0.5mm
Throat
plate
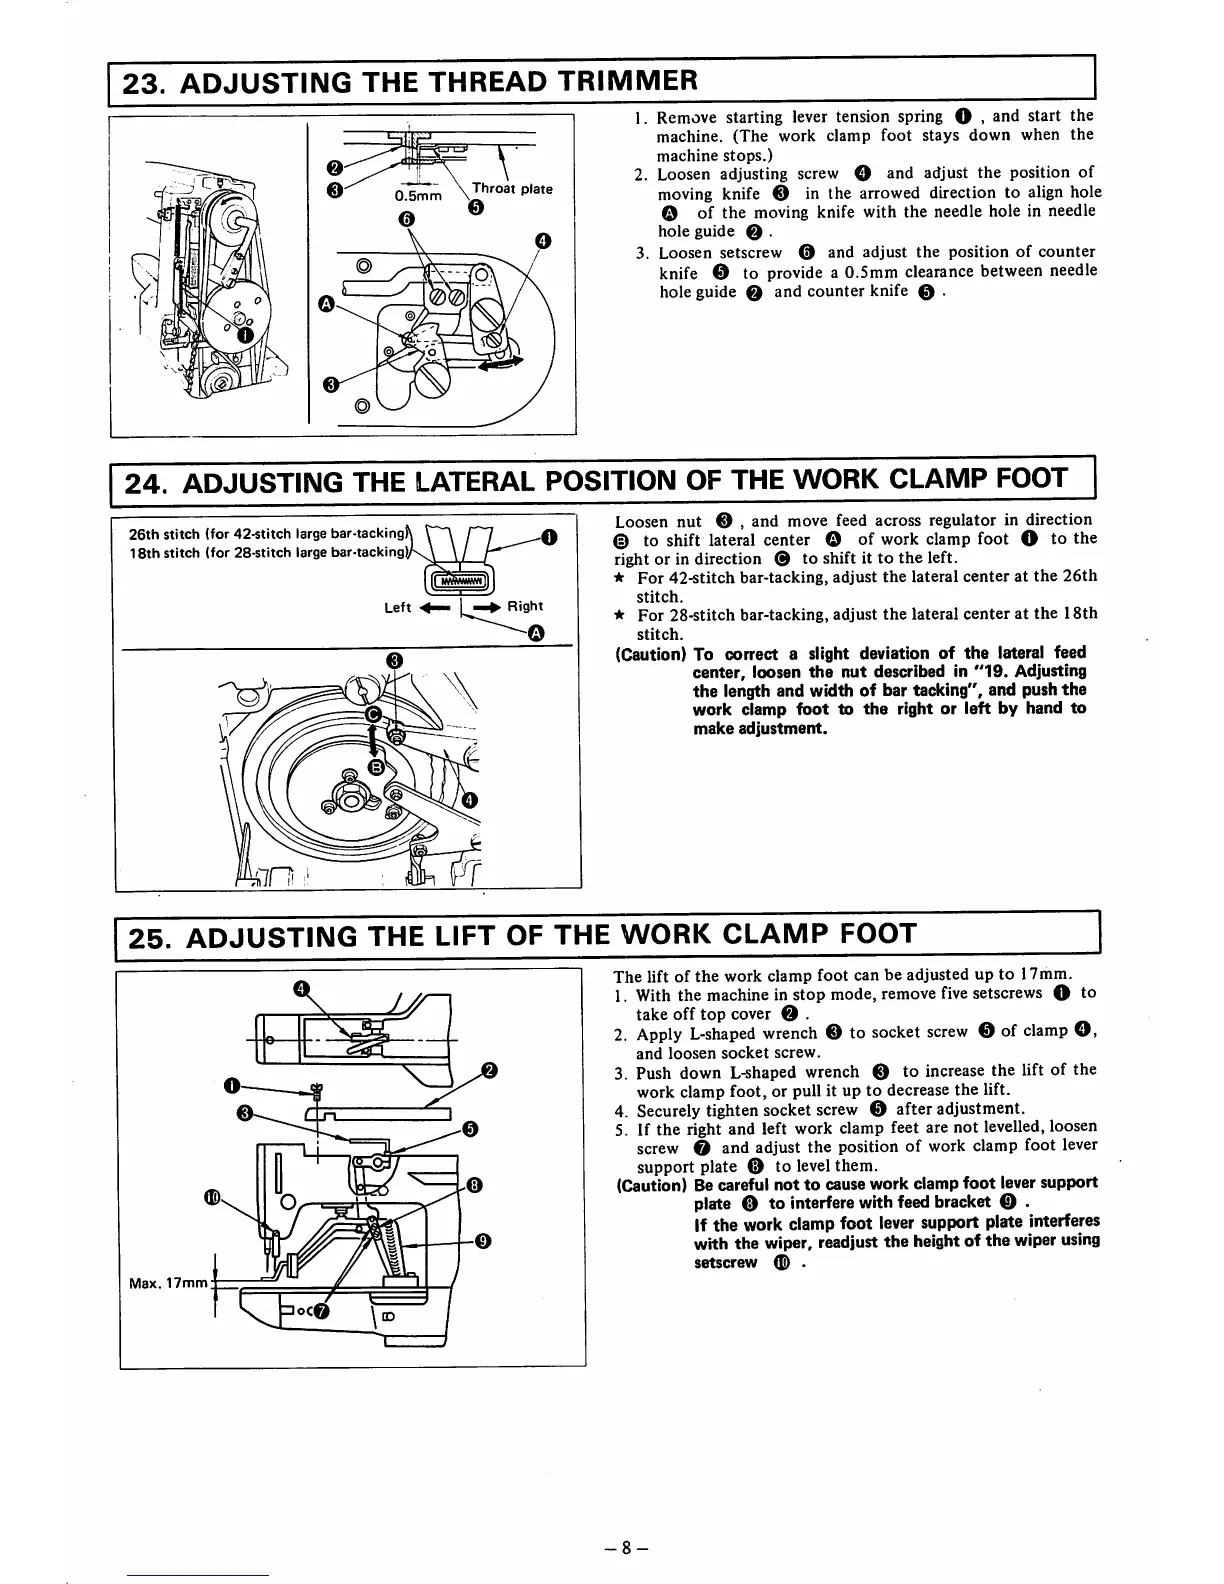
1. Remove starting lever tension spring O , and start the
machine.
(The
work clamp
foot
stays
down
when
the
machine
stops.)
2. Loosen adjusting screw O and adjust the position of
moving knife © in the arrowed direction to align hole
O of the moving knife with the needle hole in needle
hole
guide
0 .
3. Loosen setscrew 0 and
adjust
the
position
of
counter
knife 0 to provide a 0.5mm clearance between needle
hole guide 0 and counter knife e
24.
ADJUSTING
THE LATERAL POSITION OF THE WORK
CLAMP
FOOT
26th
stitch
(for
42-stitch
large
bar-tacking
18th
stitch
(for
28-stitch
large bar-tacking)>
Loosen nut 0 , and move feed across regulator in direction
© to shift lateral center O of work
clamp
foot O to the
right or in direction ® to shift it
to
the
left.
★
For
42-stitch bar-tacking, adjust
the
lateral
center
at
the
26th
stitch.
★
For
28-stitch bar-tacking, adjust
the
lateral
center
at
the
18th
stitch.
(Caution) To correct a slight deviation of
the
lateral feed
center, loosen
the
nut
described in
"19.
Adjusting
the
length and width
of
bar tacking", and push
the
work
clamp
foot
to
the
right or
left
by hand
to
make
adjustment.
25.
ADJUSTING
THE
LIFT OF
THE
WORK
CLAMP
FOOT
Max.
17mm
The
lift of
the
work clamp
foot
can be adjusted up to
17mm.
1. With the machine in stop mode, remove fivesetscrews O
take off top cover 0 .
2.
Apply
L-shaped
wrench
0 to
socket
screw
0 of
clamp
O,
and
loosen
socket
screw.
3. Push down L-shaped wrench 0 to increase the lift of the
work clamp foot, or pull it up to decrease the lift.
4. Securely tighten socket
screw
0 after adjustment.
5. If the right and left work clamp feet are not levelled,loosen
screw 0 and adjust the position of work clamp foot lever
support plate 0 to level them.
(Caution) Be careful not
to
cause work clamp
foot
lever support
plate 0 to interfere with feed bracket 0 .
If the work clamp foot lever support plate interferes
with the wiper, readjust the heightof the wiper
using
setscrew
® .
-8-
to



 To Next Page