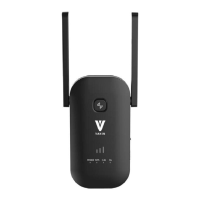
3.2.1. Router-Auto Config. (DHCP)
① Select Auto Config. (DHCP) – default
② Set the Network name (SSID), Pre-Shared Key (password)
③ Click Auto Fill button behind the MAC Address Clone, and click Save&Apply
button, Your settings are applied and the extender is ready to be used as a router.
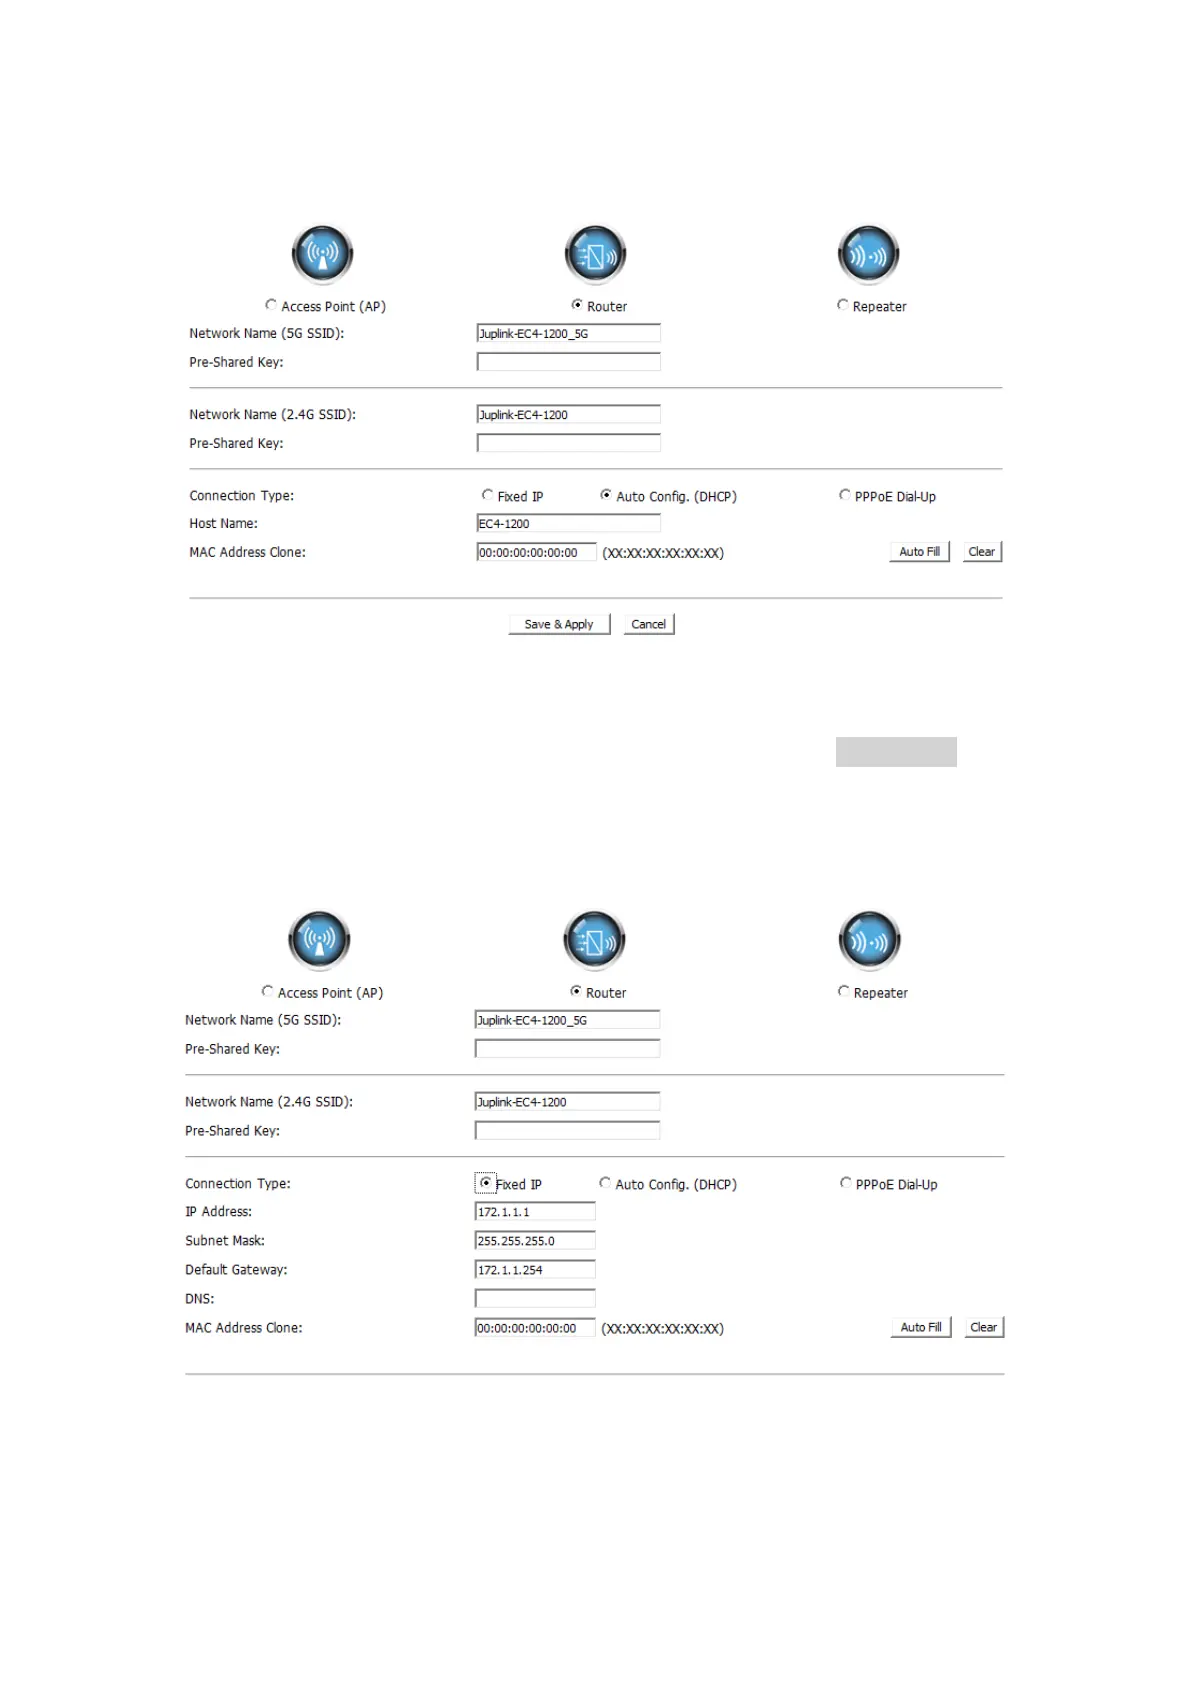
3.2.2. Router-Fixed IP
① Select Fixed IP
② Set the Network name (SSID), Pre-Shared Key (password)
③ Fill in the IP address, Subnet Mask, Default Gateway, DNS(if in need) blanks
 Loading...