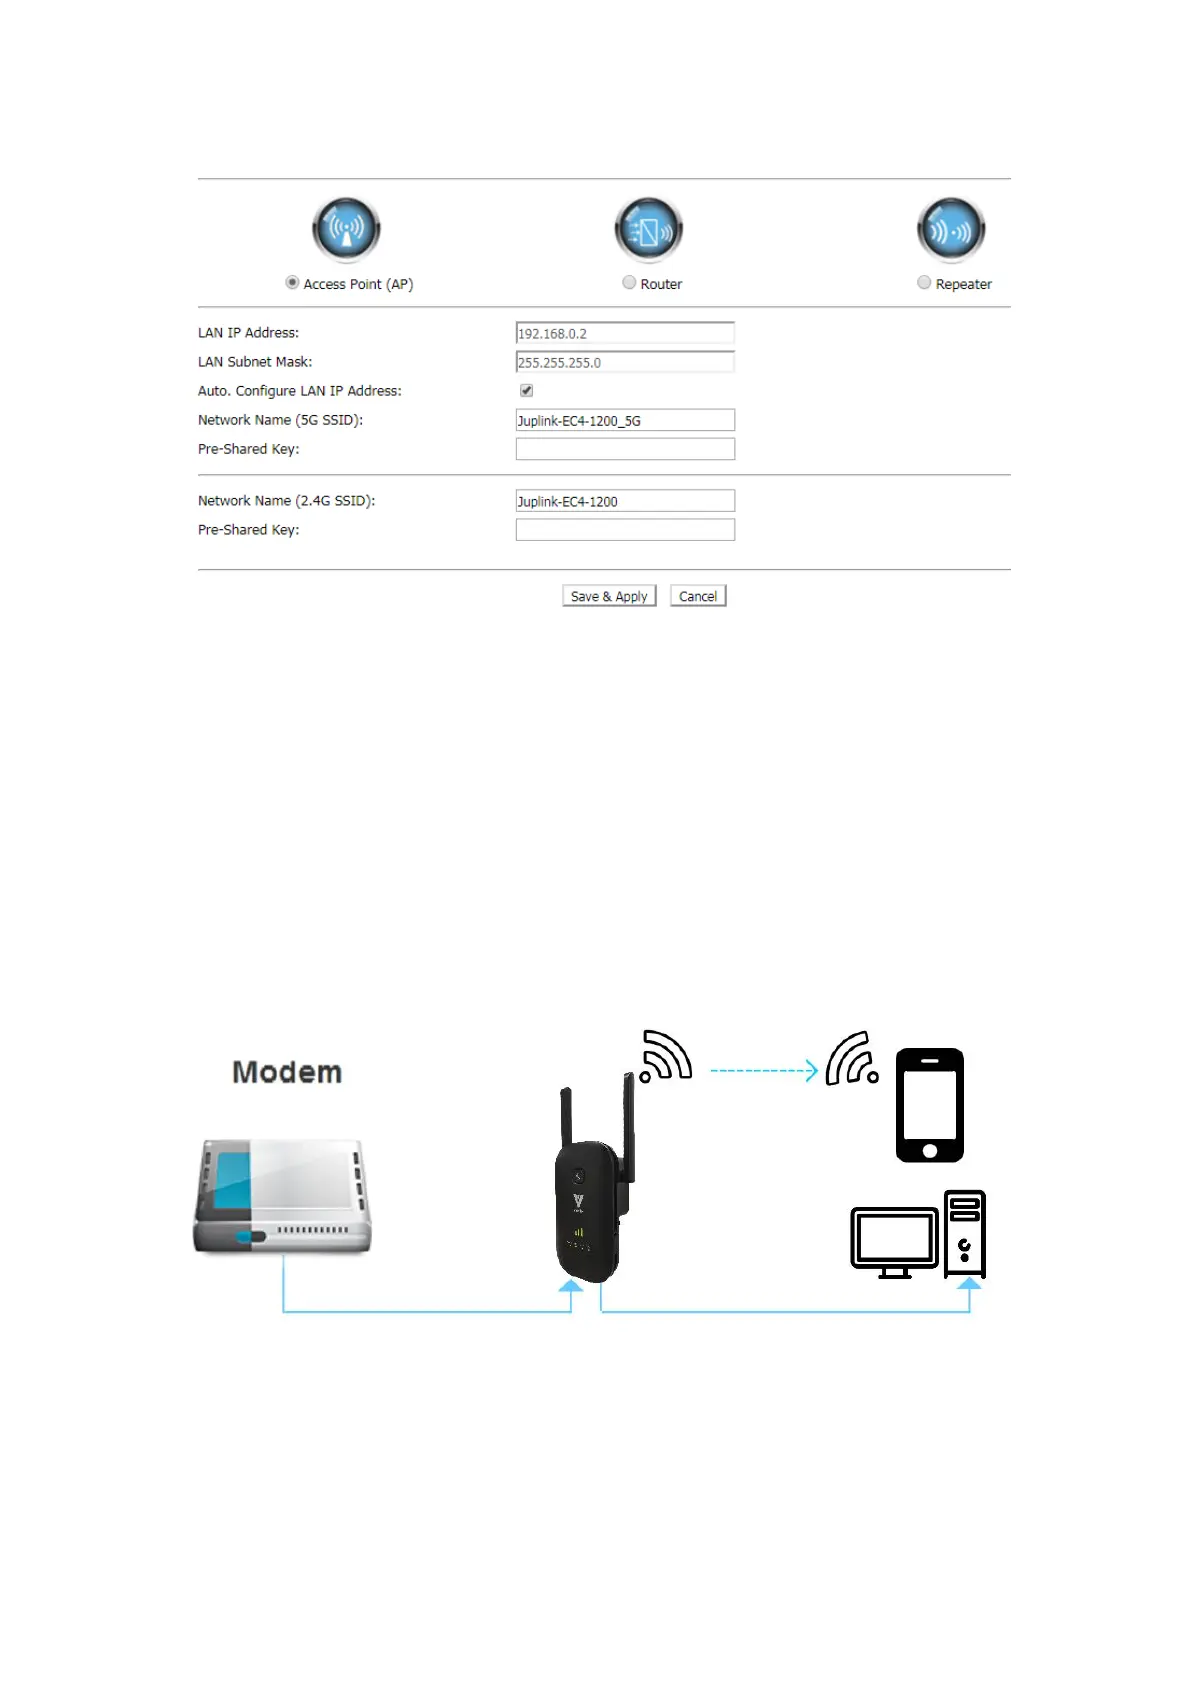
① Select Access Point (AP)
② Select Auto, Configure LAN IP address. Set the Network name (SSID), Pre-Shared
Key (password), and click the Save&Apply button to complete the setup.
Your settings are applied and the extender is ready to be used as an access point.
③ Use a Wi-Fi network manager on the computer or Wi-Fi device to connect to the
new access point network.
3.2 Manually Set Up Internet Connection-Router
Connect your Device to the Range Extender with an Ethernet cable or via wireless
connection and Log In to Your Range Extender.
Note: -Before using this mode, please use an Ethernet cable to connect the Ethernet port on the
extender to a Modem Ethernet LAN port or a remote Ethernet LAN jack with LAN Access ;
-All ports are Automatically Adjust Port. You can use any network port to connect your Modem
-According to your actual condition or the mode required by your ISP. You need select Fixed IP,
Auto Config. (DHCP) or PPPoE Dial-Up. Under Router mode, Below is the detailed method of
setting.