(No.49787B)1-19
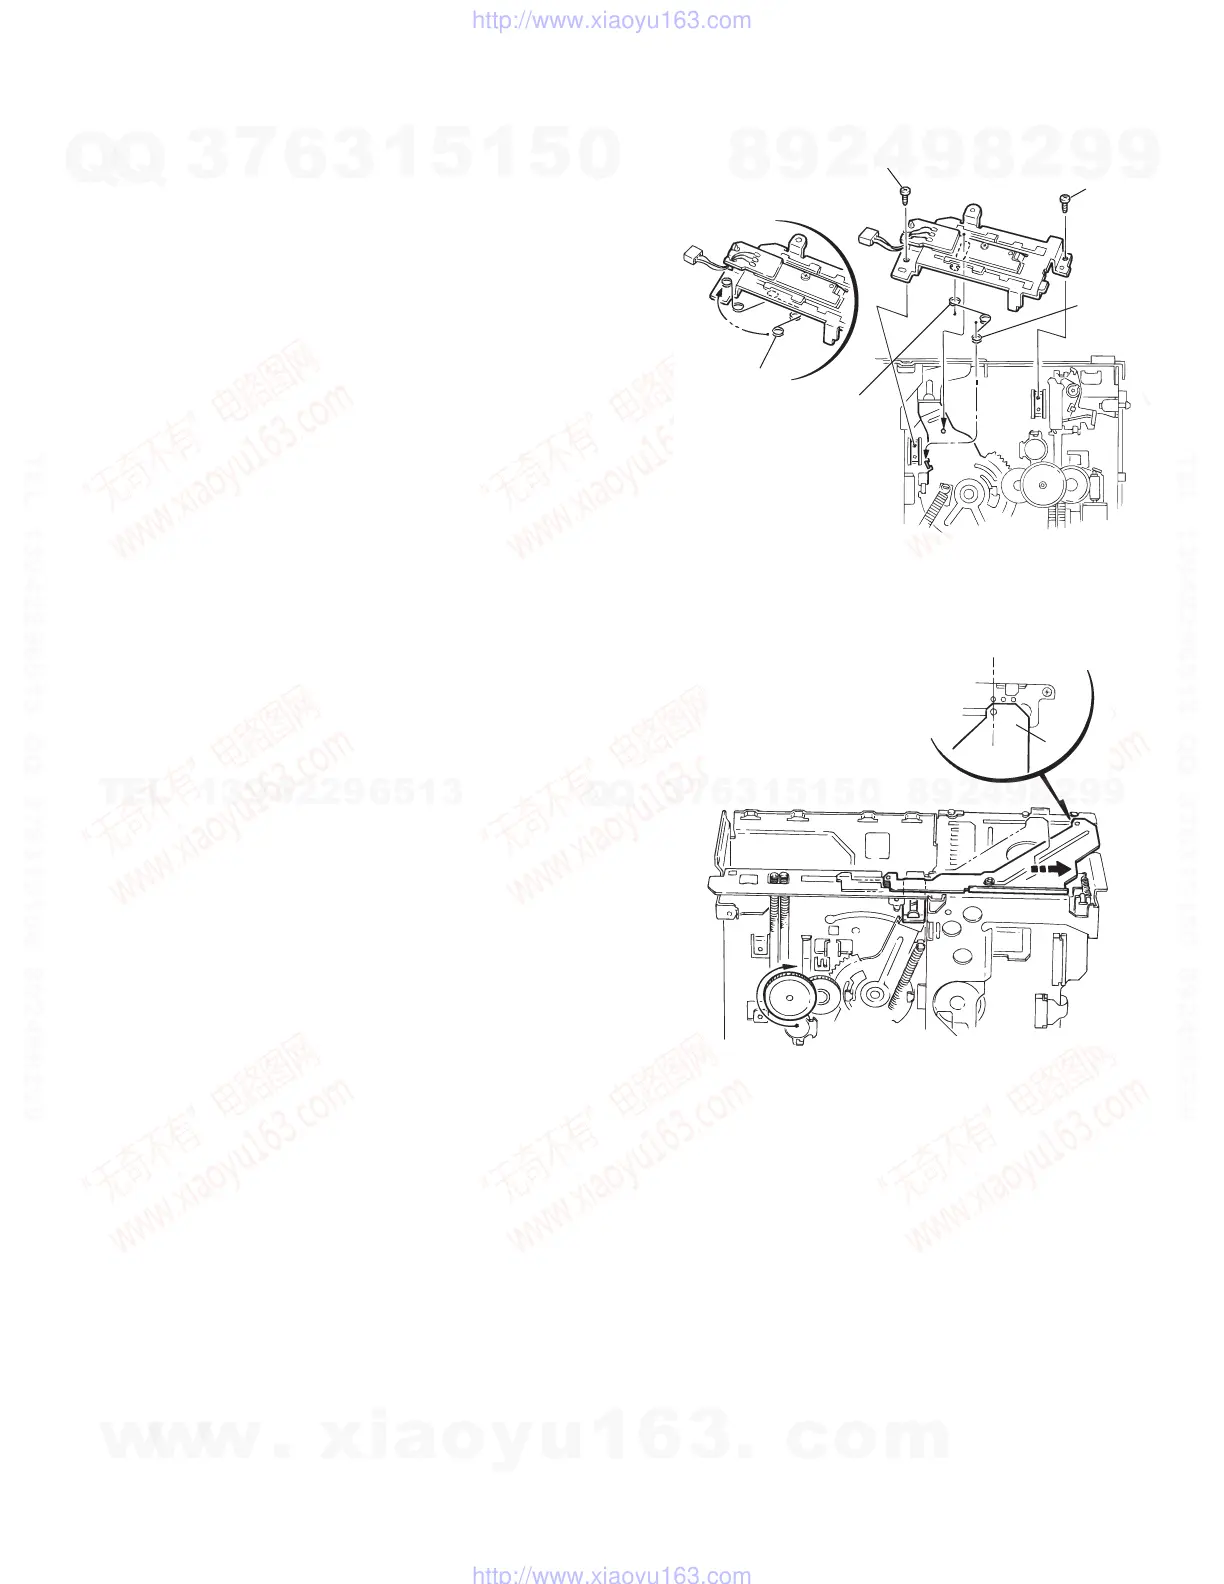
3.2.13.6 Mounting the sensor board assembly
(See Fig.36)
(1) Attach the longer spring to the white resin, and attach the
shorter spring temporarily to the sensor assembly bracket.
(2) Mount the sensor assembly so that the shaft of the lift arm
is inserted into the longer hole on the white resin located on
the back of the sensor board assembly.
(3) Attach the shorter spring to the hook of the lift arm.
Fig.36
3.2.13.7 Mounting the main PC board assembly
(See Fig.37)
(1) Rotate the third gear clockwise until section x of the front
slider and the third hole from the right are lined up.(Be sure
to set properly. If incorrectly set, the switches on
the board assembly may be damaged.)
(2) After they are correctly positioned, mount the main board
assembly.
Fig.37
Sensor assembly fixing screws
ttach
temporarily
Shorter spring
Longer spring
Shorter
spring
I
I
x
Position so that the slider hole and
third hole from the right are lined up
w
w
w
.
x
i
a
o
y
u
1
6
3
.
c
o
m
Q
Q
3
7
6
3
1
5
1
5
0
9
9
2
8
9
4
2
9
8
T
E
L
1
3
9
4
2
2
9
6
5
1
3
9
9
2
8
9
4
2
9
8
0
5
1
5
1
3
6
7
3
Q
Q
TEL 13942296513 QQ 376315150 892498299
TEL 13942296513 QQ 376315150 892498299
http://www.xiaoyu163.com
http://www.xiaoyu163.com
 Loading...