1-42 (No.MB368)
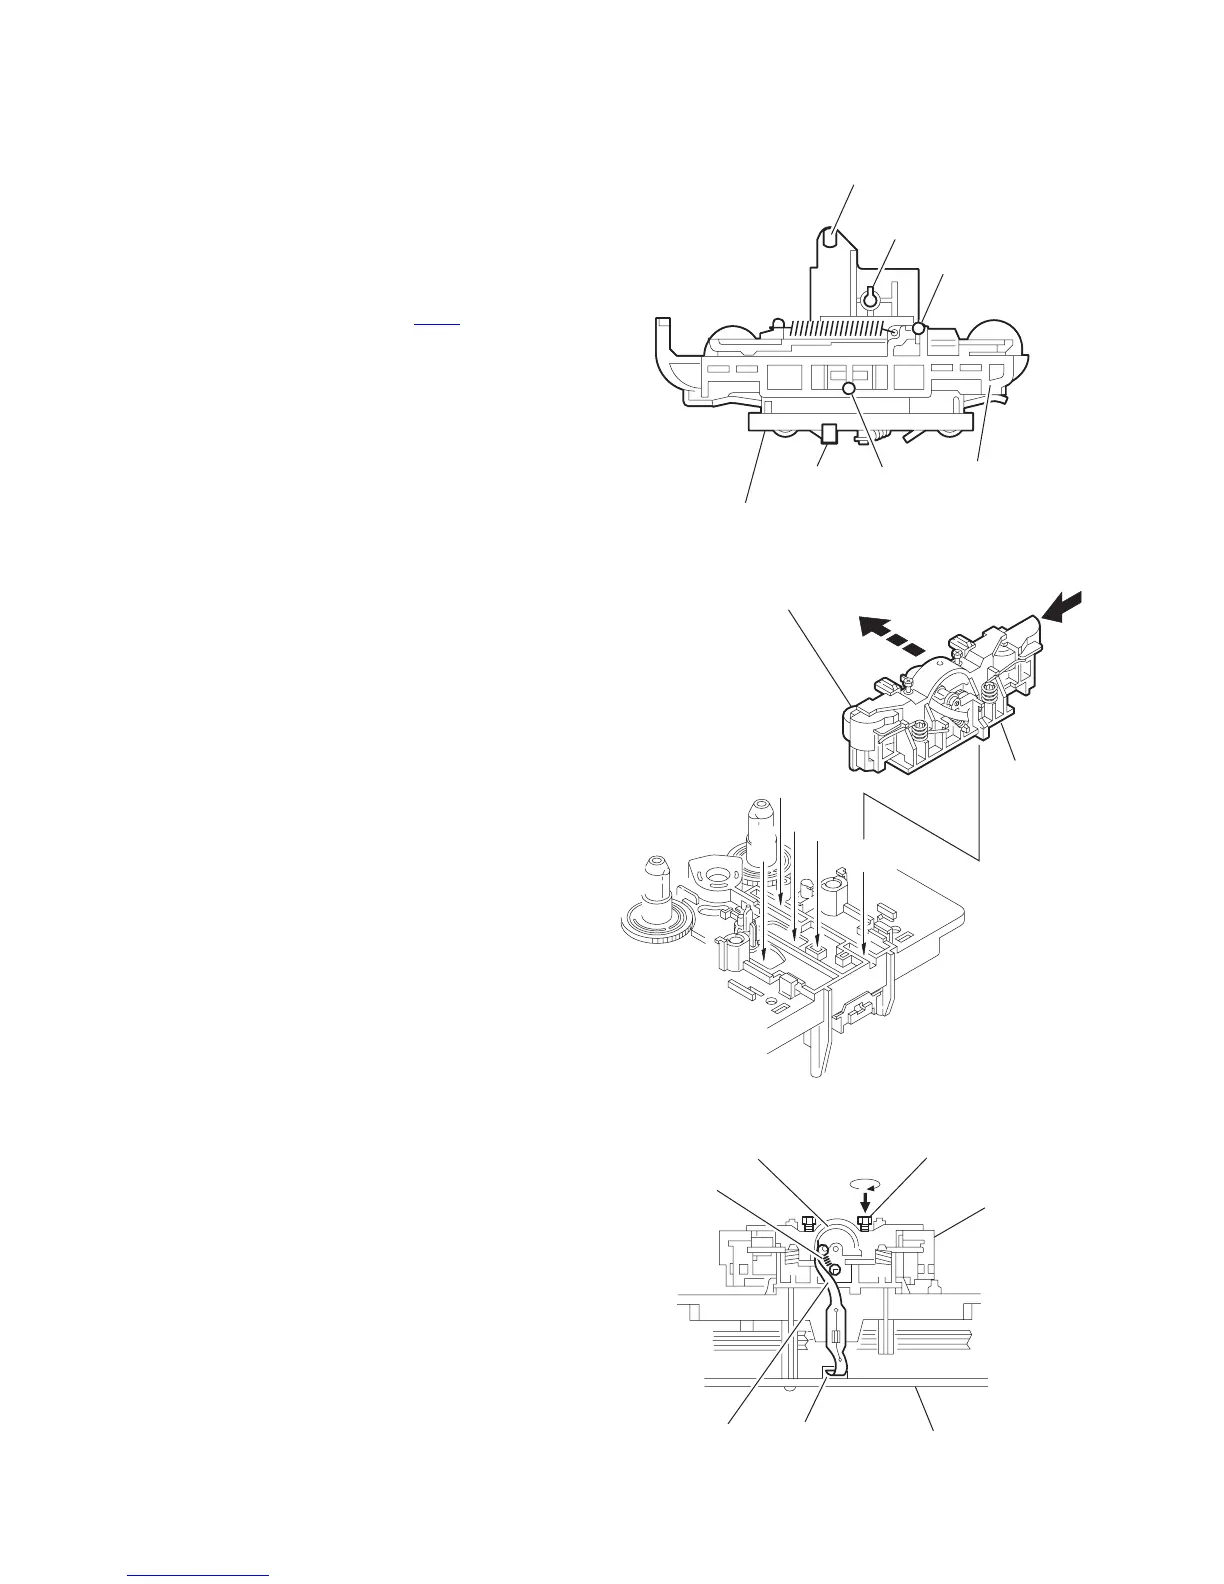
3.3.6 Reattaching the Play head
(See Fig.11 to 13)
(1) Reattaching the head mount assembly.
a) Change front of the direction cover of the head mount
assembly to the left (Turn the head forward).
b) Fit the bosses O', P', Q', U' and V' on the head mount
assembly to the holes P and V, the slots O, U and Q of
the mechanism sub assembly (See Fig.11 to 13).
(2) Tighten the azimuth screw for reversing.
(3) Reattach the spring from the back of the Play head.
(4) Connect the flexible wire to connector CN48
on the head
amplifier board.
Fig.11
Fig.12
Fig.13
P'
O'
P'
V'
U' Q'
Direction cove
Head mount assembly
V'
Direction
cover
Head mount assembly
O
U
V
P
Q
Azimuth screw for reversing
Head mount
Spring
Flexible wire
Head amplifier board
CN48
Head