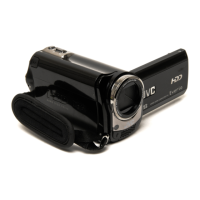
C
Christian PerrySep 9, 2025
How to make the date/time appear during recording on my JVC Camcorder?
- MMr. Frank ClarkSep 9, 2025
To display the date and time during recording on your JVC Camcorder, touch the DISP button once.

How to make the date/time appear during recording on my JVC Camcorder?
To display the date and time during recording on your JVC Camcorder, touch the DISP button once.
What to do if I can't delete files on my JVC Everio GZ-MG335 Camcorder?
If you can't delete files on your JVC Camcorder, remove protection from the files before attempting to delete them.
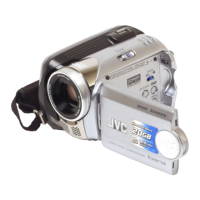
Why is my JVC Everio GZ-MG335 Camcorder so slow after switching on?
If your JVC Camcorder is slow after being switched on or when changing modes, it could be due to a large number of still images (approximately 1,000 or more) stored in the recording medium. Try copying the stored files to other devices and then deleting them from the recording medium.
What to do if the [CREATE DVD] screen is displayed and no other operations can be performed on my JVC Everio GZ-MG335?
If the [CREATE DVD] screen is displayed on your JVC Camcorder and no other operations can be performed, turn off the camera connected to the DVD burner, or disconnect the USB cable.
Why is the touch sensor not working on my JVC Camcorder?
If the touch sensor on your JVC Camcorder isn't working, make sure you are touching the sensors with your finger, not your fingernail or with gloves on.
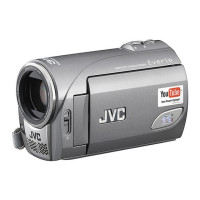
| Recording Format | MPEG-2 |
|---|---|
| Optical Zoom | 32x |
| LCD Screen | 2.7 inches |
| Weight | 0.8 kg |
| Digital Zoom | 800x |
| Image Stabilizer | Electronic |
| USB Interface | USB 2.0 |
| Image Sensor | 1/6-inch CCD |
| Video Resolution | 720 x 480 |
| Effective Pixels | 800, 000 |
| Storage | 30GB Hard Disk Drive |
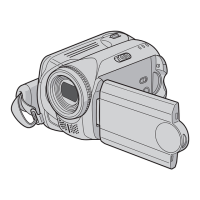
Guide to attaching the battery pack and opening the lens cover.
Steps for selecting video mode and starting recording.
Steps for selecting playback mode and viewing content.
Information on electrical shock, fire hazards, moisture exposure, and ventilation.
Precautions for handling lithium batteries and general product safety.
Essential safety instructions for operating the device.
Procedure for initiating and ending video recording.
Steps for taking still photos, including focus confirmation.
PC requirements, supported media, and system configurations for backup.
Step-by-step guide to installing the CyberLink software suite.
Procedure for connecting the camera to a PC using a USB cable.
Steps for backing up files to PC using the installed software.
Requirements for Mac OS and hardware for file backup.
Procedure for connecting the camera to a Macintosh computer via USB.
Steps for backing up camera files to a Macintosh computer.
Solutions for common camera issues like no power or recording failures.
Procedure for resetting the camera to its factory default settings.
Important safety warnings regarding operation, environment, and preventing drops.