38 EN
A
B
C
IN OUT
ç© 1 0:00:25
2
3
4
5
6
7
8
COUNTER 0:00:25
TOTAL 0:00:00
IN OUT
ç 1 0:00:25 0:01:05
2 0:03:18 0:03:31
3 0:02:33 0:02:53
© 4 0:04:11
5
6
7
8
COUNTER 0:04:11
TOTAL 0:01:13
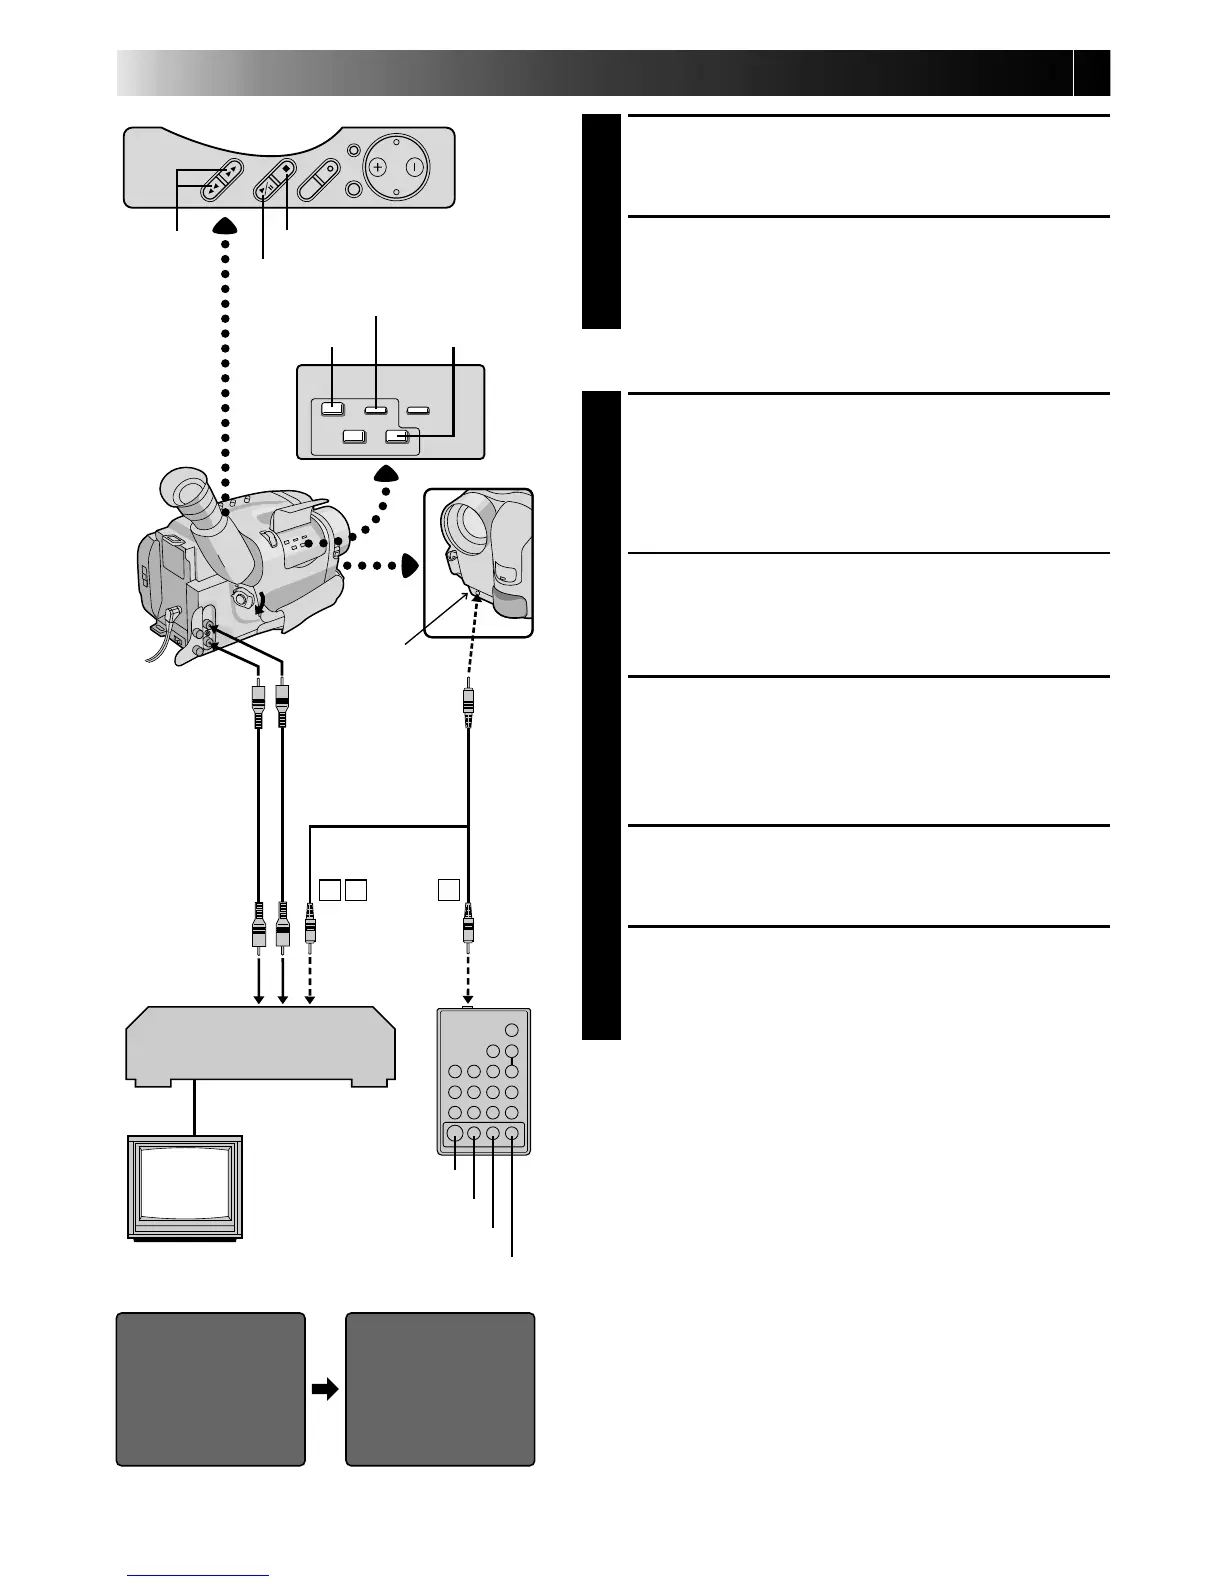
EDITING
(cont.)
REW/FF STOP
PLAY/PAUSE
R.A. EDIT
IN/OUT
CANCEL
ON/OFF
VCR REC STBY
CANCEL
IN/OUT
RM-V700U
(optional)
VCR (Recording deck)
To Remote
PAUSE
Editing cable
(optional, ø3.5
mini-plug cable)
To J terminal
(JLIP)
Open the cover
To AUDIO
and VIDEO
out connectors
Audio and
Video cable
(optional)
To AUDIO
and VIDEO IN
connectors
To Pause-In
PREPARE CAMCORDER
2
Insert a recorded tape and set the Power switch to
“PLAY”.
PREPARE VCR
3
Turn the power on, insert a recordable tape and
engage the AUX mode (refer to VCR’s instructions).
SELECT SCENES
ACCESS R.A. EDIT COUNTER
DISPLAY
1
Press PLAY/PAUSE, then press R.A. EDIT and the
counter display appears in the viewfinder and the
screen of the connected TV.
REGISTER BEGINNING OF SCENE
2
Press REW or FF to locate the beginning of a scene
you want, then press IN/OUT to register that point.
The data appears under “IN” on the display.
REGISTER END OF SCENE
3
Press REW or FF to locate the end of the scene and
press IN/OUT to register it. The data appears under
OUT on the display. The total time of the registered
scene(s) is displayed at the bottom of the screen.
REGISTER ADDITIONAL SCENES
4
Repeat steps 2 and 3 for each additional scene
(as many as 8).
MAKE CORRECTIONS
5
Press CANCEL during steps 2 and 3 to erase the
most recently registered point.
NOTES:
●
For GR-AXM20 only: The RM-V700U can be used to
operate other camcorder functions as well. Point the
RM-V700U at the camcorder’s remote sensor and press
any of the following buttons (function apears in parenthe-
ses):
— ON/OFF (camcorder R.A. EDIT)
— IN/OUT (camcorder IN/OUT)
— CANCEL (camcorder CANCEL)
●
There must be at least one second between an in-point and
its corresponding out-point.
●
To ensure correct operation, leave at least 15 seconds open
between scenes.
●
Blank portions of tape cannot be registered as in-points or
out-points.
●
If it takes more than 5 minutes to search for an in-point, the
VCR’s Record-Pause mode is cancelled and editing doesn’t
take place.
●
Pressing R.A.EDIT clears all in- and out-points from
memory.
●
Leave a small margin for error around each in-point to
ensure the scene is recorded in its entirety.