18 EN
RECORDING
Basic Recording (cont.)
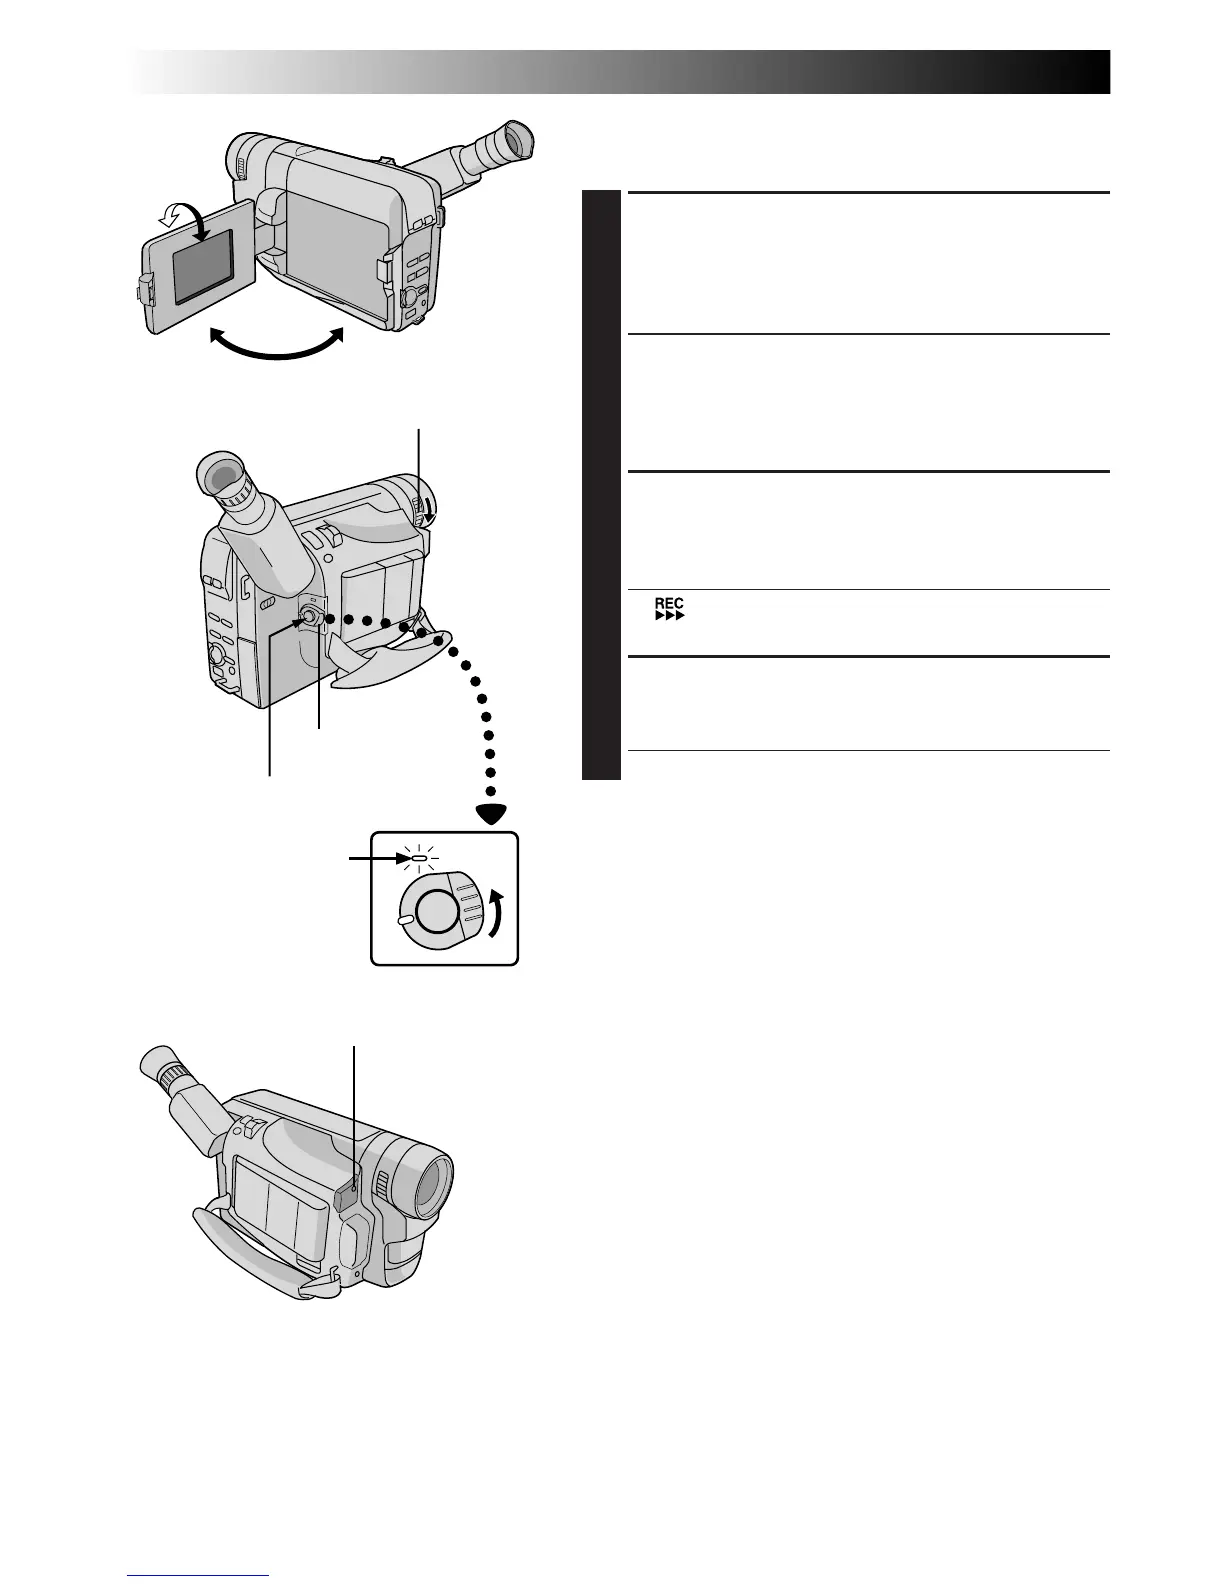
Shooting While Watching The LCD Monitor
Before the following steps, perform step 1 (Z pg. 16).
2
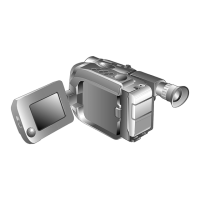
ENTER RECORD–STANDBY MODE
Make sure the LCD monitor is fully open. Turn the
LENS COVER Open/Close Ring to open the lens
cover, then set the Power Switch to “CAMERA”
(“AUTO” or “PRO.”).
•The power lamp lights and the camcorder enters the
Record-Standby mode.
•The scene you are aimed at appears in the LCD
monitor, with the word “PAUSE” superimposed
upon it.
3
START SHOOTING
Tilt the LCD monitor upward/downward for best
viewability (Z pg. 19) and press the Recording Start/
Stop Button.
•“ ” appears in the LCD monitor while recording
is in progress.
4
STOP RECORDING
Press the Recording Start/Stop Button again to stop
recording.
•The camcorder re-enters the Record-Standby mode.
NOTES:
●
When you use the LCD monitor outdoors in direct
sunlight, the LCD monitor may be difficult to see. If this
happens, we recommend that you use the viewfinder
(
Z
pg. 16).
●
To turn the tally lamp off during recording, refer to pgs.
30 and 32.
●
For other notes, refer to pg. 17.
180°
90°
LENS COVER Open/Close Ring
Power Switch
Recording Start/Stop Button
Power lamp
Tally lamp
(lights while recording is in progress)