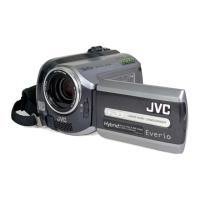
9
ENGLISH
! Index Button [INDEX] ( pg. 26)/
Remaining Space Button/Data Battery
Button [ 0/ 1 ] ( pg. 14, 19)
# Set Lever
Move to ¡ :
Reverse Skip ( pg. 24)/Up/Backlight
Compensation [ -
] ( pg. 21)/Spot
Exposure Control [ .
] ( pg. 21)
Move to ¢ :
Forward Skip ( pg. 24)/Down/
Change LED Light Setting [LIGHT]
( pg. 18)
Move to £ :
Reverse Search ( pg. 24)/Left/
Nightscope [NIGHT] ( pg. 21)
Move to ¤ :
Forward Search ( pg. 24)/Right/
Program AE [PROGRAM AE] ( pg. 20)
Press down:
Play/Pause ( pg. 24)
$ Menu Button [MENU] ( pg. 46)
% Speaker ( pg. 24)
& Playback/Recording Mode Switching
Button [SELECT PLAY/REC] (
pg. 16)
( Zoom Lever [W 7 , T
,
] ( pg. 18)
Speaker Volume Control [–VOL+]
( pg. 24)
) Still Image Shooting Button [SNAPSHOT]
( pg. 17)
* Function Button [FUNCTION] ( pg. 22)
+ Direct DVD Button [DIRECT DVD]
( pg. 41 and PC OPERATION GUIDE)
, Direct Backup Button [DIRECT BACK UP]
( PC OPERATION GUIDE)/Event Button
[EVENT] ( pg. 19)
- Auto/Manual Mode Button [AUTO]
( pg. 20)/ Information Button [INFO]
( pg. 32)
. Video Recording Start/Stop Button [REC]
( pg. 16)
/ Access/Charge Lamp [ACCESS/CHARGE]
( pg. 12)
(Blinks when you access fi les or charge
the battery. Do not turn off the power or
remove the battery pack/AC adapter while
accessing fi les.)
Video/Still Image Mode Lamp [ !, # ]
( pg. 16, 17)
0 Power/Mode Switch [OFF (CHARGE), ON,
MODE] ( pg. 12)
1 Lock Button ( pg. 12)
2 Grip Strap ( pg. 14)
3 USB (Universal Serial Bus) Connector
[
2
] ( pg. 38, 40 and PC OPERATION
GUIDE)
4 LED Light ( pg. 18)
5 Camera Sensor
6 Lens Cover ( pg. 14)
7 Lens
8 Lens Cover Switch [
=
,
>
] ( pg. 14)
9 Stereo Microphone
: SD Card Slot ( pg. 15)
; Tripod Mounting Socket ( pg. 14)
< Stud Hole ( pg. 14)
= DC Input Connector [DC] ( pg. 12)
> Audio/Video Connector [AV]
? Battery Pack Mount ( pg. 12)
@ Battery Release Button [BATT.] ( pg. 12)

 Loading...