J
Jeremy JacksonSep 12, 2025
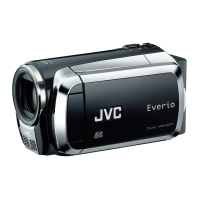
How to remove microSD card from JVC GZ-MG330U?
- EErica JohnsonSep 12, 2025
If you can't remove the microSD card from your JVC Camcorder, try pushing the microSD card in a few more times.
How to remove microSD card from JVC GZ-MG330U?
If you can't remove the microSD card from your JVC Camcorder, try pushing the microSD card in a few more times.
What to do if touch sensor does not function on JVC GZ-MG330U?
If the touch sensor or sensor button on your JVC Camcorder isn't working, make sure you're touching the sensors with your finger.
How to display date/time during recording on JVC Camcorder?
If the date/time does not appear during recording on your JVC Camcorder, touch the DISP button once.
| Recording Format | MPEG-2 |
|---|---|
| Camcorder Media Type | Hard Disk Drive |
| Sensor Type | CCD |
| Digital Zoom | 800 x |
| LCD Screen Size | 2.7 inches |
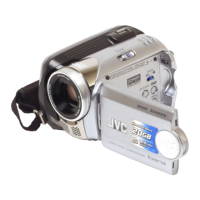
| Hard Drive Capacity | 30 GB |
| Weight | 0.8 lbs (365 g) |
| Image Stabilizer | Electronic |
| Focus Adjustment | Automatic, manual |
| Display Size | 2.7 inches |
| Microphone Operation Mode | Stereo |
| Battery Type | Lithium-ion |
| Type | Camcorder |
| Image Format | JPEG |
| Interface | USB 2.0 |
| Storage | Hard drive |
| Shooting Programs | Spotlight, sports mode, snow, portrait mode |
| White Balance | Auto, Manual |
| White Balance Presets | Daylight, Tungsten, Fluorescent |
| Connector Type | USB |
| Optical Sensor Size | 1/6" |
| Sensor Size | 1/6" |
General guidelines to prevent hazards like electric shock, fire, moisture, and damage from environmental factors.
Precautions for handling, replacing, and disposing of the device's lithium battery safely.
Safety measures during camera operation, including lens, tripod, and cable handling.
Initial steps to prepare the camera for use, including battery and screen setup.
Step-by-step guide for initiating video recording on the camera.
Instructions for accessing and viewing recorded video and still image files.
Guide on selecting menu items by sliding and touching the camera's touch sensor.
How to operate on-screen buttons using the touch sensor for functions like playback.
Procedures for backing up important recorded data and performing trial recordings for verification.
Steps to reset the camera and advice on handling malfunctions, including consulting a dealer.
Instructions for correctly connecting the camera to other devices using optional DV cables.
Lists essential accessories such as the Everio Dock, AC Adapter, and cables.
Guide on connecting various cables to the Everio Dock for camera connectivity.
Step-by-step instructions for attaching the core filter to the USB cable.
Detailed identification and page references for each component of the camera's main unit.
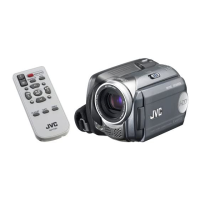
Identification and page references for each button and feature on the remote control.
Explains icons and indicators shown on the LCD screen during recording modes.
Explains specific icons and indicators shown on the LCD screen during still image capture.
Details the indicators and status information displayed on the LCD screen during video playback.
Details the indicators and status information displayed on the LCD screen during still image playback.
Step-by-step guide for charging the camera's battery pack using the AC adapter.
Procedure for setting the camera's date and time, essential for accurate recording metadata.
Instructions for attaching the shoulder strap to the camera for secure carrying.
Method to check the remaining battery power level and interpret the display.
Steps to prepare the remote control for use, including battery insertion.
Guides on setting the mode switch and pressing buttons to begin video recording.
Options for stopping recording, viewing files, and adjusting aspect ratio or picture quality.
Instructions for setting the mode switch and pressing buttons to capture still images.
Options for viewing images, changing quality, and enabling continuous shooting.
Controls and functions for playing back recorded video files, including navigation.
Controls and functions for playing back still images, including slide shows.
Steps to connect the camera to a TV for viewing recorded video and images.
Settings for aspect ratio and on-screen display when viewing on a television.
Methods to delete or protect files, including releasing protection on protected files.
Steps to select individual files for deletion or protection operations.
Overview of different methods and compatible devices for copying files from the camera.
Steps for copying video files from the camera onto DVD discs using a DVD burner.
Specifies hardware and software requirements for backing up files to a Windows PC.
Instructions for installing the provided CyberLink software for file backup on a PC.
Steps to establish a USB connection between the camera and the PC for file transfer.
Procedures for safely disconnecting the camera from the PC after file transfer.
Using the camera's DIRECT BACK UP button to automatically copy files to the PC.
Manual method for backing up files by dragging and dropping from the camera to a PC folder.
Information on accessing tutorials and user guides for the provided PC software applications.
Details the folder organization and file types stored on the camera's recording medium.
Specifies hardware and OS requirements for backing up files to a Macintosh computer.
Steps to establish a USB connection between the camera and a Macintosh computer.
Manual method for backing up files by dragging and dropping from the camera to a Macintosh folder.
Contact information for JVC customer support and CyberLink software support, including phone and web.
Solutions for common problems related to power supply, battery, and recording failures.
Solutions for playback errors, slow data processing, and media removal issues.
Guidelines for cleaning the camera exterior, LCD monitor, and lens using appropriate materials.
Explains battery level indicators and warnings for unset date/time.
Explains common error messages like HDD error, recording failure, and unsupported devices.
Technical specifications for the camera body, video format, and recording modes.
Technical specifications for still image capture, connectors, USB, and AC adapter.
Specifications for the remote control, including power, dimensions, and operating distance.
Estimated recording times for video and number of still images based on capacity.
Safety precautions related to the AC adapter and the rechargeable battery pack.
Guidelines for preventing data corruption and maintaining the LCD monitor's longevity.
Important safety warnings, usage restrictions, and advice to protect the main camera unit.
Regulatory compliance information regarding FCC rules and Canadian ICES-003 standards.