EasyManua.ls Logo

JVC HR-S7500E User Manual

JVC HR-S7500E
60 pages
To Next Page IconTo Next Page
Page #1 background imageLoading...
Page #1 background image
VIDEO-CASSETTEN-
RECORDER
LPT0049-002B
SIEHE
AUTOMATISCHE
GRUNDEINSTELLUNG
AUF DER RÜCKSEITE
BEDIENUNGS-
ANLEITUNG
SIEHE
AUTOMATISCHE
GRUNDEINSTELLUNG
AUF DER RÜCKSEITE
HR-S7500E/EH
T
V
P
R
O
G
+
T
V
P
R
O
G
T
V
T
V
+
0000
START
DEBUT
STOP
FIN
DATE
MENU
OK
TV
PROG
TV/VCR
DAILY/QTDN.VPS/PDC
AUX
WEEKLY/HEBDO
PROG
30 SEC
– –:– –
AUDIO
123
456
7
89
0
2
4
1
3
EXPRESS
VCR
TV
SAT
REW
SP/LP
DISPLAY
FF
TV PROG/
JOG
SHUTTLE
COUNTER RESET
TIMER
STANDBY/ON
VIDEOS-VIDEO
(
MONO
)
L –AUDIO– R
SPATIALIZER
REC LINK
TV PROG
TV PROG
REVIEW
SP
VPS/PDC
VCR
+
8
4
0
6
15dB
NORM
625
GE
INHALT
DEUTSCH
ZU IHRER SICHERHEIT 2
Sicherheitshinweise ................................. 2
SO IST IHR NEUER RECORDER
EINSATZBEREIT 4
Grundsätzliche Anschlüsse ..................... 4
S-VIDEO-Anschluß ................................. 5
ANFANGSEINSTELLUNGEN 6
Automatische Grundeinstellung .............. 6
Sprachwahl ............................................. 9
Bildschirmanzeigen ............................... 10
Stromsparmodus [nur HR-S7500E] ......... 11
HINWEISE ZUM FARBSYSTEM 12
Farbsystemeinstellung ........................... 12
WIEDERGABE 13
Einfache Wiedergabe ............................ 13
Weitere Wiedergabefunktionen ............. 14
AUFNAHME 18
Einfache Aufnahme ............................... 18
Weitere Aufnahmefunktionen ................ 19
B.E.S.T.-Bildbearbeitung ........................ 22
TIMER-GESTEUERTE AUFNAHME 24
SHOWVIEW-Timer-Programmierung......... 24
Express-Timer-Programmierung ............. 26
Automatische
Satellitenprogramm-Aufnahme .............. 30
SONDERFUNKTIONEN 31
Fernbedieneinheit ................................. 31
SCHNITTBETRIEB 34
Schnittvorbereitung ............................... 34
Schnittwiedergabe mit einem
Camcorder ............................................ 35
Schnittaufnahme/-wiedergabe mit
einem zweiten Videorecorder ............... 36
SYSTEMANSCHLÜSSE 38
Anschluß an Satelliten-Tuner ................. 38
Anschluß und Gebrauch eines
Decoders .............................................. 39
Anschluß und Gebrauch einer
Stereoanlage ......................................... 40
ERGÄNZENDE EINSTELLUNGEN 41
Videokanal-Einstellung .......................... 41
Senderprogrammierung ......................... 42
SHOWVIEW-Einstellung ........................... 49
Uhrzeiteinstellung ................................. 50
STÖRUNGSSUCHE 52
FRAGEN UND ANTWORTEN 54
STICHWORTVERZEICHNIS 55
TECHNISCHE DATEN 58
Question and Answer IconNeed help?

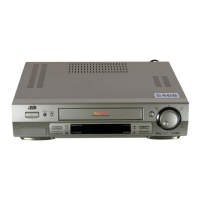
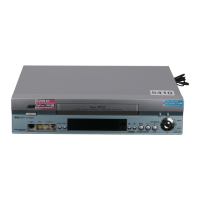
Do you have a question about the JVC HR-S7500E and is the answer not in the manual?

JVC HR-S7500E Specifications

General IconGeneral
TypeVCR
Recording SpeedSP, LP
TunerYes
Hi-Fi AudioYes
Number of heads4
Remote ControlYes
ShowViewYes
TimerYes
Playback SpeedSP, LP
ConnectionsRF
InputsComposite Video
OutputsComposite Video, Audio

Summary

ZU IHRER SICHERHEIT

Safety Precautions and Warnings

General safety advice, warnings, and precautions for safe operation of the recorder.

ZU IHRER SICHERHEIT (cont.)

SO IST IHR NEUER RECORDER EINSATZBEREIT

Basic Recorder Connections

Instructions for connecting the recorder to TV and power sources.

S-VIDEO-Anschluß

Connecting the Recorder to the TV

Steps for connecting the recorder to the TV using S-VIDEO and AUDIO inputs.

Connecting the Recorder to Power

Instructions for plugging the recorder into an electrical outlet.

ANFANGSEINSTELLUNGEN

Automatische Grundeinstellung Process

Overview of automatic channel tuning, clock setting, and other initial configurations.

ANFANGSEINSTELLUNGEN (Forts.)

Initiating Automatic Setup

Starting the automated process for tuning and configuring the recorder.

Video Channel Confirmation

Verifying or selecting the video channel for HF connections.

Finalizing Automatic Setup

Completing the initial setup procedure.

Sprachwahl

Bildschirm-anzeigen

Controlling On-Screen Display Function

Enabling or disabling the display of on-screen information.

Stromsparmodus (nur HR-S7500E)

Activating Power Saving Mode

Enabling the power saving feature to reduce energy consumption.

HINWEISE ZUM FARBSYSTEM

Farbsystem-einstellung

Selecting the appropriate color system for recording and playback.

WIEDERGABE

WIEDERGABE (Forts.)

AUFNAHME

Simple Recording Steps

Basic instructions for recording TV programs.

Initiating Recording

Starting the recording process.

Terminating Recording

Ending the recording process.

AUFNAHME (Forts.)

S-VHS and VHS Recording Modes

Options available for recording in S-VHS or VHS quality.

B.E.S.T. Picture Processing System

Feature to enhance picture quality during recording and playback.

Configuring S-VHS Recording Status

Setting the recorder to operate in S-VHS mode.

Setting the B.E.S.T. System Status

Enabling or disabling the B.E.S.T. picture processing feature.

Instant Recording Function

Starting immediate recording and setting its duration.

Setting Instant Recording Duration

Specifying the length for the instant recording.

Aufnahme Operations

TIMER-GESTEUERTE AUFNAHME

SHOWVIEW Timer Programming

Simplified programming using SHOWVIEW codes for timed recordings.

Entering the SHOWVIEW Number

Inputting the SHOWVIEW code to select a program.

Accessing the SHOWVIEW Program Menu

Viewing the details of a selected SHOWVIEW program.

TIMER-GESTEUERTE AUFNAHME (Forts.)

Express Timer Programming Method

A quick method for timer programming without SHOWVIEW codes.

Entering the Program Slot Number

Selecting the channel number for the timer recording.

Automatic Satellite Program Recording

Record satellite programs automatically via the timer.

Accessing the SHOWVIEW Menu

Steps to open the SHOWVIEW programming menu.

Deleting or Correcting Timer Programs

Removing or modifying scheduled timer recordings.

Selecting the AV2 Connection

Configuring the AV2 input for satellite tuner connection.

Accessing the Timer Program Table

Viewing the schedule of programmed timer recordings.

Activating Timer Standby Mode

Preparing the recorder for automatic timer recordings.

Entering the Timer Start Time

Specifying the exact start time for a timer recording.

Setting Timer Standby Mode

Preparing the recorder for automatic timer recordings.

Activating Automatic Satellite Program Recording

Enable the automatic satellite program recording feature.

Automatische Timer-SP/LP-Umschaltung

Setting Timer SP/LP Switching Status

Enable automatic switching between SP and LP recording modes.

Automatische Timer-Schaltung

Setting the Activation Status

Enable or disable the automatic timer activation feature.

SONDERFUNKTIONEN

Entering the Remote Control Code

Setting the remote control to operate the recorder.

SONDERFUNKTIONEN (Forts.)

TV "Multi Brand" Remote Control Functionality

Using the remote to control TVs from various manufacturers.

Entering the TV Manufacturer Code

Inputting the specific code for your TV brand.

Satelliten-Tuner "Multi Brand" Remote Control

Entering the Satellite Tuner Manufacturer Code

Inputting the specific code for your satellite tuner brand.

SCHNITTBETRIEB

Editing Preparation Steps

Setting up the recorder for optimal editing performance.

Determining the Setting Status

Configuring recording or copying modes for editing.

SCHNITTBETRIEB (Forts.)

Editing Playback Using a Camcorder

Connecting a camcorder to use its footage as source material for editing.

Editing Recording/Playback with a Second VCR

Connecting a second VCR to use its footage for editing.

Making Necessary Connections

Instructions for connecting the second VCR to the recorder.

Setting Recorder to AUX Input Mode

Configuring the recorder's input mode to receive signals from auxiliary devices.

Setting Recording Device to AUX Input

Configuring the recording device's input mode.

Starting the Recording Process

Beginning the recording of the camcorder's output onto the tape.

Starting Recording from Source VCR

Beginning the recording from the source VCR.

SYSTEMANSCHLÜSSE

AV2 Connection Setting Configuration

Setting the AV2 input mode for external devices like decoders or tuners.

SYSTEMANSCHLÜSSE (Forts.)

Connecting to a Satellite Tuner

Diagram and instructions for connecting a satellite tuner to the recorder.

Stereo System Connection and Usage

Connecting the audio output to a stereo system for playback.

Making Audio Connections

Instructions for connecting audio cables to the stereo system.

Connection and Use of Decoder

Selecting the Input Mode for Decoder

Choosing the correct input mode for the connected decoder.

Connecting the Decoder to the Recorder

Physically connecting the decoder unit.

ERGÄNZENDE EINSTELLUNGEN

Video Channel Setting Procedure

Adjusting the video channel for proper HF signal reception.

ERGÄNZENDE EINSTELLUNGEN (Forts.)

Performing Automatic Program Tuning

Executing the automated process for tuning and storing channels.

Clock Setting Procedure

Setting the recorder's internal clock accurately.

Automatic Program Tuning Function

Automatically scans and stores available TV channels.

Entering the Date and Time

Setting the current date and time on the recorder.

SHOWVIEW-Einstellung

Setting Leitzahlen (Channel Numbers)

Assigning specific channel numbers for SHOWVIEW programming.

Entering the Leitzahl (Channel Number)

Inputting the Leitzahl for a specific channel.

STÖRUNGSSUCHE

Power Supply Issues and Solutions

Troubleshooting steps for problems related to the power supply.

Tape Transport Issues and Solutions

Solutions for problems concerning tape movement and transport.

Playback Issues and Solutions

Troubleshooting steps for problems encountered during video playback.

Recording Issues and Solutions

Solutions for problems encountered during the recording process.

TIMER-AUFNAHME

Timer Recording Malfunctions and Solutions

Solutions for issues encountered during timer recording setup.

Automatische Grundeinstellung unter Bezugnahme auf die Displayfeld-Anzeigen

Related product manuals