3
Data Size: B6L (182 mm x 128 mm)
Book Size: B6L (182 mm x 128 mm)
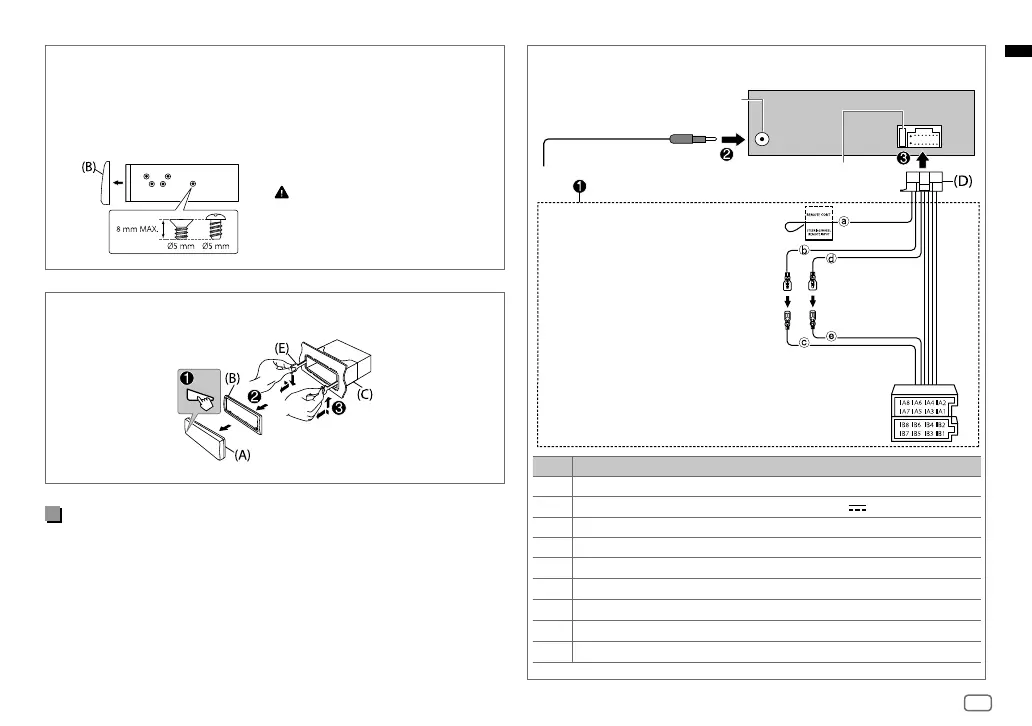
Removing the unit
Installing the unit (without mounting sleeve)
1 Remove the mounting sleeve and trim plate from the unit.
2 Align the holes in the unit (on both sides) with the vehicle
mounting bracket and secure the unit with screws (commercially
available).
Part list (supplied)
(A) Faceplate (×1)
(B) Trimplate (×1)
(C) Mounting sleeve (×1)
(D) Wiring harness (×1)
(E) Extraction key (×2)
Use only the specified screws.
Using wrong screws might damage
the unit.
Wiring connection
Antenna terminal
Fuse (10 A)
Pin Color and function
A4 Yellow : Battery
A5 Blue/White : Power control (12 V
350 mA)
A6 Orange/white : Car light control switch
A7 Red : Ignition (ACC)
A8 Black : Earth (ground) connection
B1, B2
Purple
]
, Purple/black
[
: Rear speaker (right)
B3, B4
Gray
]
, Gray/black
[
: Front speaker (right)
B5, B6
White
]
, White/black
[
: Front speaker (left)
B7, B8
Green
]
, Green/black
[
: Rear speaker (left)
a Light blue/yellow: To the
steering wheel remote control
adapter
b Yellow: Battery wire
c Yellow: A4
d Red: Ignition wire
e Red: A7
ISO connectors
JS_JVC_QSG_KD_T409_E_EN_1.indd 3JS_JVC_QSG_KD_T409_E_EN_1.indd 3 6/13/2018 3:07:08 PM6/13/2018 3:07:08 PM