CAUTION
• Do not install in the below locations;
(Unstable location, In a location that interferes with driving, In a location
that gets wet, In a dusty location, In a place that gets hot, In a place that
gets direct sunlight, In a location that gets hit by hot air)
• Do not install the unit under the carpet. Otherwise heat build-up occurs
and the unit may be damaged.
• Install this unit in a location which allows heat to easily dissipate. Once
installed, do not place any object on top of the unit.
• The surface temperature of the ampli er will become hot during use.
Install the ampli er in a place where people, resins, and other substances
that are sensitive to heat will not come into contact with it.
• When making a hole under a seat, inside the trunk, or somewhere else in
the vehicle, check that there is nothing hazardous on the opposite side
such as a gasoline tank, brake pipe, or wiring harness, and be careful not
to cause scratches or other damage.
• Do not install near the dashboard, rear tray, or air bag safety parts.
• The installation to the vehicle should securely fasten the unit to a place in
which it will not obstruct driving. If the unit comes o due to a shock and
hits a person or safety part, it may cause injury or an accident.
• After installing the unit, check to make sure that electrical equipment
such as the brake lamps, turn signal lamps and windshield wipers oper-
ate normally.
Installation procedure
Read the instruction manual well to select the proper connection and
setting.
1. Remove the ignition key and disconnect the negative⊖terminal of
the battery to prevent short circuits.
2. There are two options:
* Refer to “Connection” as below.
Type A: RCA INPUT connection
A-1
Connect the battery wire.
A-2
Connect the ground wire to chassis ground of vehicle.
A-3
Connect the power control wire.
A-4
Connect the speakers.
A-5
Connect the DC cable into the connector at KS-DR1004D.
A-6
Connect the RCA cable.
Type B: SPEAKER INPUT connection
B-1
Connect the battery wire.
B-2
Connect the ground wire to chassis ground of vehicle.
B-3
Connect the speakers.
B-4
Connect the DC cable into the connector at KS-DR1004D.
B-5
Cut off the RCA cable, then connect the correct corresponding
speaker output from the FACTORY INSTALLED HEAD UNIT directly.
3. Attach the unit.
4. Connect the negative⊖terminal of the battery.
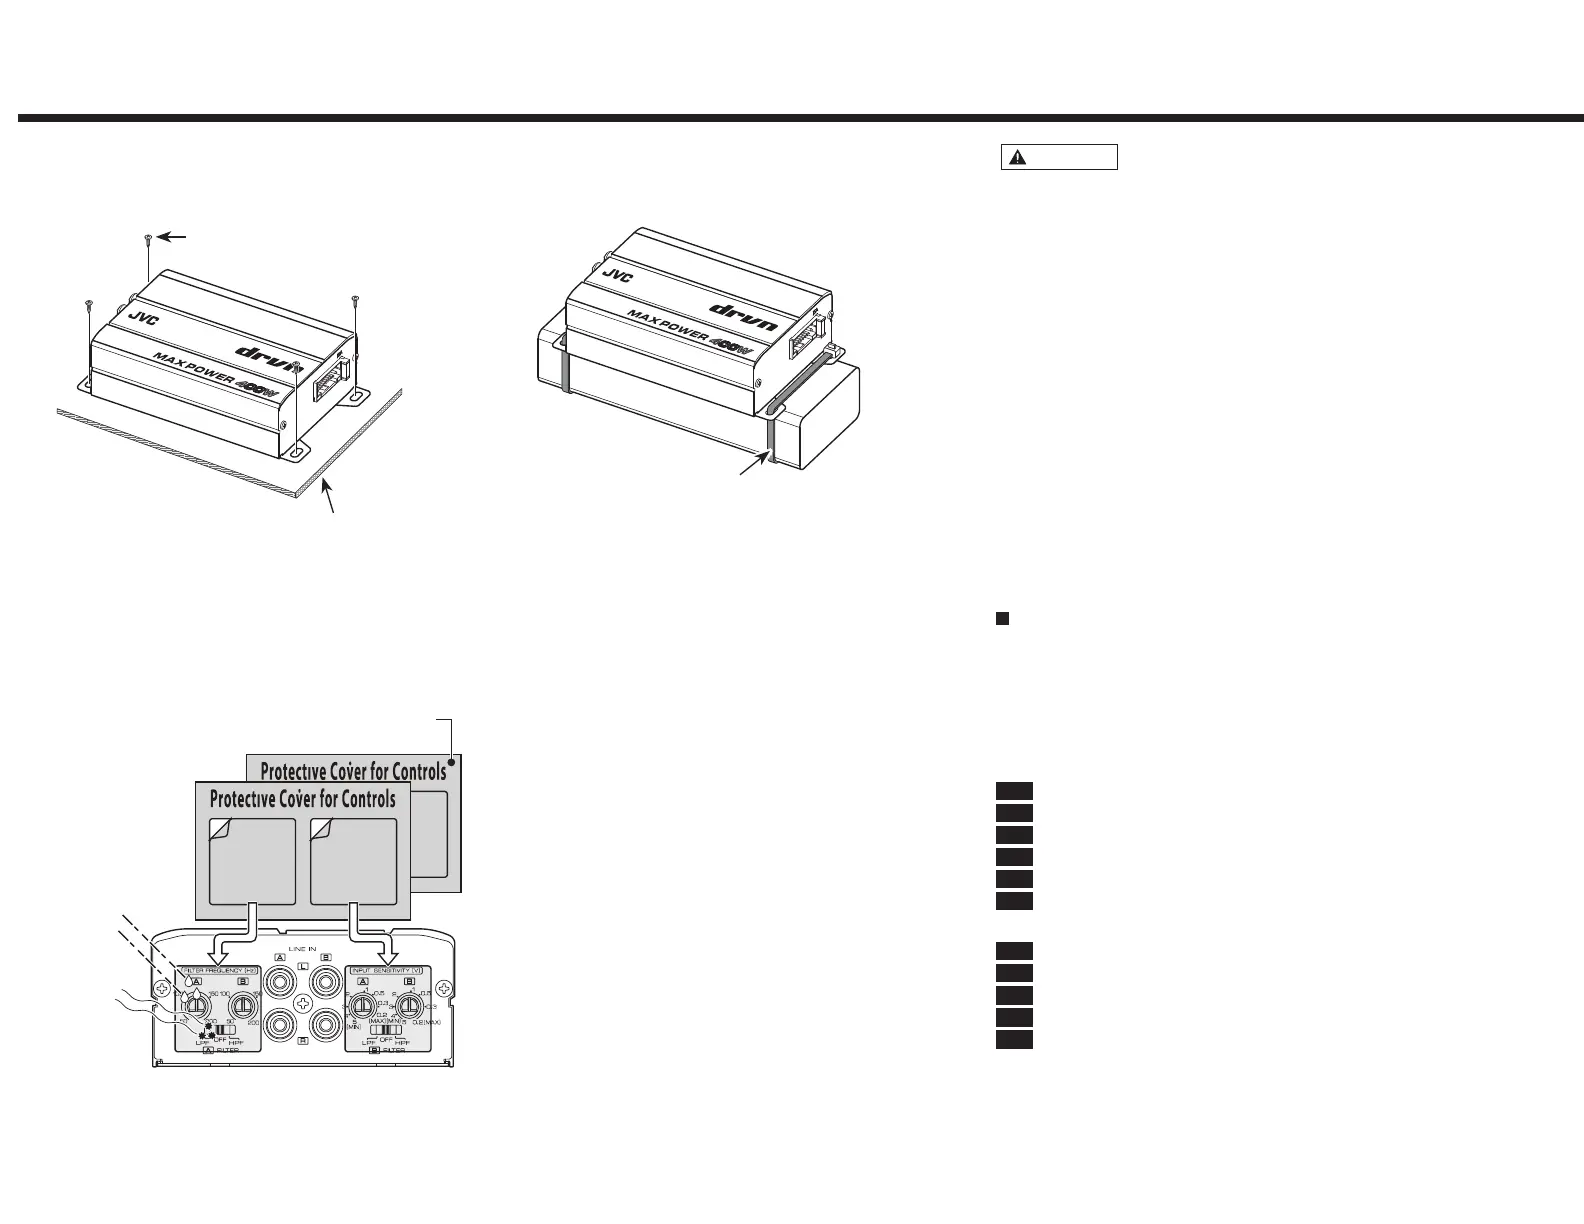
Installation / Installation / Instalación
Installation board, etc. (thickness: 15 mm or more)
Tableau d’installation, etc. (épaisseur: 15 mm ou plus)
Tablero de instalación, etc. (grosor: 15 mm o más)
Example A: using the screws
Exemple A: utilisation des vis
Ejemplo A: utilizando los tornillos
Example B: using the wire bands
Exemple B: utilisation des serre-câbles
Ejemplo B: utilizando los atadura de cables
③ Parts included
Pièces comprises
Partes incluidas
④ Parts included
Pièces comprises
Partes incluidas
(350 mm (13-3/4”))
Protective cover ⑥ / Couvercle de protection ⑥ / Cubierta protectora ⑥
Spare
De rechange
Repuesto
MOISTURE
HUMIDITÉ
HUMEDAD
DUST
POUSSIÈRE
POLVO
After setting up the unit, put the protective
cover ⑥ on the control panel.
Après avoir con guré l’unité, placez le couvercle
de protection ⑥ sur le panneau de commande.
Después de con gurar la unidad, coloque la
cubierta protectora ⑥ sobre el panel de control.

 Loading...