Installation and ConnectionInstallation and Connection
Installing the unit
Installing the unit using the mounting
bracket removed from the car
π / [
π / [
Car bracket
Note: Select the appropriate screws (supplied) for the
mounting bracket.
Installing the trim plate
(Only for KW-V350BT Region 4)
]
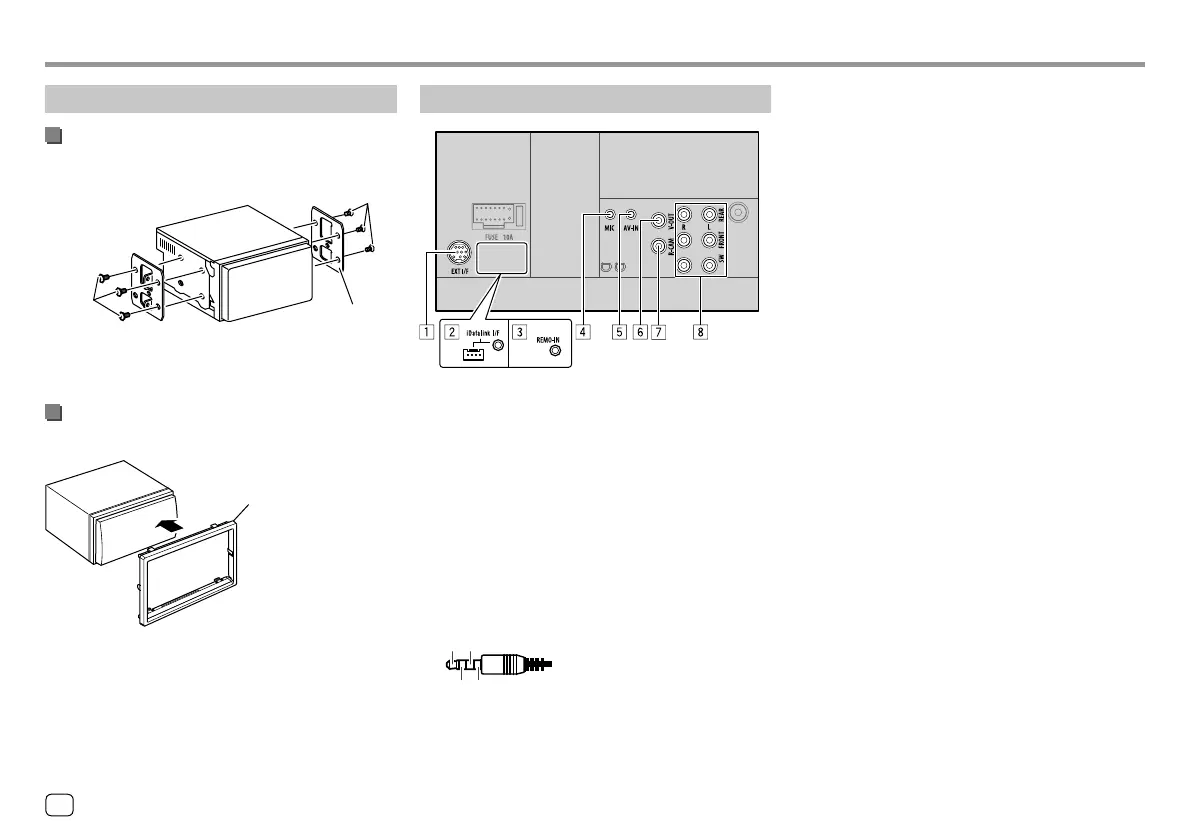
Connecting external components
1 Expansion port for connecting SiriusXM Connect
Vehicle Tuner (EXT I/F) (commercially available)*1
2 iDatalink input for connecting an ADS adapter
(commercially available)*2
3 Steering wheel remote controller input
(REMO-IN)*3
• Connect to the car’s steering remote harness
using the steering remote cable (‘). Contact
your JVC dealer for details.
4 Microphone input (MIC) (Page55)
5 Audio video input (AV-IN)
Connect the following type of 4-pole mini plug:
1
24
3
1
Left audio
2
Right audio
3
Ground
4
Composite video
6 Video output (V-OUT)
7 Rear view camera input (R-CAM)
8 Output terminals*4
• Left output (White)
• Right output (Red)
REAR: Rear speaker preouts
FRONT: Front speaker preouts
SW: Subwoofer preouts
For 3-way crossover:
REAR: Tweeter preouts
FRONT: Mid range speaker preouts
SW: Woofer preouts
*1 Only for KW-V250BT/KW-V25BT/KW-V350BT Region 1.
*2 Only for KW-V350BT Region 1.
*3 Only for KW-V350BT Region 4.
*4 When connecting an external amplifier, connect its ground wire
to the chassis of the car; otherwise the unit may be damaged.
54 ENGLISH
04_KWV_2019ST_KR_Body02.indd 5404_KWV_2019ST_KR_Body02.indd 54 22/6/2018 5:25:15 PM22/6/2018 5:25:15 PM

 Loading...