Installation and ConnectionInstallation and Connection
Installation procedure
1 Remove the key from the ignition and
disconnect the
· battery.
2 Make the proper input and output wire
connections for each unit.
3 Connect the speaker wires of the wiring
harness.
4 Take Connector B on the wiring harness
and connect it to the speaker connector in
your vehicle.
5 Take Connector A on the wiring harness
and connect it to the external power
connector in your vehicle.
6 Connect the wiring harness to the unit.
7 Install the unit in your car.
Make sure that the unit is installed securely in place.
If the unit is unstable, it may malfunction (e.g., the
sound may skip).
8 Reconnect the · battery.
9 Press the reset button on the monitor
panel. (Page3)
10 Configure <Initial Settings>. (Page4)
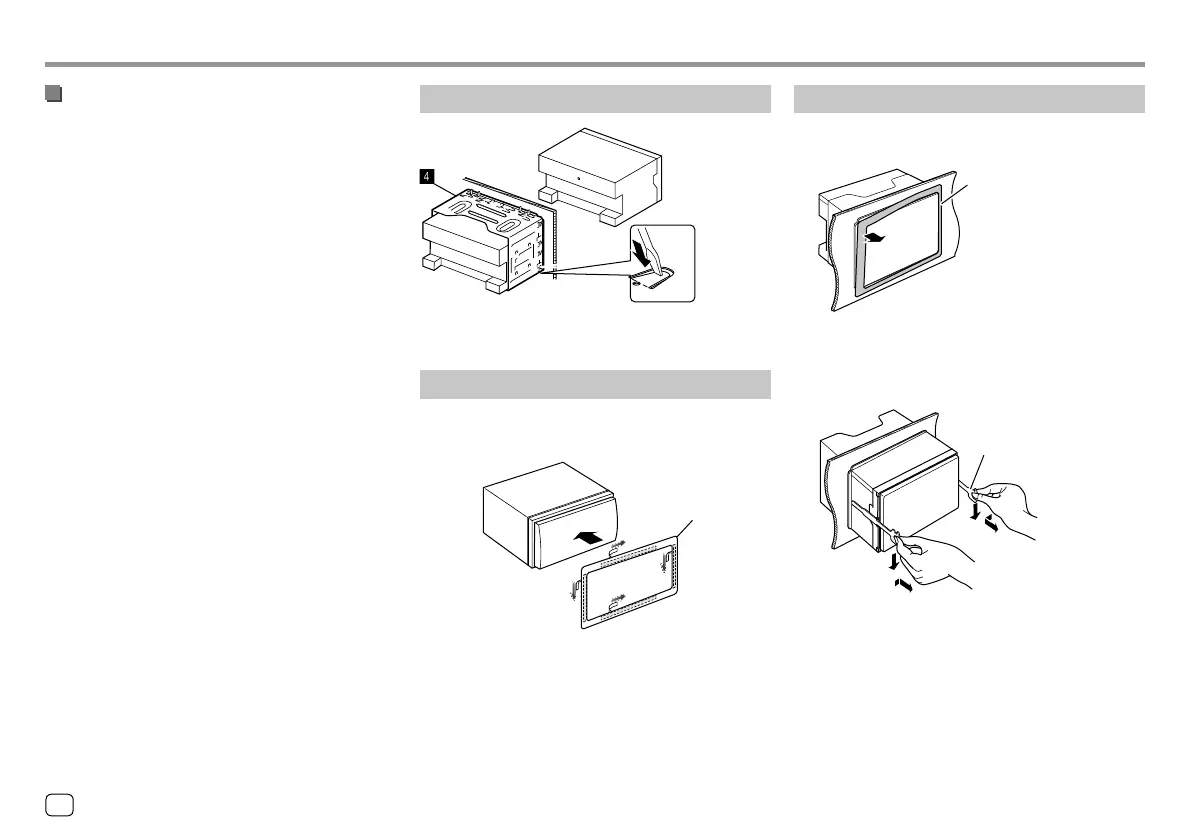
Installing the unit
Bend the tabs of the mounting sleeve with a
screwdriver or similar utensil and attach it in place.
Installing the trim plate
Remove the separator of the trim plate (“),
then attach the trim plate (
“) to the unit.
“
Removing the unit
1 Remove the trim plate (“).
“
2 Remove the unit by inserting the two
extraction keys (
]), then pulling them as
illustrated.
]
Be careful to avoid injury from the catch pins on
the extraction key.
42
ENGLISH
00_KWV_2019ST_EQ_EN.indb 4200_KWV_2019ST_EQ_EN.indb 42 29/6/2018 11:57:06 AM29/6/2018 11:57:06 AM

 Loading...